George is a seasoned interior designer and property marketing strategist with over 13 years of experience. He specializes in transforming properties into visually stunning spaces, helping clients recognize the potential and beauty in each property. With an impressive international client base of exciting projects throughout Europe and America.
You should hire professional painters for your residential needs when the project is too complex or time-consuming for you to handle yourself, especially if you lack the necessary skills and equipment. For instance, if the task involves high ceilings or intricate trim work or your walls have significant damage (cracks, holes, peeling paint), require wallpaper removal, or extensive cleaning, professionals have the tools and expertise to handle the prep work efficiently and effectively. Below are nine more reasons to call the expert painters for help:
- High or Difficult-to-Reach Areas: Painting ceilings, high walls, or exteriors, especially multi-story homes, can be dangerous without proper equipment and experience. Professionals have the necessary ladders, scaffolding, and safety training.
- Intricate or Detailed Painting: If you want complex designs, faux finishes, or detailed trim work, professionals have the skills and precision to achieve a high-quality finish.
- Time Constraints: If you have a tight deadline (e.g., moving in/out, hosting an event), hiring professionals ensures the job gets done quickly and efficiently without you having to dedicate your own time.
- Lack of Experience or Confidence: If you’re not confident in your painting abilities or simply don’t enjoy painting, hiring professionals will save you time, stress, and potential mistakes.
- Specialized Finishes or Paints: If you’re using specialized paints (e.g., epoxy, textured coatings) or require specific finishes (e.g., cabinet refinishing), professionals have the experience and knowledge to achieve the desired results.
- Exterior Painting: Exterior painting is a large and often challenging project due to weather, height, and surface preparation. Professionals have the experience and equipment to handle these challenges effectively.
- Large-Scale Projects: Painting an entire house, either interior or exterior, is a significant undertaking. Professionals can manage the project efficiently and ensure a consistent finish throughout.
- For a Flawless Finish: Professional painters have the tools, techniques, and experience to achieve a smooth, even, and long-lasting finish that is difficult for DIYers to replicate.
- Increase Home Value (Pre-Sale): A fresh coat of paint, professionally applied, can significantly improve your home’s curb appeal and increase its value when selling

How to plan a Painting Project?
Start by clearly defining the scope of the project. Which rooms will be painted? Walls only or ceilings and trim as well? This helps estimate the amount of paint and supplies needed.
Next, determine a realistic timeline that works for your schedule.
Clean the surfaces to be painted by washing walls, removing outlet plates, and scraping any loose or peeling previous paint. This prep work allows the new paint to properly adhere.
Evaluate the surfaces and determine what painting products are needed – primer, paint, brushes, rollers, drop cloths. Choose quality paint designed for the appropriate surface – interior walls, exterior, trim, etc.
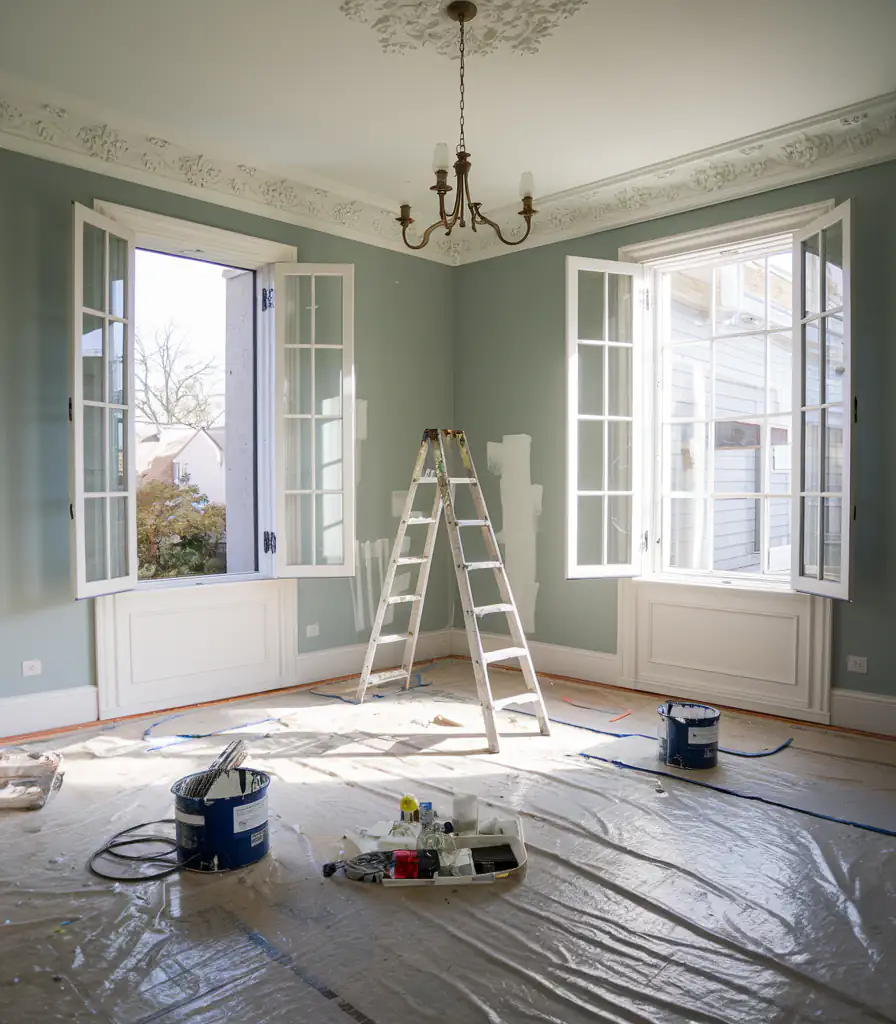
Prepare the space by moving or covering furniture, sealing vents, removing switch plates. Protect floors with drop cloths. Apply painter’s tape for clean edges if cutting-in with brushes.

Inspect all surfaces prior to priming and spot treat as needed – caulk gaps, repair imperfections in the drywall. Prime surfaces if needed, then apply two finish coats of paint for full coverage, allowing proper dry time between coats.
Work methodically room-by-room. Maintain a neat workspace and work vertically from ceiling to floor to avoid drips. Follow all safety measures and thoroughly ventilate the workspace. Allow 72 hours for paint to fully cure before removing painter’s tape or rehanging wall items.
When considering residential projects that are large in scope:
- Expert painters come equipped with knowledge and expertise.
- They bring the necessary tools to work on large surfaces efficiently.
- Professionals manage the work so it’s done quickly and with minimal disruption.
How to test if you have the skills to paint yourself?
Testing if you have the skills to paint on your own is an important step before tackling a DIY painting project, plus it can be rewarding and save you money.
Do a test patch. Paint a small section of wall and see how it turns out—are you happy with the finished appearance and technique? Does the paint adhere properly? A test run helps you gauge skills.
Evaluate cutting-in abilities. Carefully cut-in corners, edges, and trim with a brush. How precise are the borders between walls and trim? Sharp paint lines require a steady hand.
Assess rolling technique. Roll primer and paint in 3-4 foot widths, maintaining a wet edge without gaps, drips, or splatters. Proper rolling distributes paint evenly.
Check attention to detail. Painting requires meticulous prep and attention to edges, overlaps, and avoiding drips. Hiring a pro may be better if you’re not detail-oriented.
Consider equipment needs. Do you have the necessary painting tools and are you comfortable using ladders, multiple roller handles, pole painting accessories? Right gear makes the job easier.
Ask for input. Have someone inspect your test area for coverage consistency, tidy lines, and streaks. A second opinion helps identify skill gaps.
What tools are needed for a paint job?

Important: If your residence has features such as vaulted ceilings, recessed areas, or decorative trim, hiring painters can ensure these spaces are handled with care and expertise. Professionals utilize quality tools and techniques that homeowners may not have on hand, leading to more professional results. In case of a more straightforward job, below is the list of tools and their prices once you might need to complete a full paint job.
The basic tools needed for a paint job include:
1.Paintbrushes – An array of high-quality bristle brushes for cutting in edges and painting trim of various sizes. Good quality for cutting in: $10 – $20 each (you’ll want at least 2-3 sizes) but cheaper brushes for general use $5 – $10 each.
2.Paint rollers – At least a 9-inch roller frame and nap covers compatible with the wall surface material. Consider buying 4-inch rollers for tighter spaces as well. A 4-inch roller with frame: $5 – $10 or 9-inch frame: $5 – $15 also nap covers (pack of 2-3): $5 – $15 (you’ll need multiple depending on the project)
3.Paint trays – For rolling out the paint with the roller. An angled paint tray is ideal. $5 – $15 each (liners are cheap, get those for easy cleanup)
4.Drop cloths – Canvas or plastic sheets for protecting floors and furniture from drips and overspray. Canvas (more durable and less slippery): $15 – $30+ each (worth the investment for multiple projects)
5.Painters tape – Low tack, easily removable tape for keeping border lines crisp. $5 – $10 per roll (get a good brand like FrogTape for sharp lines)
6.Sandpaper – For sanding and smoothing minor imperfections before priming. $5 – $10 for an assortment pack.
7.Patching compound – For repairing small holes or dents in the walls before painting. $5 – $15 for a tub or tube from a non-brand or $30 for a branded model.
8.Paint scraper – Useful for removing loose paint in prep. Also, window scrapers for cleaning glass panes. $5 – $15 (a basic one is fine)
9.Extension poles – Allow hard to reach places to be painted via pole-mounted brushes or rollers. $10 – $30 (very helpful for ceilings and high walls).
10.Ladder/Scaffolding – Secure, stable access equipment rated for your weight to reach all wall areas. $30 – $100+ (get a sturdy one), for very large ceilings use rental, as often they are better brands, $50 – $100+ per day.
11.PPE Equipment – Respirator mask, goggles, cap, protective clothing. $15 – $30 (especially important for sanding and solvent-based paints), add $5 – $15 for goggles and $5 – $10 for a pack of gloves, in total $50 for PPE for a paint job.
12.Primer – Preps the surface for top-coat adhesion depending on surface type. $15 – $40+ per gallon (depends on type and quality)
13.Paint pails – For holding paint, priming large rollers. $5 – $10 each (handy for larger jobs).
14.Rags & cleaning solvent – For wipe-ups, spillage, final cleanup. Proper tools, combined with quality paint and technique, ensure an expert paint job with polished results. $10 – $20 (for a pack of rags and a bottle of mineral spirits or similar)
15.Drop cloths – Canvas or plastic sheets for protecting floors and furniture from drips and overspray. Plastic (cheap, but can be slippery): $5 – $15 for a pack.
For small projects such as a room, two or three, a basic tools set will set you back at $50 – $100, while for more more complete set for larger projects: $150 – $300+
Buy quality brushes and rollers: They last longer and give better results, so they’re worth the investment.
- Clean your tools properly: This will extend their lifespan.
- Consider renting scaffolding: Unless you’ll use it often, renting is more cost-effective.
- Look for sales and discounts: Many stores offer deals on painting supplies.
- Start with the basics and add as needed: You don’t need to buy everything at once.
Compliance with Safety and Environmental Standards
Hiring professional painters brings significant advantages in ensuring adherence to safety and environmental standards for your residential project.
Professionals are trained to identify potential hazards associated with painting projects, such as working at heights, handling chemicals, and dealing with lead-based paint (in older homes). They conduct thorough risk assessments and implement appropriate safety measures to mitigate these risks.

Expert painters will use the correct safety equipment, including ladders, scaffolding, harnesses, respirators, and protective gear, and are trained in their safe usage. They also employ safe painting techniques to minimize risks like falls, spills, and exposure to harmful substances.
How to do Proper Disposal of Paint Waste?
Professionals adhere to environmental regulations for the safe disposal of paint waste, including leftover paint, solvents, and cleaning materials. They prevent these materials from ending up in landfills or contaminating the environment.
Many professional painters prioritize the use of low-VOC (volatile organic compound) paints and environmentally friendly products. These products reduce indoor air pollution and minimize the impact on the environment.
They employ techniques to minimize waste, such as accurate paint quantity estimation and proper storage of materials. This reduces the amount of waste generated by the project.
In older homes, professionals are trained to handle lead-based paint safely, following EPA guidelines for its removal and disposal. This prevents lead exposure, which can have serious health consequences.
Surface Preparation and Repair Requirements
Preparing surfaces is critical to the success of any painting project. Most surfaces may require sanding, filling, or even minor repairs before painting can begin. Professionals are skilled in evaluating and preparing these areas properly, which often includes repairing cracks, holes, or other imperfections.
When addressed, these repairs set the stage for a smooth, high-quality finish that will stand the test of time.
If you think you can handle the surface preparation and repair without an expert, here’s what to do.
Determine the type of surface you’re painting (e.g., drywall, wood, metal, plaster). Different materials require different preparation methods.
Inspect the surface for any imperfections, such as:
- Cracks
- Holes
- Dents
- Peeling or flaking paint
- Water stains
- Mold or mildew
- Grease or dirt
Remove Loose Debris: Use a brush, broom, or vacuum to remove loose dirt, dust, and debris.
Wash the Surface: Wash the surface with a mild detergent solution and a sponge or cloth. For greasy areas, use a degreaser. Rinse thoroughly with clean water and allow to dry completely.
Remove Mold or Mildew: If you find mold or mildew, use a solution of bleach and water (1 part bleach to 3 parts water) to clean the affected area. Wear gloves and protective eyewear. Rinse thoroughly and allow to dry completely.
Small cracks: Widen the crack slightly with a utility knife or scraper. Remove any loose debris. Apply patching compound with a putty knife, pressing it firmly into the crack. Smooth the surface and allow to dry completely.
Large cracks or holes: Use a fiberglass mesh tape to cover the crack or hole. Apply multiple thin layers of patching compound, allowing each layer to dry before applying the next. Sand smooth.
Dents: Fill dents with patching compound, smooth the surface, and allow to dry completely. Sand smooth.
Peeling or Flaking Paint: Scrape away loose paint with a paint scraper. Sand the edges smooth to blend with the surrounding surface.
Water Stains: If the water stain is still visible after cleaning, apply a stain-blocking primer to prevent it from bleeding through the new paint.
Purpose of Sanding: Sanding creates a slightly rough surface that allows the paint to adhere better. It also smooths out any imperfections and removes any remaining loose paint or debris.
Choosing the Right Sandpaper: Use different grits of sandpaper depending on the surface and the severity of the imperfections:
Coarse grit (80-100): For removing heavy imperfections or rough surfaces.
Medium grit (120-150): For smoothing out rough surfaces and removing light imperfections.
Fine grit (180-220): For final smoothing before painting.
Sand in a circular motion or with the grain of the wood. Apply even pressure and avoid gouging the surface.
Purpose of Primer: Primer creates a uniform surface for the paint to adhere to, improves paint coverage, and blocks stains.
When to Prime:
- New surfaces
- Repaired surfaces
- Surfaces with stains
- Surfaces with a significant color change
- Glossy surfaces
Use a primer that is compatible with the surface you’re painting and the type of paint you’ll be using.
Specific Surface Considerations:
Drywall: Requires patching of holes and cracks, sanding, and priming.
Wood: Requires sanding to smooth the surface and remove any imperfections. Priming is recommended.
Metal: Requires cleaning to remove rust and grease. Priming with a metal primer is essential.
Plaster: Requires patching of cracks and holes. Priming is recommended.
Tips for Selecting Qualified Professional Residential Painters
If you do not do good research when selecting painters, you might find unqualified experts who are not suited to do residential work, leaving you with subpar results and potentially costly repairs.
Personal recommendations are invaluable. Ask people you trust if they’ve had positive experiences with any local painters.
Look for reviews on reputable websites like Google Reviews, Yelp, and Angie’s List. Pay attention to both the overall rating and the details of individual reviews. If nothing works check the local paint store employees, often paint stores have insights into the reputations of local painters.
A professional approach to painting provides a level of detail and expertise that often leads to a beautiful and lasting transformation. Consider hiring professional residential painters if your project involves complex features, time limitations, or a need for long-term durability. By choosing experienced painters for your residence, you can achieve a flawless result that elevates your home’s appearance.
Verify Credentials and Experience
- Check Licensing – Verify they have the proper state licensing for contractors. This is a basic standard that must be met.
- Request Proof of Insurance – Only consider painters that have general liability and workers comp insurance. This protects your home in event of any damage.
- Get References – Ask for and check 2-3 recent paint job references for quality and satisfaction.
- Confirm Years in Business – Choose an established company with 3+ years in business in your area. This indicates good stability and reputation.
- Ask About Warranties – Choose companies that back work with written warranties. Better painters protect their work.
- Evaluate Prep Process – Well-qualified painters will take steps for adequate surface repair, caulking, priming – not just apply paint.
- Assess Provided Estimates – Detailed, written estimates indicate rigorous assessment and planning for your project.
- Verify Safe Work Site – The company should explain safety practices to contain dust, paint, and properly ventilate.
Consider the Overall Value
Don’t Just Focus on Price: While price is a factor, it shouldn’t be the sole deciding factor. Consider the overall value, including the quality of work, experience, and professionalism.
Compare Apples to Apples: Ensure that the estimates you’re comparing include the same scope of work and materials.
Trust Your Gut: If you have any doubts or reservations about a particular painter, it’s best to move on to another option.
9 Questions to Ask Potential Painters Before Hiring
- Are you licensed and insured?
- How many years have you been in business?
- Can you provide references?
- Can I see examples of your previous work?
- What type of paint do you use?
- How do you prepare the surfaces for painting?
- What is your cleanup process?
- Do you offer a warranty?
- What is your payment schedule?
Are you going to save money by painting yourself?
Yes, you will generally save money upfront by painting yourself, but it’s crucial to consider the full picture.
DIY Painting will cost you at least $150 for materials and prep, and paint is not included. Brushes, rollers, trays, tape, drop cloths, sandpaper, etc.: $50 – $150+ (depending on quality and what you already own) and many others, plus the paint.
Add Your Time, this is a significant cost that’s often overlooked. Consider the hours you’ll spend on:
- Shopping for supplies
- Preparing the surfaces (cleaning, patching, sanding)
- Taping
- Painting multiple coats
- Cleaning up
Potential Mistakes: If you make mistakes, you might need to:
Buy more paint to correct errors, repair damage to surfaces and at the end potentially hire a professional to fix major issues.
Professional Painting Costs
Labor: This is the biggest cost factor. Painters typically charge:
- Per square foot: $2 – $6+ (depending on location, complexity, and surface)
- Per hour: $30 – $70+
- Per day: $300 – $700+
Professionals usually get discounts on paint and supplies, which can offset some of the labor costs. Preparation and Cleanup should be included in the price.
Cost Comparison Example (10x12 ft Room)
DIY:
Paint (2 gallons): $80 – $200
Supplies: $70 – $150
Total: $150 – $350+
Time: 1-2 days (or more, depending on experience)
A professional paint job will likely last longer and look better, potentially saving you money on repainting in the future.
Professional:
Labor (assuming $3/sq ft and 8ft ceilings): $288
Materials (often included): minimal additional cost
Total: $300 – $500+ (depending on location and complexity)
Time: 1 day or less
DIY painting can be stressful and time-consuming. Hiring professionals can free up your time and reduce stress.
When DIY Saves You More?
Small, simple projects: Painting a small room or a few walls.
You have the time and skills: You enjoy DIY and are confident in your abilities.
Tight budget: You absolutely cannot afford professional labor.
For small rooms a motivated DIY first-timer can save modestly after acquiring all equipment/supplies. But entire interior house painting is usually faster, safer and higher quality when performed by a fully insured professional painting contractor. Calculate the costs carefully.
While DIY painting generally has a lower upfront cost, it’s essential to consider your time, skills, and the potential for mistakes. For larger or more complex projects, hiring professionals can be a worthwhile investment that saves you time, stress, and potentially money in the long run.
When Hiring Professionals is More Cost-Effective (in the long run)?
Large or complex projects: Whole-house painting, exteriors, intricate designs, high ceilings. Some painters even use 3D renders and create a project.
Limited time or skills: You have a busy schedule or lack painting experience.
Desire for a flawless finish: Professionals have the tools and expertise to achieve a higher quality result.
Avoiding costly mistakes: Preventing potential damage or the need to redo work or hire a 3D interior designer to help you with the project by making a concept project. Having 3D renderings or consulting an interior designer helps plan and envision the scope of work.
The 3D visualization, custom designs, project scope assessment, and technical painting knowledge that designers provide is extremely valuable for big, intricate painting jobs. Their fees and renderings are investments that give clarity on execution, budgeting, scheduling and the best end results. Even small jobs can benefit from expert planning guidance. Evaluating if professional design input would be beneficial based on your goals, budget and capabilities is recommended.