To create an ideal outdoor living space, consider various ideas that can be implemented regardless of yard size. A key strategy is to transform your space by focusing on maximizing functionality and aesthetic appeal. For example, an outdoor kitchen is the second most wanted feature in a garden after a lounge space. In this post, we’ll take a look at how to design and plan the build of an outdoor kitchen space with a grill.
Want to get 3D rendering for your interior design project?

George is a seasoned interior designer and property marketing strategist with over 13 years of experience. He specializes in transforming properties into visually stunning spaces, helping clients recognize the potential and beauty in each property. With an impressive international client base of exciting projects throughout Europe and America.
TALLBOX provides information for educational purposes only and does not offer financial advice; users should consult with qualified professionals before making any investment decisions. TALLBOX and George Nicola are not liable for any losses or damages incurred as a result of relying on the information provided.
George Nicola shares: Let’s explore how you can fully utilize every square inch of your outdoor space and make it a more enjoyable part of your home.
-
Prioritize and Plan: Identify the primary goals for your outdoor space, such as relaxation, dining, cooking, or play. This helps in organizing the design efficiently without overcrowding.
-
Functional Layout: Since the focus is outdoor kitchen, grill island is a must. Either I-shaped or L-shaped both provide easy access from all sides to the counter space. U-shaped islands are not ideal for small outdoor areas, as they are more expensive to build and will further take unnecessary space. Design the outdoor area to ensure ease of movement around the outdoor kitchen cabinets. Consider pathways and divisions for different zones like dining, food prep and cooking space, lounging, or gardening.
-
Indoor-Outdoor Integration: Use design elements like French doors or consistent flooring to visually and physically connect indoor and outdoor spaces, enhancing the sense of openness.
-
Vertical Space Utilization: Implement vertical gardening, which utilizes structures or walls for growing plants, thus saving ground space and adding visual interest.
-
Simplicity and Minimalism: Choose uncomplicated layouts and limit the variety of materials and plants to create a clean, cohesive look.
For small spaces, use elements like compact movable furniture, multi-purpose pieces, and potted plants to maximize efficiency without sacrificing style. In larger areas, you might incorporate distinct rooms, such as a dining patio or a poolside lounge, to optimize the available area. If your garden is not on a slope, removing unnecessary railings will further optimize the space.
Consider using a pergola for vertical growth and shade; it creates a colorful focal point to which you can add outdoor rugs or murals and hide storage solutions to maintain tidiness in compact areas. Using these concepts to transform your garden into a welcoming and functional extension of the home.
Outdoor kitchen ideas
New Age Stainless Steel Outdoor Kitchen
New age outdoor kitchens, are open-air cooking spaces that integrate the functionality of an indoor kitchen with the ambiance of the outdoors. Achieve the modern design by choosing high-quality materials that can endure various weather conditions.
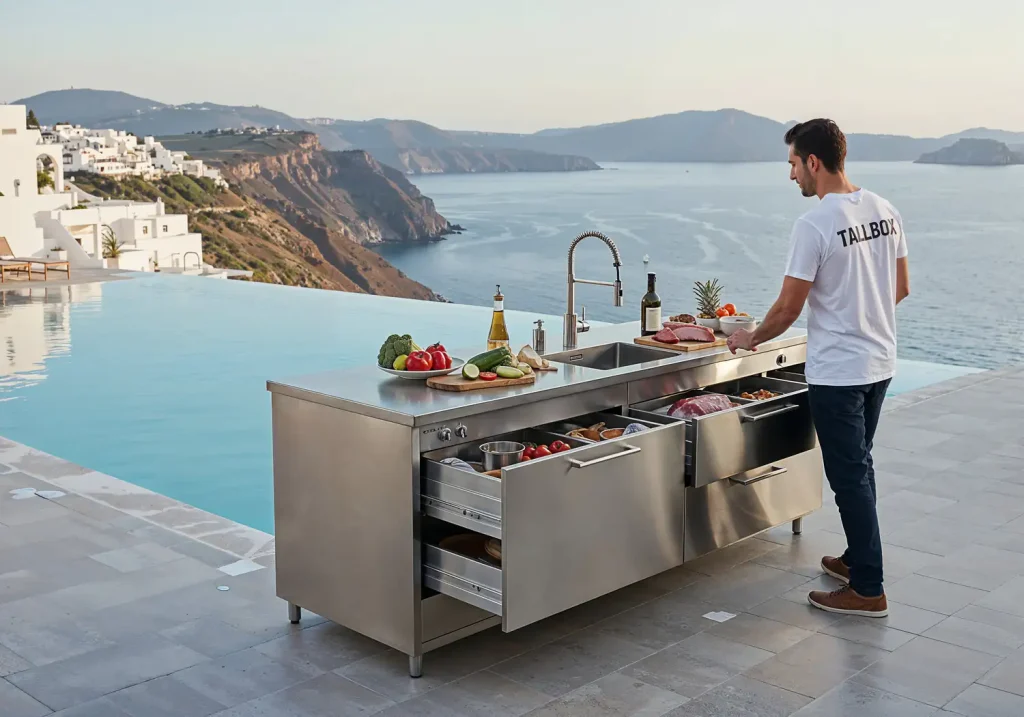
How to get the look: Position appliances and work areas strategically if you plan to optimize workflow and space. Incorporate a design that matches the environment. Stainless steel is an appropriate option for cabinetry, countertops, and appliances, if you prefer a material with low maintenance. Stainless steel offers a resistance of 95% to corrosion.
Features like a built-in grill, sink, refrigerator, and storage drawers enhance the functionality, if you need convenience. Finish the space with proper lighting, seating, and possibly a fire pit or outdoor heaters, if you need comfortable and inviting spaces to enjoy and entertain.
Covered Patio Lounge and Outdoor Kitchen
To create a covered patio, extend a roof structure over an outdoor area, providing shelter while maintaining an open-air feel. Covered patios merge indoor comfort with outdoor living, forming versatile spaces for relaxation and entertainment.
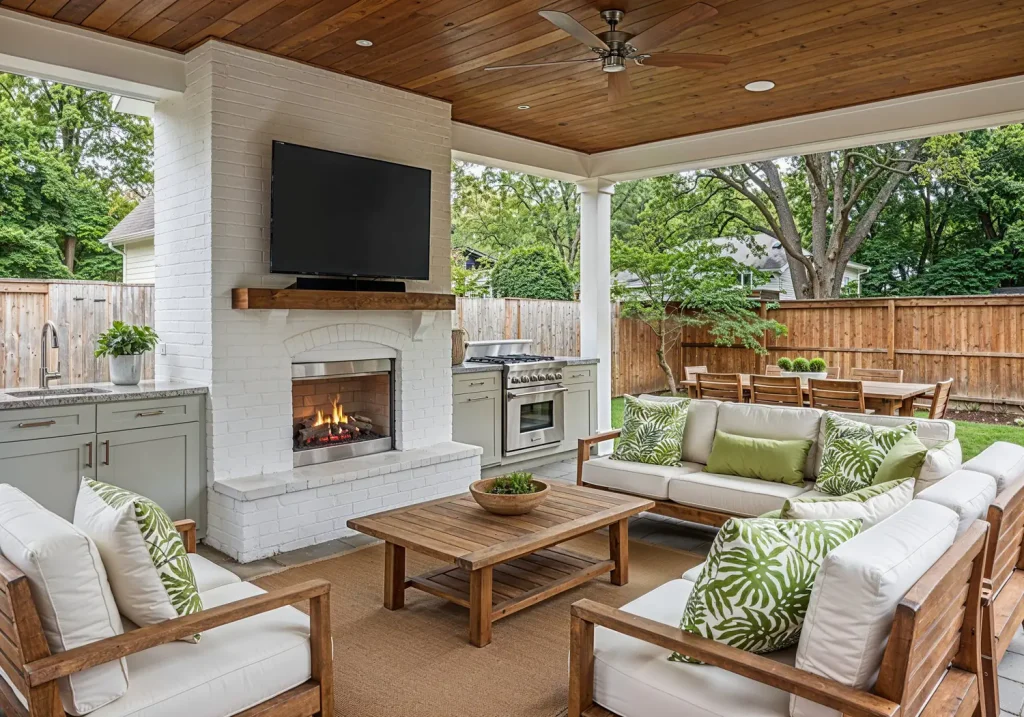
How to get the look: Covered patios are outdoor living spaces with a roofed structure, designed to provide shade and protection from the elements.
Make an outdoor kitchen functional year-round by integrating, heating, cooling, and entertainment facilities.
Wooden beams and a paneled ceiling create a warm, inviting look, if you want to create a cohesive design. The pillars and framework match the house’s exterior. A brick fireplace with a mounted TV acts as a focal point, if you want to combine warmth and entertainment. Position the features at a convenient position.
Comfortable seating arrangements, include sofas and armchairs with patterned cushions, enhance the usability of space. Match and coordinate with the architectural elements.
Include a compact outdoor kitchen area with a BBQ grill, sink, and cabinets, if you need to keep it minimal. The installation has a success rate close to 85%.
Rooftop outdoor kitchen
To establish a rooftop kitchen, integrate cooking and dining facilities into a rooftop space, maximizing views and utilizing open-air environments. Rooftop kitchens combine urban living with outdoor enjoyment, offering a unique cooking and dining experience.

How to get the look: Rooftop kitchens are cooking spaces located on building roofs, designed to make use the views and outdoor settings. Maximize utility and enjoyment by incorporating durable, weather-resistant materials.
A pergola provides partial shade, if you are looking to create a comfortable environment. The layout optimizes the space. Stainless steel appliances and granite countertops are used for their durability and sleek appearance, if you expect longevity and style. These materials can withstand the elements.
Incorporate built-in grills, a sink, and ample storage, if you are aiming to create a functional kitchen. The position has a sea view and direct sun exposure. The open-air setting, combined with the panoramic ocean view, creates a serene and unique experience, if you prefer exclusivity. The setting offers a 90% relaxation rate.
Under-deck outdoor kitchen
To develop an under-deck kitchen, utilize the space beneath a raised deck, converting it into a functional outdoor cooking and dining area. Under-deck kitchens combine practicality with innovative design, creating a unique outdoor living space

How to get the look: Under-deck kitchens are outdoor cooking areas built beneath elevated decks, designed to use space with overhead shelter. Maximize functionality and aesthetic appeal by integrating, weather-resistant materials, and efficient designs.
The kitchen is built into the existing structure with wooden paneling and stonework, if you need continuity in design. Ensure the materials coordinate with their environment.
The use of stone for the bar and wood for the walls gives a natural ambiance, if you want something to harmonize with the outdoor setting. Stainless steel appliances are selected for its durability.
The kitchen includes a grill, refrigerator, and sink, if you are aiming to meet every necessity. The kitchen offers the most essential needs.
Hanging lanterns provide warm lighting, if you desire enhanced ambiance and visibility. This results in a space that is functional and inviting at around 90% of its capacity.
Poolside outdoor kitchen
To design a poolside kitchen, integrate cooking and dining facilities directly adjacent to a swimming pool, offering convenience and enhancing the outdoor leisure experience. Poolside kitchens combine the functionality of outdoor cooking with the recreational aspects of a pool area.
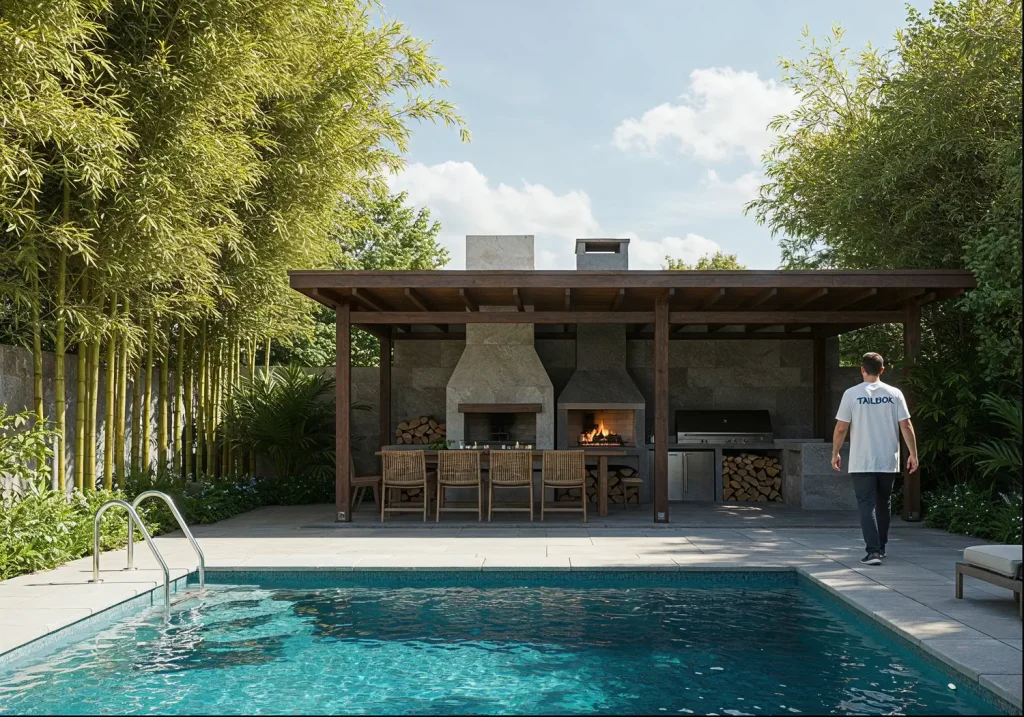
How to get the look: Poolside kitchens are outdoor cooking spaces located beside swimming pools. They are designed to blend culinary activities with poolside relaxation. By incorporating weather-resistant materials and functional designs, poolside kitchens achieve a perfect combination of utility and leisure.
A wooden pergola provides shade and structure, if you are looking to maintain an airy, open feel. The solid stone walls add a sense of luxury. Stone fireplaces and wooden structural elements are chosen for their natural look, if you want to harmonize with the environment. Stacked firewood adds a rustic appeal.
Integrate dual fireplaces, a grill, and ample seating, if you want to enhance functionality and aesthetic appeal. The seating accommodates various needs.
The proximity to the pool and the surrounding greenery enhances the outdoor experience, if you aim to combine natural elements with social aspects. This design increases the usability to almost 95%.
Pergola outdoor kitchen
To create a pergola kitchen, construct an outdoor cooking area beneath a pergola structure, combining open-air ambiance with partial shade and shelter. Pergola kitchens merge culinary functionality with architectural design.
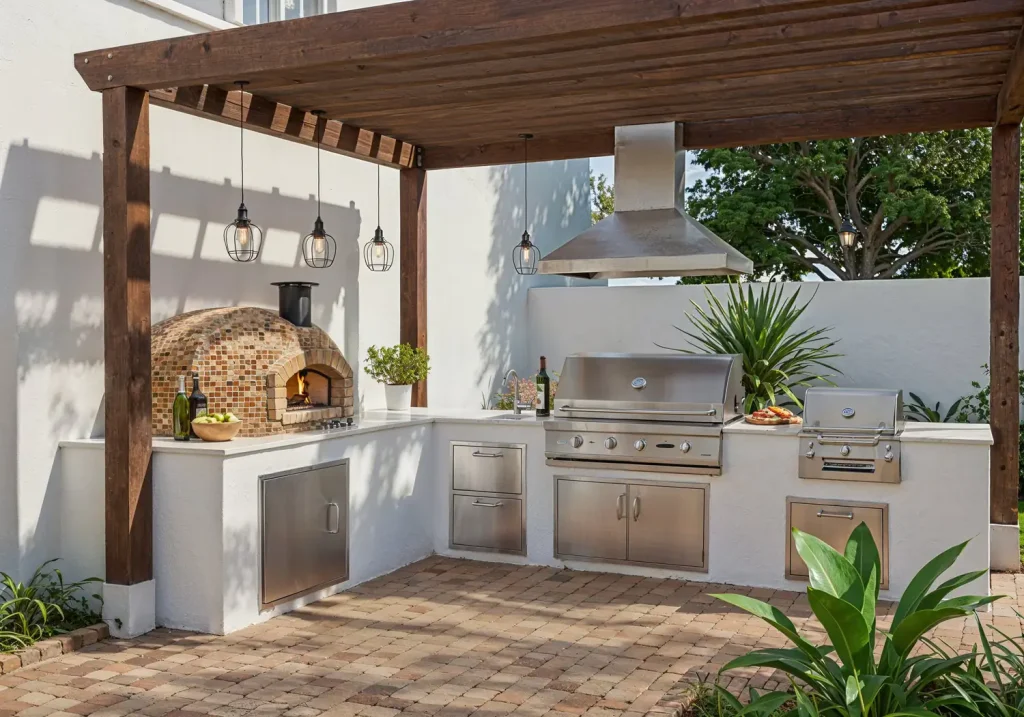
How to get the look: Pergola kitchens are outdoor cooking spaces set under pergola structures, providing partial cover and a stylish architectural element. Achieve an ideal mix of functionality and aesthetics by integrating durable materials and appealing designs.
A wooden pergola offers shade and support for hanging lights, if you intend to create a cozy atmosphere. The structure is connected to the house. Use a brick pizza oven and stainless steel appliances for their practicality, if you want a durable space. The combination of textures adds interest.
Include a grill, pizza oven, sink, and storage cabinets, if you want to build a perfect outdoor cooking space. A vent hood manages smoke and odors.
Pendant lights and surrounding greenery enhance the setting, if you aim to make something inviting and functional. The integration of natural elements and practical features creates a usability of nearly 90%.
Minimalist outdoor kitchen
To develop a minimalist outdoor kitchen, streamline the design to essential elements, focusing on clean lines, neutral colors, and functional simplicity. Minimalist outdoor kitchens combine simplicity with functionality, creating uncluttered and efficient spaces.
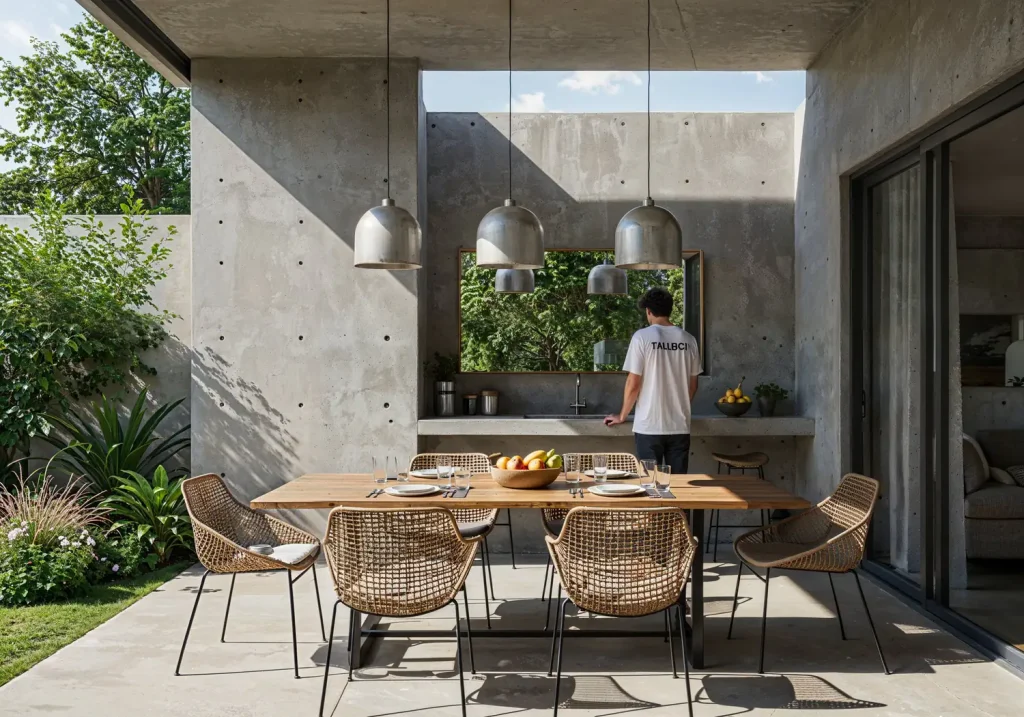
How to get the look: Minimalist outdoor kitchens feature basic cooking and dining setups, characterized by clean lines and lack of ornamentation. Achieve a streamlined look using simple materials and a neutral color palette, focusing on functionality.
The use of raw concrete for walls and countertops creates a cohesive modern appearance, if you want to achieve a monolithic design. The design extends seamlessly from the interior. Concrete and stainless steel are selected for their durability, if you need materials that look good with little maintenance. These elements complement the surrounding greenery.
Integrate a sink and countertop space for food preparation and washing, if you need an efficient space. A mirror above the sink reflects the outdoor environment.
The open layout and pendant lighting enhance the minimalist design, if your goal is to focus on natural light and simplicity. This approach creates an efficiency and usability rate of approximately 85%.
Traditional outdoor kitchen with grill
To create a traditional outdoor kitchen, incorporate classic design elements such as brick or stone, integrating a built-in grill and dining area for a timeless look. Traditional outdoor kitchens mix classic aesthetics with functional cooking spaces, creating enduring and inviting environments.

How to get the look: Traditional outdoor kitchens focus on classic design, using materials like brick and stone for a robust, timeless appearance. Achieve a blend of functionality and aesthetics by integrating essential cooking appliances and comfortable dining spaces.
The kitchen features a built-in brick structure, if you need to achieve a cohesive and classic design. A stone chimney adds a traditional architectural element.
Brick and stone are selected for their durability and classic look, if you want to make sure the design endures. Stainless steel appliances add functionality.
Include a grill, sink, and storage cabinets, if you intend to build a functional outdoor cooking area. The chimney acts as a ventilation for smoke.
A nearby dining area with an umbrella provides a comfortable space, if you need to eat outdoors. The traditional style and proximity to the garden create a timeless appeal, at an effectiveness of about 85%.
Rustic-covered outdoor kitchen
To establish a rustic outdoor kitchen, use natural materials like stone and wood, integrating the kitchen into a covered patio space for a blend of indoor and outdoor living. Rustic outdoor kitchens combine natural aesthetics with functional design, perfect for enhancing outdoor living space
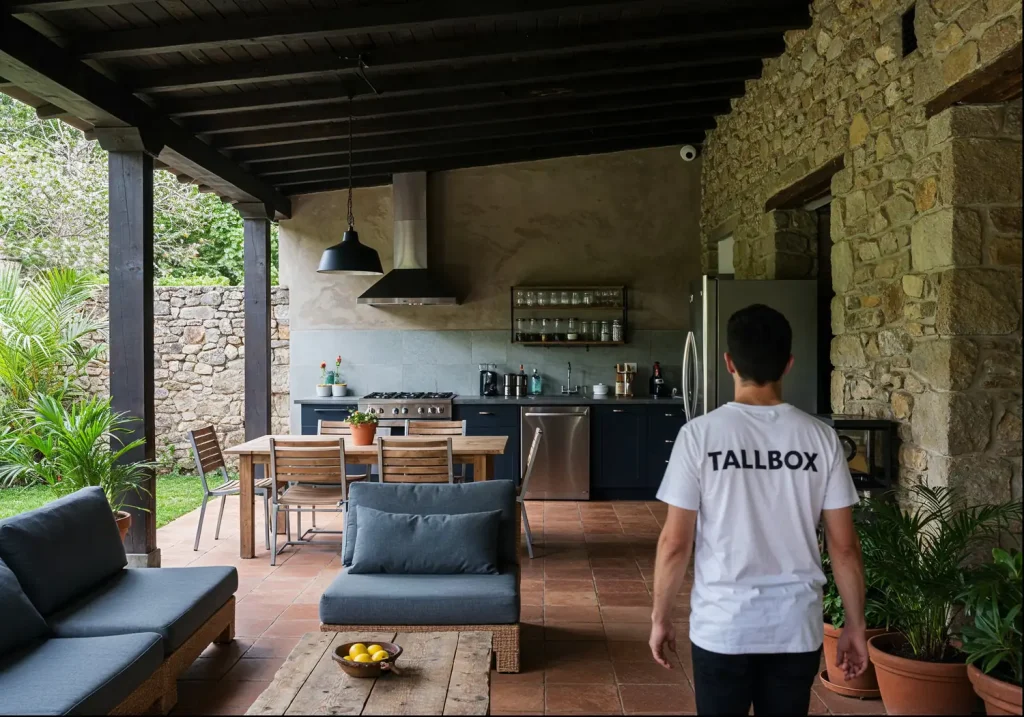
How to get the look: Rustic outdoor kitchens are cooking areas located on covered patios, blending natural materials and indoor-outdoor living. Achieve a warm, inviting atmosphere using stone walls and wooden beams, integrating the design with the surrounding environment.
A dark wooden ceiling and beams provide a sheltered space, if you are looking for both comfort and style. Terracotta floor tiles add a traditional touch.
Stone walls and wooden furniture are chosen for their natural aesthetic, if you intend to create a space that feels organic. These materials blend into the natural backdrop.
Integrate a grill, sink, refrigerator, and ample storage, if you aim to achieve a full kitchen functionality. A large range hood manages ventilation.
The mix of stone, wood, and natural light enhances the rustic charm, if you want a cozy setting. This space offers a blend of natural elements and functionality, with usability at around 90%.
Indoor-outdoor outdoor kitchen
To design an indoor-outdoor kitchen, blend interior and exterior spaces seamlessly, using large sliding doors or windows to create a continuous flow between cooking and outdoor areas. Indoor-outdoor kitchens combine the convenience of indoor cooking with the appeal of outdoor living.

How to get the look: Indoor-outdoor kitchens merge interior and exterior spaces, using elements like large glass doors to create a connected cooking and living area. Achieve a harmonious blend by utilizing materials and designs that complement both environments.
Large sliding glass doors connect the kitchen to the outdoors, if you prefer a fluid transition between spaces. A wooden ceiling extends from inside to out.
Stone walls and patterned tiles add texture and visual interest, if your goal is to make an aesthetic appeal. Stainless steel appliances offer durability and modern style.
Include a grill, sink, range, and ample storage, if you intend to have all the elements of an indoor kitchen. A large vent hood handles smoke and odors.
The open design and scenic view enhance the cooking and dining experience, creating an open-air atmosphere. This layout offers a blend of indoor convenience and outdoor beauty, at an usability of about 97%.
Traditional L-shaped covered outdoor kitchen
To develop a traditional L-shaped covered outdoor kitchen, integrate cooking and dining facilities beneath a solid roof or awning, providing protection from the elements while maintaining an open-air feel. Covered outdoor kitchens blend the functionality of indoor kitchens with the appeal of outdoor living.

How to get the look: Covered outdoor kitchens are cooking spaces located under awnings or roofs, combining the protection of indoor spaces with outdoor exposure. Achieve a functional and appealing design using durable materials and integrating weather protection.
A striped awning provides shade and shelter, if you are aiming to protect from sun and rain. The structure is connected to the house. Use stone for the base and granite for countertops for their durability, if you prefer a natural and robust appearance. Stainless steel appliances offer resilience and functionality.
Integrate a grill, sink, storage cabinets, and a range hood, if you aim for a fully equipped kitchen. The large range hood manages smoke and odors efficiently. The covered space with views of the pool and garden enhances the outdoor living experience, if you want a functional space. This setup offers shelter and functionality, at a usability rate of about 95%.
Outdoor kitchen with pizza oven
To create a backyard kitchen with pizza oven, integrate cooking and dining facilities into a backyard setting, blending functionality with the natural environment. Backyard kitchens combine culinary convenience with outdoor enjoyment, perfect for those who appreciate alfresco dining.

How to get the look: Backyard kitchens, are outdoor cooking spaces set within a backyard, designed to blend with the landscape while providing full kitchen capabilities. Achieve a cohesive and practical space by using durable materials and functional layouts.
A wooden pergola provides partial shade and supports string lights, if you are aiming for a cozy, functional environment. The wooden deck complements the surrounding greenery.
Green cabinets and granite countertops offer a natural appearance, if you want a space that harmonize with the garden. A brick pizza oven adds a rustic touch.
Incorporate a grill, pizza oven, sink, and ample storage, if you desire full functionality. The pizza oven acts as focal point.
String lights and surrounding plants enhance the backyard setting, if you want an atmosphere that is cozy. This arrangement achieves an almost perfect usability of 95%.
Portable outdoor kitchen (Ikea style)
To assemble a portable outdoor kitchen (Ikea style), use modular, lightweight components that can be easily moved and reconfigured, providing flexibility for various outdoor settings. Portable outdoor kitchens combine convenience with adaptability, ideal for those who need mobile cooking solutions.
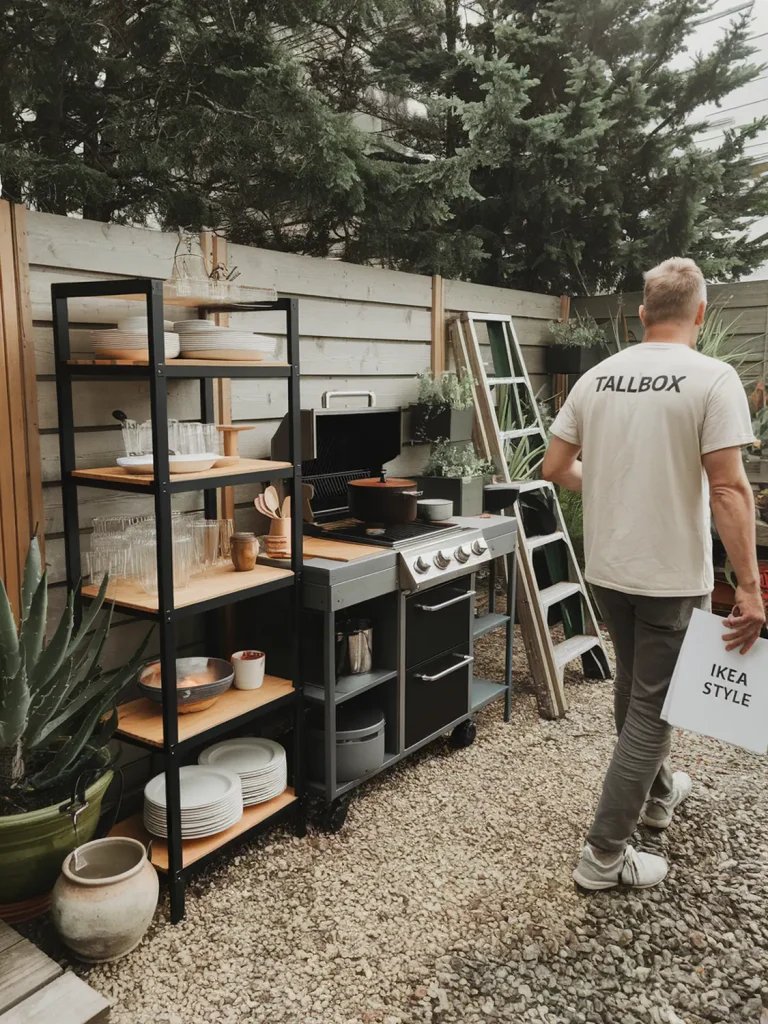
How to get the look: Portable outdoor kitchens use modular units that are easy to transport and set up, providing a cooking solution for different locations. Achieve flexibility by selecting lightweight materials and components designed for mobility.
The kitchen consists of separate, movable units, if you need easy rearrangement and transport. A wheeled grill unit and shelving unit are used.
Metal framing and wooden shelves provide a balance of durability, if you are looking for lightweight structures. These materials ensure easy handling.
Include a portable grill, shelving for storage, and additional bins, if you intend to keep all essentials mobile. Each component is designed for easy relocation.
The setup is adaptable to different outdoor environments, making it suitable for various settings. The focus on mobility and functionality offers a practical and convenient solution, achieving a flexibility rate of approximately 80%.
Comprehensive U-shape outdoor kitchen
To design a U-shape outdoor kitchen, integrate multiple cooking, dining, and storage elements into a single, unified space, creating a fully functional outdoor living area. Comprehensive outdoor kitchens combine the features of indoor kitchens with the ambiance of outdoor spaces.
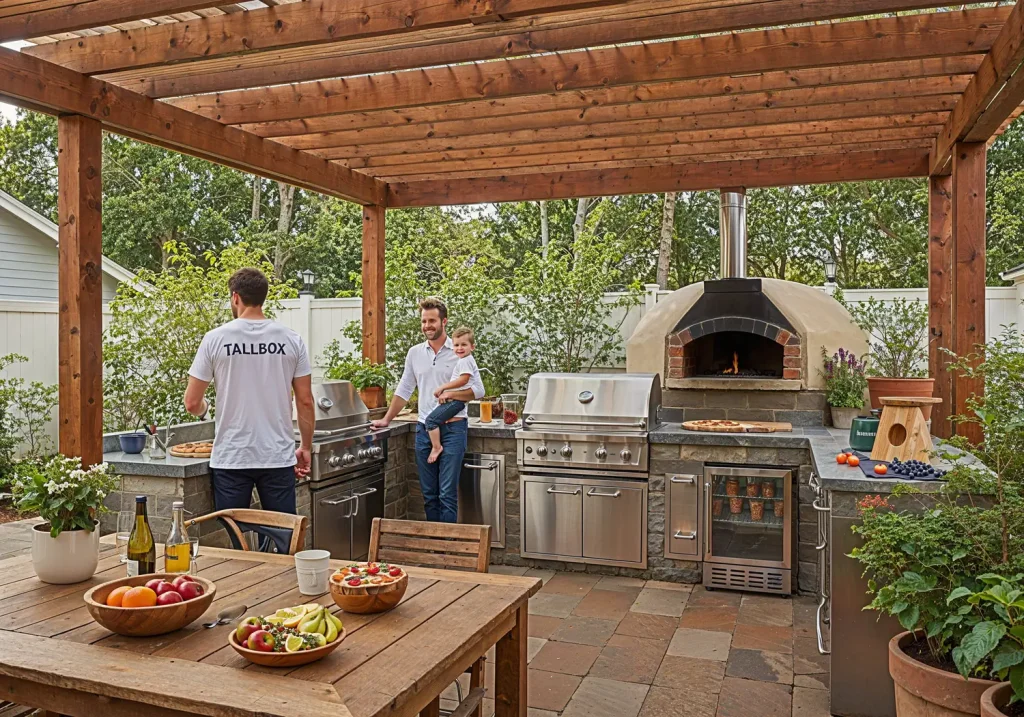
How to get the look: U-shape kitchens incorporate all essential kitchen elements into an outdoor setting, offering a full range of cooking and dining options. Achieve a fully functional and integrated space by using durable materials and a cohesive design approach.
A wooden pergola provides shade and structure, if you want to define the kitchen area while maintaining an open feel. Stone flooring extends throughout the space.
Use stone and brick for the structural elements for their durability, if you desire a natural look. Stainless steel appliances offer modern functionality.
Integrate multiple grills, a pizza oven, a sink, a refrigerator, and ample storage, if you need a fully equipped kitchen setup. The pizza oven provides specialized cooking option.
The integration of multiple functional areas creates a complete outdoor living space, if you are aiming for social gatherings and everyday use. This design achieves near-total usability, at 98%, providing a comprehensive and functional outdoor environment.
Selecting the Perfect Size and layout of your outdoor kitchen
To determine the right outdoor kitchen design, assess your space’s approximate size and shape first.
Consider a straight run for small areas, also called an I-island. It maximizes workspace in a line, and many modular kitchen designs offer that. An L-shaped layout suits medium spaces, creating a functional “work triangle” among appliances. Choose a U-shaped design for extensive areas, offering abundant preparation and serving space.
Opt for a G-shaped layout in the largest spaces for maximum storage and versatility. Once the layout is decided, incorporate essential features like grills, sinks, and refrigerators to optimize function. Add seating based on available space, enhancing social interaction. Select colors that complement your chosen layout and space size.
Start by sketching your outdoor kitchen layout and deciding on the appliances you wish to install. Once you have your plans and layout finalized, order your appliances along with all necessary materials.
Cost ranges for the outdoor kitchen
Outdoor kitchen costs vary widely based on components like grills, modules, countertops, appliances, and stonework, ranging from about $2,880 for basic setups to over $50,000 for luxury versions. These variations depend on material quality, feature sets, and design intricacy.
Basic grills cost between $100 and $5,000, depending on size, fuel type (propane, natural gas, or charcoal), and added features like smokers or rotisseries, while built-in grills range from $2,500 to $10,000 for stainless steel models and $5,000 to over $16,000 for high-end luxury options like hybrid grills.
Char-Broil modular kitchens feature grill modules such as the 5-Burner Gas Grill at $2,000 and the 3-Burner Gas Grill at $1,500, with additional modules including griddles and refrigerators priced from $3780 to $1,100, and pre-designed packages like “The Essentials,” “The Entertainer,” and “The Complete” ranging from $3,145 to $5,940

Individual components contribute to the overall cost, with granite or concrete countertops priced between $95 and $300 per square foot, appliances such as refrigerators and dishwashers ranging from $300 to $4,000, and sink installation costing between $215 and $630, depending on plumbing distance. IKEA offers pre-assembled outdoor kitchens, with the GRILLSKÄR series including a kitchen with a gas grill for $1,110 and a sink unit/cabinet for $621, and the BÅTSKÄR series featuring an island with a bar table for $1,360 and a kitchen with a charcoal BBQ and sink for $1,461.
Custom stonework adds significantly to the expense, with simple U-shaped stone cabinets for grills costing between $7,200 and $9,500 and more complex stonework, potentially including bar attachments or larger layouts, ranging from $8,000 to $24,000, making a detailed cost breakdown dependent on selecting each desired component.
What is your climate like?
Climate significantly influences outdoor kitchen design. Consider local elements like heat, snow, seawater, and wind as they determine material, layout, and location of the cabinetry. Identify optimal shading solutions, particularly in sun-drenched areas, to prevent overheating and discomfort. Ensure protection from wind, especially in high-elevation settings, using walls or permanent structures for stability.
Combat moist environments with stainless steel, especially 316-grade for water proximity, to minimize rust and corrosion. For snowy climates, safeguard appliances with covers to reduce moisture impact during harsh seasons. Regular cleaning of stainless surfaces maintains longevity across variable weather conditions.
Select shading and protective features carefully to ensure durability and functionality of your outdoor kitchen throughout diverse climate challenges.
Plan your outdoor kitchen project with the landscape, not against it.
Flat Terrain is the most straightforward option for outdoor kitchen construction, requires minimal groundwork, and offers unlimited design flexibility. Construction costs remain lower due to simplified foundation requirements and easier utility installation.
Sloped Land requires strategic planning with retaining walls and terracing to create level areas for kitchen placement. While offering opportunities for dramatic multi-level designs, costs increase due to additional engineering and drainage requirements.
Wooded areas provide natural protection from the elements and create an intimate cooking environment with built-in shade. Tree root management and selective clearing must be considered during foundation planning.

Open spaces offer maximum design freedom but demand careful consideration of weather protection elements. Additional structures like pergolas or shade sails become essential for comfortable year-round use.
For expert guidance, bring in professionals with a good track record in handling landscaping projects. In collaboration with landscape designers, have them guide you in selecting the perfect plants for your region. A good team will also base their operation on your preferences, meaning they’ll take time to understand your expectations and needs.
Tip: Foundation requirements vary based on terrain grade, with proper drainage slopes essential for water management. Adequate spacing between components ensures safe operation and comfortable workflow in the kitchen space.
Outdoor Lighting
String lights, lanterns, or LED path lights can add a warm and inviting atmosphere that welcomes one in. Outdoor lighting is essential in creating an atmosphere and making your outdoors accessible during nighttime. You could use spotlights to highlight focal items, such as statues or fountains.
Keep harmony between form and function in mind when designing your lighting scheme. Use dimming lights in your installation in such a manner that intensity can vary with occasion. Solar-powered lights, on the other hand, offer a budget and environmentally friendly alternative for your backyard oasis.
What is your preferred style for the new outdoor cooking space?
To identify a preferred style, define the aesthetic that aligns with your personal taste. Consider categories such as modern, with its clean lines and sleek materials; rustic, emphasizing natural elements like wood and stone; traditional, which includes elegant and timeless furnishings; or eclectic, which combines diverse styles for a unique look. If you gravitate towards minimalist spaces, for instance, you’ll focus on simplicity and function with a neutral palette.
If you’re drawn to the bohemian style, incorporate vibrant colors, layered textures, and elements from different cultures to create a relaxed and artistic environment.
What outdoor kitchen accessories to select?
Consider including a built-in grill, as it stands as the centerpiece of your outdoor kitchen experience. An outdoor refrigerator keeps beverages chilled, creating a seamless cooking and dining environment. Install an outdoor sink for convenient cleaning and hand washing during food preparation. Invest in kitchen storage solutions to keep utensils and supplies organized.
To enhance your cooking variety, a kamado smoker and outdoor flat top grill provide additional culinary options. Add a pizza oven to bring the authentic wood-fired pizza experience home. Side burners extend your cooking abilities beyond the grill, allowing for side dishes and sauces. Make sure the space is filled with outdoor lighting to ensure functional and ambiance during nighttime gatherings.
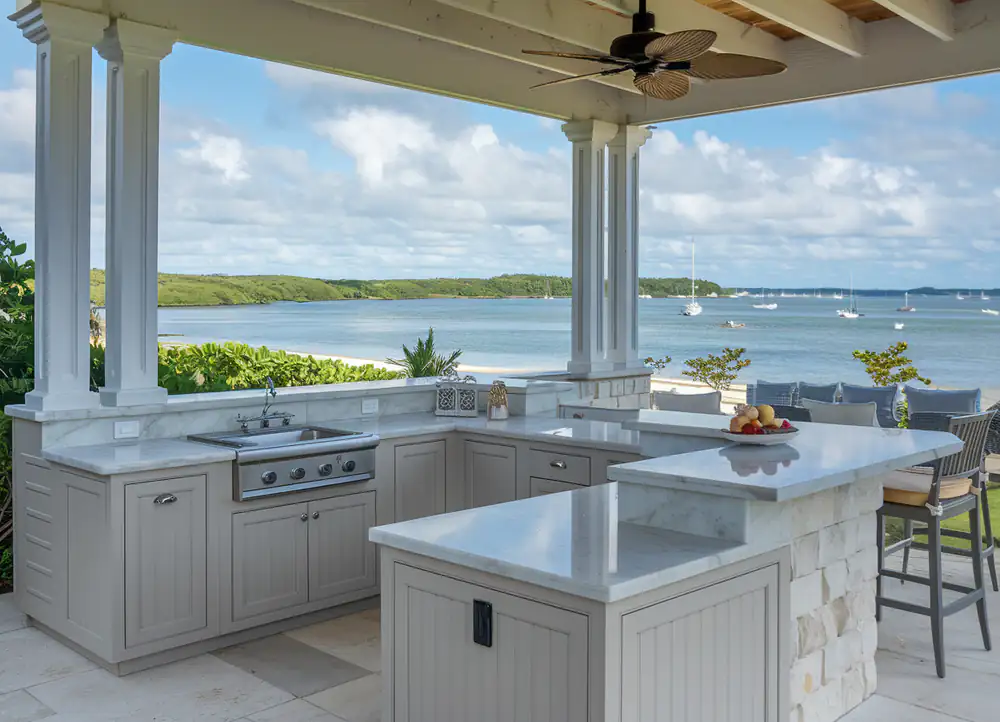
Building codes for outdoor kitchens
Before attempting anything, make sure your project is up-to all building codes for your area, below are some of the most common you might face.
Gas Pipe Stub: The gas pipe must extend high enough above the finished decking to expose a minimum of 2 inches of unthreaded pipe. This allows for proper fitting and tightening with a pipe wrench.
Paint for Protection: Paint the gas pipe before decking installation to protect it from corrosion.
Professional Installation: Only trained and professional plumbers or mechanical contractors should install gas lines. Licensure requirements vary by state.
20-Amp Circuits: The International Residential Code (IRC) requires all kitchens to have two 20-amp circuits dedicated to receptacle outlets. However, this is rarely enforced for outdoor kitchens due to their optional and often seasonal use.
Appliance Outlets: If receptacles are included, they must follow standard electrical installation requirements.
Fire Safety: Observe minimum clearances around built-in or freestanding BBQ grills to minimize fire risk.
Exhaust Hoods: Consider installing an exhaust hood to manage smoke, especially if the grill is under a roof or near a window.
Sink Installation: Discuss outdoor sink installation with the local building department, as requirements vary based on local rules and climate.
Water Supply Options: In freeze-prone areas, use a seasonal water supply system with a stop and waste valve. For year-round service, place the sink against an exterior wall with a hot-cold frost-protected hose bibb.
Drainage: A P-trap is required for sinks connected to the home’s DWV (drain, waste, and vent) system to separate the sink from the sewer system.
Environmental Differences: Consider the unique environmental challenges of outdoor kitchens compared to indoor kitchens.
Consult Local Building Department: Always consult with the local building department, as outdoor kitchen features may be uncommon and require specific approvals or adjustments.
Permit Requirements: Anytime sewer, water, electric, or gas is involved, a permit and inspection are required.
Accessory Structures: Structures less than 200 sq. ft. may be exempt from permits, but this can vary.
Building an outdoor kitchen
To build you outdoor space either DIY or with a professional firm requires meticulous planning and preparation. The first crucial step is to check local building codes. Compliance with these regulations is essential to avoid any future legal issues.
Thorough planning lays the foundation for a successful project. Begin by drafting detailed elevations of your kitchen layout. This blueprint will guide your design and material decisions.
For this project, pressure-treated lumber is used, known for its durability and resistance to outdoor elements. Before purchasing materials, create a comprehensive material list and detailed plans that include all sides of the structure.
Additionally, plan for essential utilities like gas lines for propane and water.
Framing the Outdoor Kitchen
Building an outdoor kitchen is an exciting endeavor that demands careful planning and execution, particularly in the framing stage. This section will outline the key steps for framing your outdoor kitchen using pressure-treated materials or metal studs.
Sketching and Ordering Appliances
Begin by outlining the layout of your outdoor kitchen and selecting the appliances you want to install. Once your design is finalized, order your appliances and all the essential framing materials.
Appliance Dimensions
Before you start framing, it’s essential to have your appliances on-site. Accurate appliance dimensions, including access doors and drawers, are a must. While online guides can provide measurements, using a tape measure to measure the appliances directly ensures the precision of your cutouts, giving you a sense of control and security in your project.
Using Liners for Pressure-Treated Framing
If you opt for pressure-treated wood for your framing, it’s important to remember that it’s combustible. To ensure safety and durability, using liners for all appliances is crucial. This protective measure shields the wood from heat damage, providing you with peace of mind and reassurance. However, if you choose metal framing, liners are not necessary.

Level Construction
Establishing a level foundation is essential when building an outdoor kitchen, especially if you plan to install concrete countertops. First, recognize that any irregularities in the concrete surface must be addressed, as patios typically slope to direct water away from the building.
Begin by using a laser level to evaluate the area. Measure from a benchmark position across various points of the construction site to identify any significant slopes or dips.
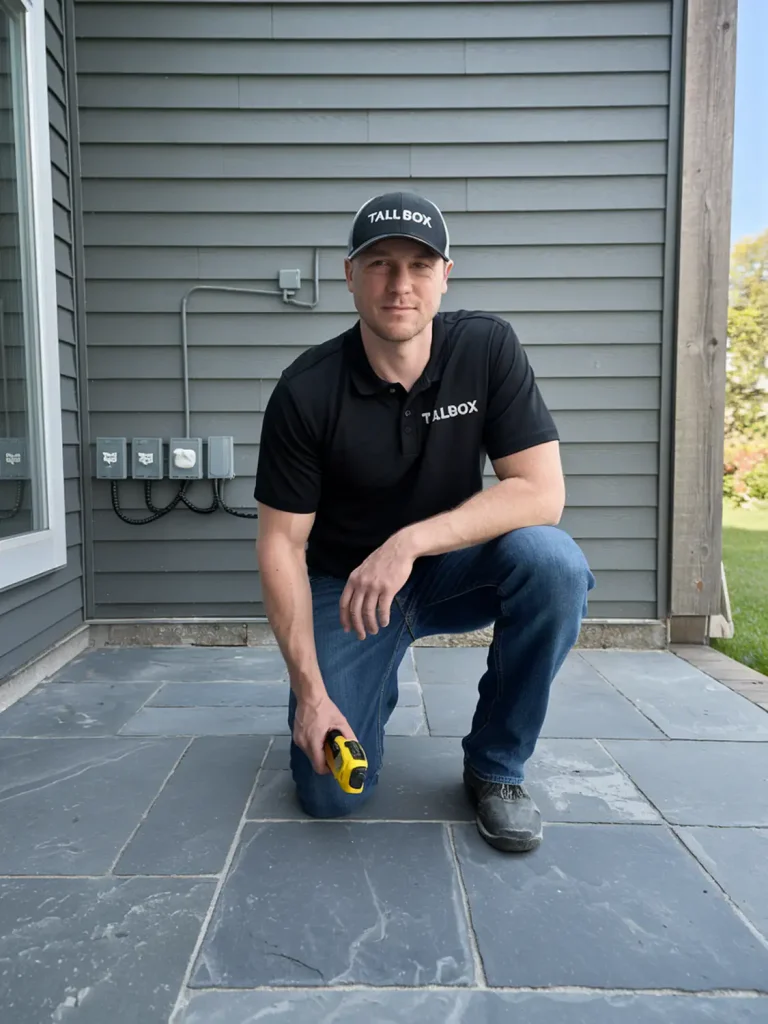
For instance, if your laser measures 54 ¾ inches in one spot and 53 ¾ inches in another, you’ll need to account for that one-inch difference in your framing. The objective is to frame directly onto the concrete while making the necessary adjustments to ensure your countertops are perfectly level.
When framing your outdoor kitchen area, keep the following points in mind:
Check for Levelness: Use a laser level and tape measure to detect any slopes.
Adjust for Slope: If you encounter a significant slope, modify your framing accordingly.
Secure Framing: Make sure your framing is firmly anchored to the concrete.
After evaluating and adjusting for slopes, concentrate on achieving a perfectly level top surface. This requires making precise adjustments as you build upward to where your countertops will eventually be installed.
By adhering to these steps and consistently checking for levelness throughout the construction process, you’ll ensure that your outdoor kitchen foundation is well-prepared for features like concrete countertops.
Measuring and Cutting for Rough Openings
This guide provides detailed steps for measuring and cutting rough openings in your outdoor kitchen project, ensuring that all components fit perfectly for smooth installation and functionality.
Step 1: Outline the Layout
Chalk the layout on the stamped concrete where your outdoor kitchen will be framed. This line marks the outer edge of your two-by-four framing, excluding the sheathing. Measure 25 inches from the bottom of the block wall to account for siding thickness, and mark the position of your framing.

Step 2: Choose the Right Chalk
Opt for blue chalk instead of red to prevent permanent markings on your concrete. The chalk lines should clearly indicate where the two-by-four framing will be placed throughout the entire kitchen layout.
Step 3: Adjust the Layout as Needed
Review your marked layout and make any necessary adjustments based on utility lines or appliance placement. You may need to shift cabinetry or appliances to accommodate plumbing.
Step 4: Select Quality Lumber
Choose four straight, pressure-treated two-by-fours that are free from warping, as this will affect the fit of your framing.
Step 5: Measure Rough Openings for Doors and Drawers
For accurate rough openings:
– Measure across the faces of the drawers. If a drawer face is 17 inches, ensure the rough opening is slightly larger, around 15 inches, for a proper fit.
– For height measurements of drawers or doors, add a small increment (e.g., a quarter inch) to allow for adjustments during installation.
– Apply similar measurements to access doors, ensuring that rough openings accommodate all installation aspects, including any lips or overhangs.
By following these steps, you’ll create a precise foundation for your outdoor kitchen’s structural framework.
Building the Frame and Securing to Concrete
In this section, we will guide you through the process of constructing the frame and securing it to the concrete, establishing a solid foundation for your outdoor kitchen. Our focus will be on framing for doors, drawers, and essential features like the sink.
Building and Securing the Frame
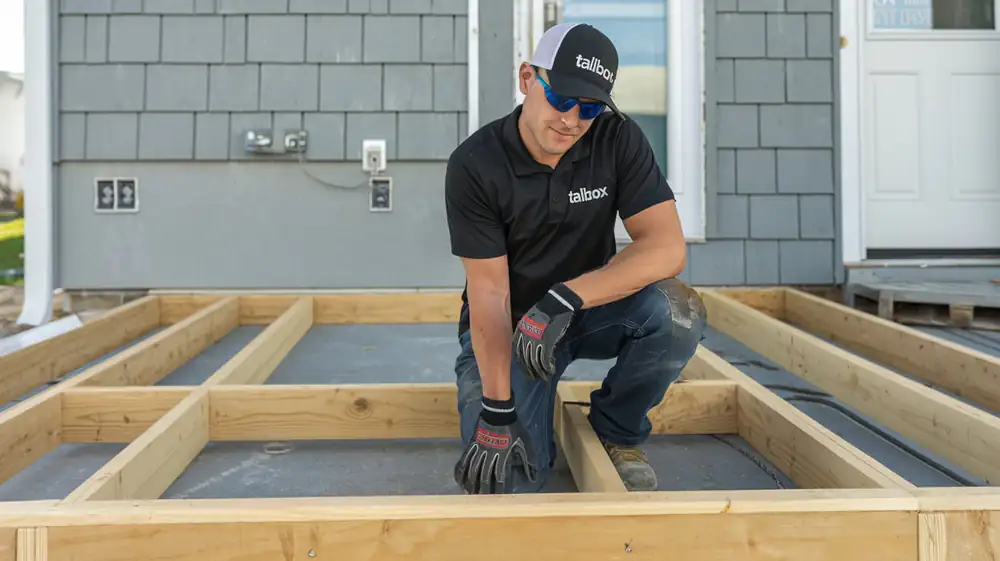
Begin by framing for your doors and drawers, starting with the sink as it serves as a fixed reference point due to the drain line. Mark the center of the drain line, which will determine the center of the sink. Using a framing square, draw a line across your two-by-fours at this center point.
This center mark will also indicate where your 36-inch access door will be positioned below the sink. Create rough openings on cardboard or paper for easy reference, ensuring to mark both sides of each opening with square lines.
In this section, we will guide you through the process of constructing the frame and securing it to the concrete, establishing a solid foundation for your outdoor kitchen. Our focus will be on framing for doors, drawers, and essential features like the sink.
Building and Securing the Frame
Begin by framing for your doors and drawers, starting with the sink as it serves as a fixed reference point due to the drain line. Mark the center of the drain line, which will determine the center of the sink. Using a framing square, draw a line across your two-by-fours at this center point.
This center mark will also indicate where your 36-inch access door will be positioned below the sink. Create rough openings on cardboard or paper for easy reference, ensuring to mark both sides of each opening with square lines.
Using Ram Set for Anchoring
Once your frame is laid out on the plates, ensure that any open spans have studs placed at least every two feet on center. Consider any additional features, such as stone veneer or sheathing, that may affect stud spacing.
Considerations for Future-Proofing the Structure
Leave sections open where necessary, such as behind sinks or where drawers may extend into wall space. Verify that frame heights are accurate by subtracting allowances for plates and countertops from your desired finished heights.
To cut multiple studs efficiently, use a miter saw equipped with a stop block, which is particularly useful when working with uneven concrete surfaces.
Final Adjustments Before Securing to Concrete
Assemble the frames using three-and-a-quarter-inch galvanized ring shank nails designed for exterior use with pressure-treated wood. For each connection point, align the studs with the marked lines before securing them with nails.
When adding supports for drawers or trash can holders, mark four inches from the bottom as placement points for these supports. For access doors, mark eight inches from the bottom to better align them with the overall kitchen height.
Stand the short walls in place before cutting any top plates that might interfere with appliances like refrigerators, ensuring nothing obstructs their installation beneath the countertops.
Gas Line Installation and Safety
Installing a gas line for your outdoor kitchen requires careful planning and professional execution to ensure both safety and functionality. This guide outlines the essential steps, considerations, and safety measures for gas line installation.
Running Black Iron Pipe for Gas Lines
For this project, black iron pipes are utilized to create a reliable gas distribution system. The setup consists of a trunk and branch system, where a three-quarter inch trunk line connects to half-inch branches using reducing tees. Each appliance in your outdoor kitchen, including the grill, side burner, and griddle, will be linked through these branches.
To maintain proper gas flow and regulation, a shutoff valve will be installed at each appliance connection point. The entire system will be powered by a propane tank equipped with a regulator that reduces the pressure to approximately half a pound before distribution.
Importance of Professional Installation
While running gas lines may seem like a feasible DIY project, it is vital to seek professional assistance. Improper installation can lead to serious safety hazards, including gas leaks and pressure issues. Professionals possess the necessary tools and expertise to ensure all connections are secure and comply with safety standards.
Pressure Testing and Safety Measures
After the gas lines are installed, pressure testing is crucial to verify that there are no leaks. This process involves sealing the system, applying pressure with specialized equipment, and monitoring for any pressure drops that may indicate leaks.
Safety measures should include ensuring all connections are tight, using approved materials for fittings and pipes, and checking all regulator settings. Additionally, installing carbon monoxide detectors in nearby areas enhances safety by providing alerts in the event of any issues.
By adhering to these guidelines or hiring professionals who do, you can enjoy your outdoor kitchen with confidence, knowing your gas lines are safely installed.
Electrical Setup for Outdoor Kitchen
Setting up the electrical components for your outdoor kitchen requires precision and adherence to safety standards. This guide provides the necessary steps to ensure a successful installation, emphasizing the importance of professional involvement and obtaining the necessary permits.
Installing Receptacles and Wiring
Before starting any electrical work, ensure you have the necessary permits. This step is essential for compliance with local regulations and for maintaining safety. If you lack the qualifications, it’s advisable to hire a professional.
Plan Your Layout: Identify where receptacles are needed in your outdoor kitchen. Consider the placement of appliances and how you intend to use the space.
Gather Materials: Collect all required materials, including receptacles, wiring, conduit, a drill, screws, and any other items specific to your setup.
Install Receptacles: Begin by connecting to an existing receptacle if possible. Run wiring from this point to power additional receptacles throughout your outdoor kitchen.
Secure Wiring: Use conduit to protect the wiring from exposure to the elements and potential damage.
Test Your Setup: After installation, test each receptacle to ensure they are functioning properly.
Importance of Permits and Professional Installation
Electrical work should not be taken lightly. In many areas, permits are required for significant electrical installations or modifications. These permits help ensure that the work meets safety standards and is inspected upon completion.
Hiring a professional electrician can also mitigate potential hazards associated with improper installation or faulty wiring.
**Ensuring Safety with GFCI Protection**
Ground Fault Circuit Interrupter (GFCI) outlets are crucial in outdoor settings where moisture may be present:
– Install GFCI Outlets: These outlets help prevent electrical shock by cutting off power when a ground fault is detected.
– Regular Testing: Test GFCI outlets monthly to ensure they are functioning correctly.
– Weatherproof Covers: Install weatherproof covers on all outdoor outlets to protect them from rain and moisture.
By following these steps, you can safely set up the electrical components of your outdoor kitchen.
Preparing for Concrete Countertops
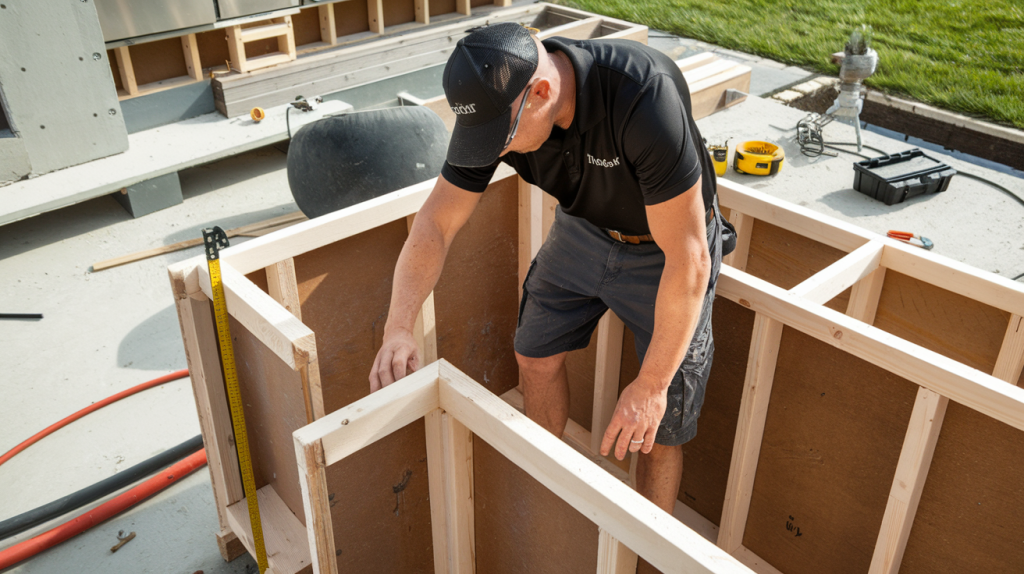
When preparing for concrete countertops in your outdoor kitchen, attention to detail in framing is crucial. This process ensures a level and sturdy support system, essential for the durability of your countertops.
Framing for Concrete Countertops
Begin by addressing the plumbing and ensuring all necessary adjustments are made before framing. This includes installing a Studer vent and necessary adapters, as these tasks are easier before the countertop is in place.
The framing process involves creating a level support structure. This is important not only for concrete countertops but can also be applied to granite or other materials. The edge of the framing should be flush with the sheathing, especially if you plan on applying stone veneer.
Ensuring Level and Sturdy Support
The layout involves using two-by-four pressure-treated studs, typically set 16 inches on center. However, adjustments may be needed based on your specific design needs, such as overhangs or support for specific appliances like grills or side burners.
Considerations for Overhangs and Material Choice
When planning your overhangs, consider future materials like stone veneer that may affect dimensions. For this project, a three-inch overhang is planned to accommodate a one-inch overhang over the stone veneer.
The choice between pressure-treated plywood and cement board is crucial. Though plywood offers strength, cement board’s durability makes it suitable for outdoor use despite its lack of strength for overhangs.
Finally, take measurements carefully to ensure all appliances fit correctly with the countertop design. Adjust as needed based on appliance specifications and personal preferences.
Final Adjustments and Finishing Touches
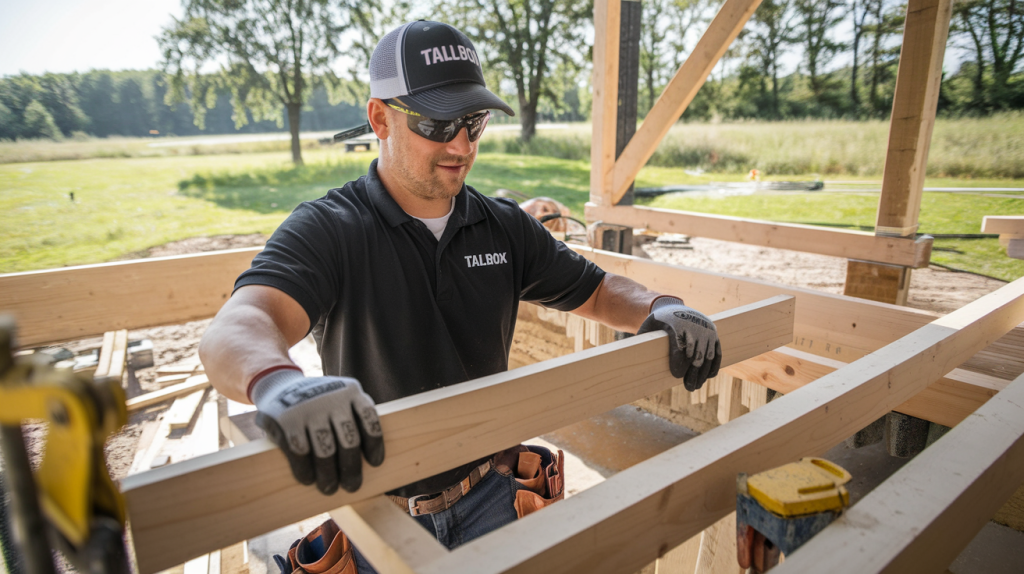
In this final stage of building your outdoor kitchen, focus on making the last adjustments and ensuring everything is perfectly set up. Here’s a step-by-step guide to completing the project:
Fine-tuning Leveling with Shims
Check Leveling with a Laser: Use a laser level to find the highest point in your countertop framing. Measure from the top of the framing and identify any discrepancies.
If a laser level isn’t available, a four-foot level can be used.
Ensure measurements are consistent around the perimeter.
Adjust with Shims: Use composite shims, which resist moisture, to level any uneven areas.
Pry up sections with a pry bar gently and insert shims to achieve the correct height.
Secure in place by breaking off excess shim material.
Securing Framing and Sheathing
Final Nailing: Once leveled, secure the sheathing by nailing it around the entire frame.
Use both laser and four-foot levels for precision.
Pay special attention around appliance cutouts for grills, sinks, and burners to ensure they are perfectly level.
Cut Openings for Doors and Drawers: Drill corner holes with a half-inch bit before cutting with a Sawzall or circular saw for cleaner edges.
Mark corners from inside out with nails and snap chalk lines for guidance if using a circular saw.
Prepare for Appliance Installation: Plan ahead by cutting necessary openings for vents to allow proper airflow and moisture control in your kitchen setup.
Vents help manage potential gas leaks or moisture issues effectively.
Preparing for Appliance Installation and Final Checks
Rust Protection: Apply Rust Stop on black iron pipes under countertops for added protection against weather elements.
Clean pipes thoroughly before applying two coats of protection solution.
Future Preparations: Plan your layout effectively by pre-determining receptacle locations for appliances like TVs or refrigerators during initial framing stages.
By following these steps, you ensure that your outdoor kitchen is not only functional but also built to last against various elements!