After a renovation project, it is important to properly manage waste disposal to ensure that waste is removed efficiently and in an environmentally responsible way. Otherwise, the consequences might be double.
Is it best to start waste removal along with planning a home renovation or decluttering project before selling? It’s essential to have an efficient disposal strategy to ensure that your waste is properly handled and disposed of.
In this post, we’ll provide you with practical tips for efficient disposal strategies for your home project, including how to sort and separate your waste, choosing the right disposal method, and reducing waste through recycling and donations.
This is how a plan for garbage disposal should look like:
Sort and Separate Your Waste:
Sorting and separating your waste is the first step towards efficient disposal. It can be done DIY, sub-contractor or by a trash pickup company. If you hired a designer or architect, they can plan and manage the waste removal on and off-site. By separating your waste into different categories, such as recyclables, non-recyclables, and hazardous waste, you can ensure that each type of waste is properly disposed of. This will not only help you reduce the amount of waste that ends up in landfills but also help you identify potential recycling and donation opportunities.
Choose the Right Disposal Method:
Choosing the right disposal method is crucial to ensure that your waste is disposed of safely and responsibly. Depending on the type and amount of waste you have, you may need to use different disposal methods. For example, if you have hazardous waste, you’ll need to use a specialized disposal service to ensure that it’s handled safely. For non-hazardous waste, you may be able to use local waste management services or rent a dumpster.
Recycle and Donate:
Recycling and donating are great ways to reduce the amount of waste that ends up in landfills. Before disposing of items, consider if they can be recycled or donated to a local charity. Many household items, such as clothing, electronics, and furniture, can be recycled or donated, which can help reduce waste and benefit your community.
Reduce Waste:
Reducing waste is another critical aspect of efficient disposal strategies. By using sustainable building materials, reducing packaging waste, and minimizing the use of disposable items, you can significantly reduce the amount of waste generated during your project. Additionally, by planning your project carefully and ordering only what you need, you can avoid unnecessary waste and reduce the overall cost of your project.

George is a seasoned interior designer and property marketing strategist with over 13 years of experience. He specializes in transforming properties into visually stunning spaces, helping clients recognize the potential and beauty in each property. With an impressive international client base of exciting projects throughout Europe and America.

It’s lawful to dispose of waste only at designated facilities that can legally accept it.
It’s about making sure waste doesn’t harm people or the environment. Illegal dumping can contaminate soil and water, posing health risks and damaging ecosystems. Proper facilities have the infrastructure to handle waste safely, minimizing those risks. Also, it’s about responsible resource management. Recycling and recovering valuable materials from waste reduces the need to extract new resources, which is better for the planet in the long run.
Home renovations can create a lot of waste. Sorting and disposing of construction and renovation trash properly is important for safety and the environment. Organizing renovation waste involves separating materials, recycling what you can, and safely disposing of the rest yourself or by a trash pickup firm.
Many materials from renovations can be reused or recycled. Wood, metal, cardboard, and some plastics are often recyclable. Hazardous materials like paint and chemicals need special handling. Sorting waste as you go makes the cleanup process easier.
Renting a dumpster is helpful for larger projects. For smaller jobs, you can use trash bags or your regular garbage service. Some areas have special pickup days for construction waste. Check local rules about what can go in the regular trash. Proper planning helps avoid fines and makes the cleanup go smoothly.
Key Takeaways
- Sort renovation waste into categories for easier disposal
- Recycle materials when possible to reduce environmental impact
- Use appropriate disposal methods for different types of waste
What are the steps of PLANNING construction waste disposal in ADVANCE?
If you decide to plan in advance and manage yourself do this:
Start by planning the project’s scope. Take a good look at your project. What kind of stuff are you gonna rip out or use?
#1. How much of it will there be? Knowing this helps you figure out the best way to get rid of it all.
#2. Check with your local council or waste authority. They’ll have rules on what you can and can’t do with your waste. This keeps you out of trouble and avoids any nasty surprises.
#3. Reduce, Reuse, Recycle: Think smart! Can you reuse any materials? Donate anything that’s still in good nick? Maybe even tweak your project a bit to create less waste.
#4. Pick Your Disposal: Based on what kind of waste you have and what the rules are, figure out how to get rid of it. You might need a skip, take some stuff to the tip yourself, or even have it hauled away.
#5. Make a Plan: Jot down how you’ll handle the waste throughout your project. When will it be collected? Where will it go? Do you need any permits? Having a clear plan keeps things running smoothly and helps avoid any eco-disasters.
What are the steps of PLANNING construction waste disposal after the fact?
If you have a completed your renovation project, but you’re now left with a mountain of leftover materials do this:
#1. What kind of waste are you dealing with? How much of it is there? Get a handle on the volume and types of materials so you can plan the next steps.
#2. It’s time for research. Look up local regulations and find out where you can dispose of each type of waste. Some items might need special handling or designated drop-off locations.
#3. Start sorting. Separate recyclables like metal, wood, and cardboard from the non-recyclables. Be sure to put any hazardous materials like paint cans or chemicals aside – those need special care.
#4. Figure out your disposal strategy. If you have a ton of stuff, renting a dumpster might be your best bet. For smaller loads, your regular trash collection or a trip to the local waste facility could do the trick.
#5. Schedule pickups or drop-offs. Make sure everything is ready to go when the truck arrives or you head to the facility. Remember to get any necessary permits or documentation beforehand.
Why Renovation Waste Management can fail your reno?

Renovation projects, whether a minor kitchen update or a full-scale exterior overhaul, inevitably generate waste. Neglecting its proper management can snowball into a series of problems that impact your project’s timeline, money issues, health problems, and overall design success.
Improper disposal of hazardous materials like asbestos, lead paint and sawdust can pose health risks to workers and occupants, potentially resulting in lawsuits. To avoid these pitfalls, meticulous planning and adherence to local regulations are crucial.
Improper disposal of hazardous materials during renovation indeed poses significant health risks.
Here’s an expanded list of hazardous materials and their associated risks:
Asbestos:
Causes lung cancer and mesothelioma when fibers are inhaled
Often found in older insulation, flooring, and roofing materials
Lead paint:
Causes developmental issues, especially in children
Common in homes built before 1978
Sawdust:
Irritates respiratory system and eyes
Can be combustible in large quantities
Solvents and chemicals:
Toxic fumes can cause respiratory problems and organ damage
Includes paint thinners, strippers, and adhesives
Mold:
Triggers allergic reactions and respiratory issues
Often uncovered during bathroom or basement renovations
Silica dust:
Causes silicosis, a lung disease
Produced when cutting concrete, stone, or ceramic tiles
Treated wood:
Contains toxic preservatives that can leach into soil
Harmful if burned or disposed of improperly
Mercury:
Found in old thermostats and fluorescent lights
Causes neurological and kidney damage
PCBs:
Present in old caulking and electrical equipment
Linked to cancer and other health issues
Proper handling and disposal of these materials is crucial for protecting worker and occupant health, as well as complying with environmental regulations.
Types of Renovation Waste
Renovation waste comes in many forms. Common types include:
Wood scraps, drywall pieces, metal remnants, old fixtures and appliances, paint cans and solvents, packaging materials, broken tiles and ceramics, concrete and brick rubble, insulation scraps, carpet and flooring remnants, old wiring and electrical components, plumbing pipes and fixtures, and landscaping debris like branches and leaves.

Some waste can be recycled or reused. Wood scraps might be useful for small projects. Metal can often be recycled. Old fixtures may be donated if in good condition.
Hazardous waste needs special care. This includes paint, solvents, and certain chemicals. These cannot go in regular trash and require proper disposal methods.
Construction Waste disposal groups
To effectively plan the disposal of renovation waste, it’s essential to sort waste into different categories. Here are some common groups of renovation waste:

- Demolition Debris: This group includes materials like wood scraps, drywall pieces, metal remnants, and broken tiles and ceramics. These materials are typically generated during the demolition phase of a renovation project.
- Hazardous Waste: Some renovation waste can be hazardous to human health and the environment. This group includes items like paint cans and solvents, old wiring and electrical components, and plumbing pipes and fixtures. These materials require special handling and disposal methods to ensure that they are disposed of safely and responsibly.
- Packaging Materials: Renovation projects often generate a significant amount of packaging materials, such as cardboard boxes and plastic wrap. These materials can be recycled or reused to reduce waste.
- Landscaping Debris: Renovation projects can also generate landscaping debris, such as branches and leaves. This group of waste can be composted or mulched to reduce waste and improve the environment.
- Construction Waste: This group includes materials like concrete and brick rubble, insulation scraps, carpet and flooring remnants, and old fixtures and appliances. These materials can often be recycled or repurposed.
- General Waste: This is the miscellaneous stuff that doesn’t fit into the other categories, like drywall pieces, insulation scraps, carpet remnants, and landscaping debris. Depending on the amount, you could use a skip or your regular trash collection service.
- Bulky Waste: Think big and heavy items like old fixtures, appliances, concrete rubble, and plumbing pipes. You might need to arrange for a special pickup or take them to a designated disposal facility yourself.

To plan for the disposal of these materials, you should first assess the amount and type of waste that will be generated during your renovation project. Next, determine the best disposal method for each type of waste, such as recycling, donating, or disposing of it in a landfill. Establish clear communication channels with your project team and waste management providers to ensure that everyone is on the same page regarding waste management.
How do designers manage waste disposal?
Designers tackle waste disposal in several clever ways.
They aim to minimize waste from the get-go by carefully planning their projects and choosing materials wisely. They often opt for durable, sustainable options and consider the entire lifecycle of a product, from production to disposal.

Designers and architects embrace the “reduce, reuse, recycle” mantra that leads to efficient waste management.
They explore innovative ways to repurpose materials, giving them a new lease on life. Upcycling discarded items into functional and stylish creations is a common practice.
Designers collaborate with manufacturers and suppliers who prioritize sustainable practices. They look for partners who minimize waste during production, use eco-friendly materials, and offer take-back programs for end-of-life products.
Expert designers will educate clients and sub-contractors to adopt good maintenance practices around the renovations. They raise awareness about the environmental impact of waste and promote responsible consumption through their designs and actions.
By integrating these strategies into their work, designers contribute to project delivery on time.
When to start removing waste - simple plan

During the Renovation
- Daily Cleanup: Remove small debris like packaging materials, broken tiles, and drywall pieces at the end of each workday. This keeps the workspace safe and manageable.
- Hazardous Waste: Immediately set aside hazardous materials like paint cans and solvents in a designated area for proper disposal later.
2. Mid-Project
- Bulk Items: Schedule a mid-project pickup for bulky items like old fixtures, appliances, and large amounts of construction debris. This prevents clutter from accumulating.
- Recyclables: Take a trip to the recycling center with wood scraps, metal remnants, and other recyclables.
3. End of the Project
- Final Sweep: Conduct a thorough cleanup of all remaining waste, including insulation scraps, carpet remnants, and landscaping debris.
- Special Disposal: Arrange for the disposal of hazardous materials and any remaining bulky items.
Tips:
- Plan Ahead: Schedule pickups and trips to disposal facilities in advance to avoid delays.
- Stay Organized: Keep different types of waste separated from the start to streamline the disposal process.
Starting waste removal at these stages will help keep your renovation project running smoothly and your workspace safe. Need more details on any specific step?
By how much bad renovation affects house value?
Bad renovations can seriously dent your home’s value, sometimes knocking off 10-20% or even more, depending on the severity of the issues; this means that a $50,000 investment can become a loss of $70,000 in depreciation, the total of investment plus lost value.
Think shoddy workmanship, outdated designs, or materials that scream “cheap!”
Potential buyers see those red flags and either walk away or offer way less than you’d hoped for.
They’re not interested in inheriting someone else’s DIY disasters or fixing up a house that feels stuck in the past.
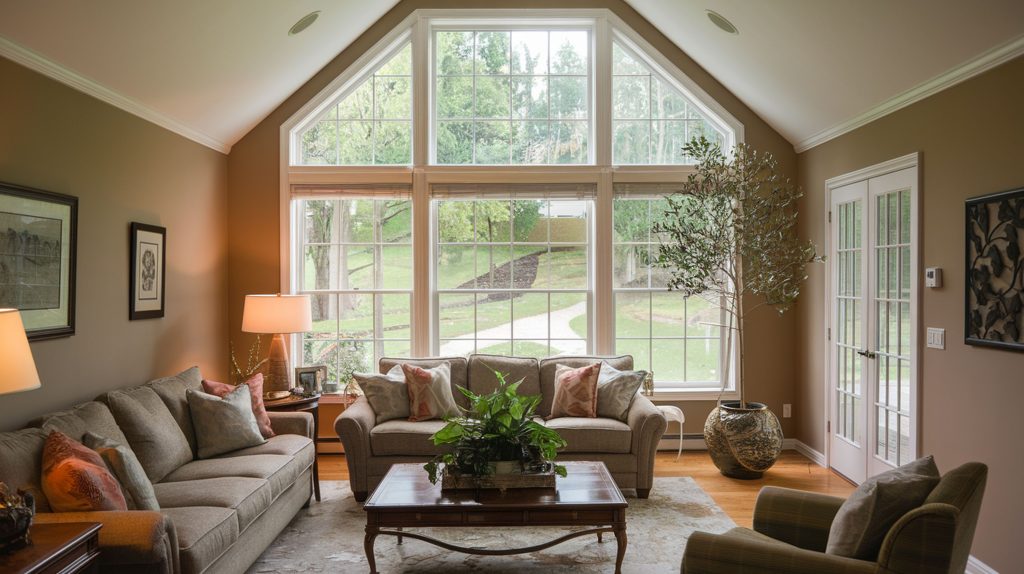
- Losing a bedroom: Removing a bedroom to create a larger living space can reduce a home’s value by up to 15%. Bedrooms are key selling points, so reducing their number can significantly decrease property value.
- Poor quality workmanship: Low-quality renovations or poor craftsmanship can lead to a decrease in home value rather than an increase.
- Over-improving: Making improvements that are too luxurious or out of character for the neighborhood can result in a poor return on investment.
- Choosing unpopular design trends: Opting for very trendy or personalized design choices that may not appeal to a wide range of buyers can negatively impact value.
- Reducing functionality: Renovations that reduce the usability of the home, such as removing storage space or making impractical layout changes, can decrease value.
- Ignoring structural issues: Focusing on cosmetic upgrades while neglecting important structural or systems repairs can lead to decreased value.
- Improper budgeting: Overspending on renovations without a proper plan can result in financial losses and potentially decrease the home’s overall value relative to the investment.
- Failing to obtain proper permits: Renovations done without required permits can lead to legal issues and decreased home value

On the flip side, well-executed renovations can significantly boost your home’s appeal and market value.
It’s all about striking the right balance between personal style and what’s attractive to the majority of buyers.
How to select a Dumpster Rental?

Selecting a dumpster rental for your renovation project is not expensive, but selecting the wrong company or dumpster can cause further delays and money spent. There are several factors to consider the main one being the rental period and volume of the dumpster.
It’s especially crucial in places like Toronto dumpster rental or Mississauga similarly to those in dumpster rental Oakville service, where strict waste disposal laws and permit requirements can really complicate things.
Here are some tips to help you choose the right dumpster rental:
- Determine the size of the dumpster: The first step is to determine the size of the dumpster you need. Consider the amount and type of waste that will be generated during the renovation project. Choose a dumpster size that will be able to accommodate all of the waste that will be generated.
- Choose the right type of dumpster: There are different types of dumpsters, such as construction dumpsters, residential dumpsters, and roll-off dumpsters. Choose the right type of dumpster for your project. For example, a roll-off dumpster is a great option for large renovation projects.
- Consider the rental period: Determine how long you will need the dumpster rental for. You can choose a rental period that will accommodate the duration of your renovation project.
- Compare prices: Comparing prices from different dumpster rental companies is essential. Please be sure to look for competitive pricing and make sure that the rental fee includes delivery, pickup, and disposal fees.
- Check the company’s reputation: Research the company’s reputation and read reviews from previous customers. Look for a company that has a good reputation for reliability and customer service.
- Schedule delivery and pickup: Once you have chosen the right dumpster rental, schedule delivery and pickup. Make sure that the company will be able to deliver and pick up the dumpster within your desired timeframe.
Cost of Hiring Dumpster vs. Not Hiring
Cost of Hiring a Dumpster:
- Average residential dumpster rental: $800 CAD
- Average commercial dumpster rental: $1,500 CAD
- Rental prices can range from $450 CAD to $5,500 CAD depending on size and duration
Typical weekly rates:
- 10-yard bin: $475 to $865 + taxes
- 14-yard bin: $555 to $865 + taxes
- 20-yard bin: $675 to $865 + taxes
Some companies offer flat rates, e.g. $399 for a 14-yard bin for 1 week (up to 2 tons)
Cost of Not Hiring a Dumpster:
Potential fines for illegal dumping:
- Nova Scotia: $812 for first offense, $2,422 for subsequent offenses
- Halifax: $500 to $10,000 for illegal dumping
- Vancouver: $100 to $10,000 under the Street and Traffic Bylaw
Disposal fees at drop-off depots:
- Toronto: $176.39 per tonne for garbage and renovation waste
- Minimum fee of $18 for up to 100 kg
Additional Considerations:
- Time and effort required to transport waste to disposal facilities
- Potential damage to personal vehicles when transporting heavy waste
- Multiple trips may be necessary without a dumpster, increasing fuel costs
- Risk of improper disposal leading to environmental damage
Final Site Cleanup
At the end of the project it’s time for final site cleanup. Aafter a renovation is all about turning your construction zone back into a livable space. It’s the last, but oh-so-important step to enjoying your newly renovated home.
Remove any leftover construction debris, like nails, screws, and leftover materials. Sweep and vacuum every nook and cranny, from floors to ceilings, to remove all that dust and grime. Next, tackle the floors – mop those hard floors with the right cleaning solution and vacuum those carpets. You might even want to steam clean them if they’ve taken a beating during the reno.

It’s time to shine up all the surfaces. Dust all those shelves, countertops, and furniture. Clean and polish any hardwood floors, getting rid of those pesky scuff marks and residue. Don’t forget to clean the windows inside and out, making sure those frames and sills are sparkling too.
Give the bathrooms and kitchen a thorough cleaning and disinfecting. You want those areas to be spotless and germ-free. Pay extra attention to appliances, cabinets, and countertops.
And there you have it – a clean and refreshed space, ready for you to enjoy! Remember, a good final cleanup can make all the difference in transforming your renovated space from a construction site to a cozy home.