You’ve just finished your dream kitchen renovation, but dust and debris are stealing the spotlight. As you stand in what should be your perfect space, a fine layer of construction dust coats every surface, from the new countertops to the ceiling fans. The excitement of seeing your vision come to life quickly fades in the face of a major cleanup.
How can you restore your home while protecting your health and investment in the new finishes?
Post-renovation cleaning is not easy; it is more than just a cosmetic concern—it’s a vital step that determines whether your renovation truly succeeds or leads to ongoing problems. Construction dust may contain hazardous materials like silica, which can harm air quality and pose health risks, especially for those with allergies or respiratory issues. Effective cleanup goes beyond typical household routines and requires specific techniques and equipment to safely remove debris and preserve your renovated space.
Choosing between doing the cleanup yourself or hiring professional services depends on factors such as the size of the project, your budget, available time, and health concerns. What are the challenges and costs associated with each option? Understanding these details will help you make a decision that protects both your family’s health and your renovation investment.

George is a seasoned interior designer and property marketing strategist with over 13 years of experience. He specializes in transforming properties into visually stunning spaces, helping clients recognize the potential and beauty in each property. With an impressive international client base of exciting projects throughout Europe and America.
Post-Renovation Mess

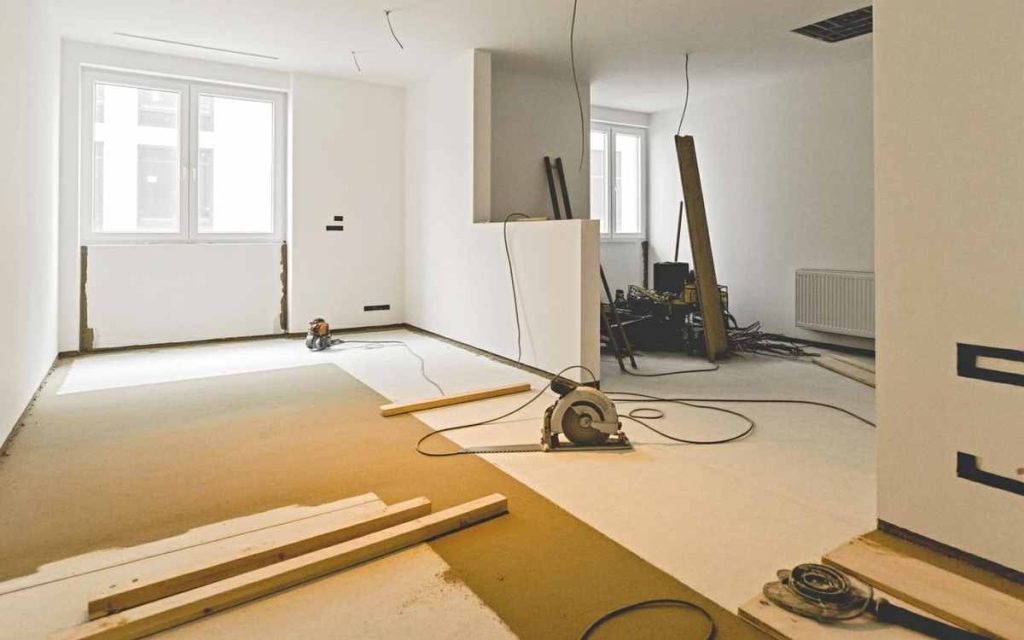
Even the most carefully managed renovation can leave behind an overwhelming mess. Post-construction debris is not like everyday dust—it’s a complex mix of materials that create unique cleaning challenges. Fine dust coats every surface and infiltrates unexpected areas, while larger debris scattered throughout the space serves as a reminder of the work.
What makes construction dust so difficult to manage? It includes multiple components, each requiring specific cleanup methods. Drywall dust, one of the most common, contains gypsum particles as small as 0.1 microns—small enough to bypass natural nasal filtration.
Concrete and masonry work produce silica dust, with particles between 0.3 and 10 microns, which can pose serious health risks. Other sources include wood shavings from carpentry, adhesive residues from flooring, and paint splatters from finishing.
Systematic Approach with Professional-Grade Equipment

To fully clean a post-renovation space, professional-grade equipment and a systematic approach are often necessary to protect both health and property, ensuring a livable environment.
Step 1: Remove remaining debris: After the contractor’s broom-swept cleaning, collect any leftover debris (e.g., small screws, wood scraps) room by room. Example: Use a heavy-duty bag to collect stray nails in a new garage space, sorting recyclables like metal separately.
Step 2: Top-to-bottom dusting: Use a HEPA-filtered vacuum or microfiber cloths to dust ceilings, walls, and baseboards. Example: Vacuum dust from a new ceiling fan in a bedroom with a soft brush attachment, then wipe walls with a damp microfiber cloth.
Step 3: Clean surfaces: Use mild, surface-safe cleaners (e.g., diluted dish soap or pH-neutral cleaners) for fixtures, countertops, and glass. Example: Wipe a new quartz bathroom vanity with a 1:10 dish soap-water solution, then dry to prevent water spots.
Step 4: Floor care: Vacuum with a HEPA filter, then clean floors based on material (e.g., hardwood, tile). Example: Mop a new tile floor with a diluted vinegar solution, focusing on grout lines, and dry thoroughly.
Step 5: Final touches: Clean windows, mirrors, and small fixtures like doorknobs. Example: Polish a new glass shower door with a 1:1 vinegar-water solution for a streak-free finish.
Step 6: Inspect and re-clean: Check for missed dust or smudges and address them. Example: Re-wipe a new window sill where dust settled after initial cleaning.
Professional-Grade Equipment:
Commercial vacuums: Offer stronger suction and HEPA filtration for large areas. Example: Rent a commercial vacuum from Home Depot to clean a new living room’s carpet thoroughly.
Steam cleaners: Remove adhesive residues and clean grout without harsh chemicals. Example: Use a rented steam cleaner to remove sticky film residue from a new kitchen backsplash.
HEPA air scrubbers: Maintain air quality by capturing airborne dust. Example: Run a rented air scrubber in a renovated basement to ensure clean air before occupancy.
Cleaner Recommendations:
Diluted Dish Soap (e.g., Dawn): Safe for most surfaces. Example: Use on new cabinet handles to remove fingerprints.
Vinegar-Water Solution: Ideal for glass and tiles. Example: Clean a new mirror with a 1:1 mix to ensure clarity.
pH-Neutral Cleaner (e.g., Method): Protects delicate finishes. Example: Wipe a new quartz countertop to remove dust without dulling.
Avoid: Abrasive scrubbers, harsh chemicals (e.g., bleach), or standard vacuums without HEPA filters, as they can damage surfaces or redistribute dust.
Making the Space Safe and Livable
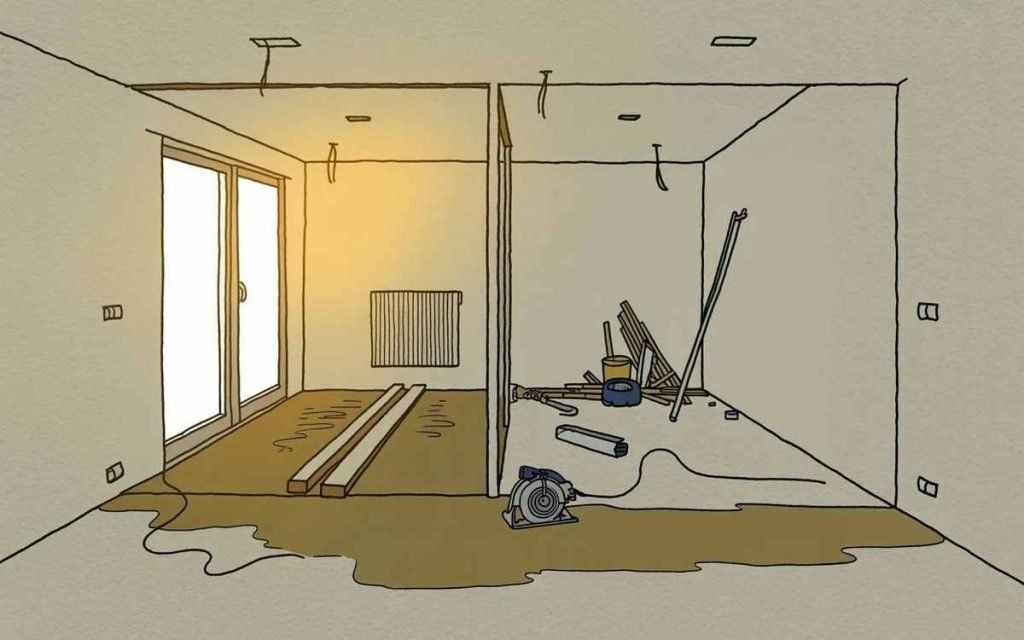
To ensure the space is safe and livable:
Ventilation: Open windows and run exhaust fans to clear airborne dust during cleaning. Example: Open windows in a new kitchen while vacuuming to improve air circulation.
Protect new surfaces: Use microfiber cloths and non-abrasive tools to avoid scratches. Example: Clean a new stainless steel fridge with a microfiber cloth to preserve its finish.
Dispose of waste properly: Follow local regulations for hazardous materials (e.g., paint cans) and recycle where possible. Example: Take leftover paint from a renovation to a local hazardous waste facility.
By moving beyond broom-swept cleaning with a systematic approach, HEPA-filtered equipment, and safe cleaners, you can eliminate fine dust, protect new finishes, and create a healthy, livable space ready for immediate use.
Hazards of Post-Renovation Dust
The health risks of construction dust exposure are serious. Crystalline silica, a Group 1 carcinogen identified by the International Agency for Research on Cancer, can lead to silicosis, lung cancer, and kidney disease with prolonged exposure. What about short-term effects? Even brief exposure to high dust levels can cause respiratory problems, especially for people with asthma or allergies. The Centers for Disease Control and Prevention warns that fine particles can stay airborne for hours, making poor cleaning practices a lasting threat to indoor air quality.
Improper cleaning after renovation can also damage your new finishes. Construction dust is abrasive—it can scratch hardwood floors, cloud painted surfaces, and clog HVAC systems. Dust in ductwork recirculates through your home, undoing cleaning efforts and straining heating and cooling equipment. Fine particles can also settle inside electrical fixtures and appliances, causing early wear or malfunctions.
Why "Broom-Swept" Isn’t Enough?
Most contractors leave a space in “broom-swept” condition, removing only visible debris and doing a basic surface sweep. Is that enough to make the space safe and livable? No—this minimal cleaning doesn’t address the fine dust that can affect health and damage finishes.
Fine dust, including microscopic particles from drywall, wood, or insulation, can linger after a broom-swept cleaning, posing health risks like respiratory irritation and potentially damaging new finishes.
Health risks: Fine dust particles (e.g., silica or drywall dust) can be inhaled, causing respiratory issues or allergies, especially for sensitive individuals like children or those with asthma. Example: Inhaling drywall dust left in a new living room can irritate lungs, particularly if no further cleaning is done.
Damage to finishes: Dust can settle into new surfaces like countertops, floors, or fixtures, causing scratches or dulling if not properly removed. Example: Uncleaned sawdust on a new hardwood floor can scratch the finish when walked on.
Air quality concerns: Broom-sweeping doesn’t address airborne particles that settle later, affecting indoor air quality. Example: Dust from a renovated bedroom can circulate through the HVAC system, spreading to other areas.
Use HEPA Filters for Thorough Cleaning
HEPA filters, which capture 99.97% of particles 0.3 microns or larger, are essential for removing microscopic dust that standard methods leave behind, ensuring a healthier and cleaner space.
HEPA-filtered vacuums: Use a vacuum with a HEPA filter to capture fine dust from floors, walls, and furniture. Example: Vacuum a new hardwood floor in a renovated dining room with a HEPA-filtered shop vac to remove drywall dust without scratching.
HEPA air scrubbers: Rent a HEPA-filtered air scrubber to remove airborne particles during and after cleaning. Example: Run an air scrubber in a newly renovated open-plan kitchen for 24 hours to capture fine dust particles before moving in furniture.
Replace HVAC filters: Install new HEPA or high-efficiency MERV 13 filters in the HVAC system to trap dust and prevent recirculation. Example: Replace the filter in a new HVAC system with a MERV 13 filter to maintain clean air in a renovated home.
DIY Deep Cleaning: Steps and Tips
Even a well-managed renovation can leave behind a challenging mess. Post-construction debris is not like regular household dust—it’s a mix of materials that require special cleaning methods. Fine dust coats surfaces and reaches unexpected areas, while larger debris scattered throughout the space serves as a clear sign of the recent work.
Cleaning up after a renovation requires preparation, the right equipment, and a methodical approach focused on safety and thoroughness. Is it just a more intense version of regular housecleaning? No—post-renovation cleaning is a specialized task that calls for specific tools, techniques, and safety measures to achieve proper results.
Effective DIY post-renovation cleaning starts with proper preparation. What should you gather before starting?
Essential supplies include a HEPA-filtered vacuum, microfiber cloths, surface-specific cleaning solutions, and protective gear such as N95 respirators, safety goggles, and disposable gloves. Ventilation is also important—open windows and consider using HEPA-equipped air purifiers to improve air quality. Document the condition of surfaces beforehand to track progress and identify areas needing extra attention.

Debris Removal and Top-Down Dusting
After removing visible debris, the next step in post-renovation cleaning for a new, unused space is thorough top-to-bottom dusting to eliminate fine construction dust, followed by detailed surface cleaning and floor care. This ensures the space remains pristine and free of contaminants. Below is a detailed guide, with subordinate text first, maintaining the same logic as previous responses for a clean, organized approach in a new, unused environment.
Top-to-Bottom Dusting
Top-to-bottom dusting is the core of the process and requires attention to detail to remove fine construction dust that settles on all surfaces, preventing re-contamination of cleaned areas.
Start with ceilings: Use a vacuum with a soft brush attachment or a microfiber cloth on an extendable pole to remove dust from ceilings, focusing on corners, ceiling fans, and light fixtures. Example: Vacuum dust from a new living room ceiling fan with a HEPA-filtered vacuum’s brush attachment to avoid scratching blades.
Clean crown molding and high features: Wipe crown molding, recessed lighting, and other high decorative elements with a damp microfiber cloth. Example: Use a microfiber cloth lightly dampened with water to wipe new crown molding in a dining room, then dry to prevent water marks.
Move to walls: Dust walls with a microfiber cloth or a dry sponge, paying attention to switch plates, outlet covers, and decorative features like wall sconces. Example: Wipe a new bedroom’s light switch plate with a slightly damp cloth to remove drywall dust, then dry with a clean cloth.
Work top-to-bottom: Always clean from the highest surfaces (ceilings) to the lowest (baseboards) to prevent dust from falling onto already-cleaned areas. Example: After dusting a ceiling, move to walls, then baseboards in a new office space to ensure no dust resettles.
Use appropriate tools: Microfiber cloths or HEPA-filtered vacuums prevent scratching new surfaces and capture fine particles. Example: Use a microfiber duster to clean a new chandelier’s delicate crystals without leaving residue.
Applying Material-Specific Cleaning Techniques
Surface cleaning should match the materials used in your renovation. How should you clean newly painted walls? Use a slightly damp microfiber cloth to avoid damaging the finish. For natural stone countertops, choose a pH-neutral cleaner to prevent etching. Always test cleaning solutions on a hidden area first to ensure they won’t damage the surface. Wipe all cabinet surfaces, inside and out, and focus on hardware and handles where dust tends to cling.
Floor cleaning requires extra care to protect new finishes while removing dust thoroughly. Avoid using a standard broom on hard floors—it stirs dust back into the air. Instead, use a HEPA-filtered vacuum with the right attachments for your flooring type. For hardwood, follow with a barely damp mop and a wood-safe cleaner. For carpets, vacuum slowly with multiple passes to extract embedded particles.
Surface Cleaning: Detailing the Space
After dusting, cleaning surfaces ensures all new fixtures and fittings are free of dust, fingerprints, and construction residues.
Clean fixtures and fittings: Use a mild, non-abrasive cleaner (e.g., diluted dish soap or a pH-neutral cleaner like Method All-Purpose) for surfaces like countertops, shelves, and railings. Example: Wipe a new staircase handrail with a 1:10 dish soap-water solution to remove fingerprints, then dry with a microfiber cloth.
Polish glass and mirrors: Use a streak-free glass cleaner or a 1:1 vinegar-water solution for windows, glass doors, and mirrors. Example: Spray a new glass dining table with a vinegar-water mix, wipe with a microfiber cloth, and buff dry for a spotless finish.
Wipe small details: Clean doorknobs, cabinet handles, and other small fixtures with a damp cloth and mild cleaner. Example: Use a cloth with diluted dish soap to wipe new brass cabinet pulls in a renovated hallway, then dry to prevent water spots.
Avoid harsh chemicals: Steer clear of abrasive or acidic cleaners that could damage new surfaces like quartz, stainless steel, or painted walls.
Floor Care: Final Surface Cleaning
Floors, as the lowest surface, are cleaned last to capture all dust and debris that settle during the process.
Vacuum first: Use a HEPA-filtered vacuum to remove loose dust and debris from all floor types. Example: Vacuum a new hardwood floor with a soft brush attachment to avoid scratches while removing sawdust.
Clean according to floor type:
Hardwood: Use a manufacturer-recommended cleaner or a damp mop with minimal water. Example: Mop a new oak floor with a hardwood-specific cleaner like Bona, ensuring the mop is only slightly damp.
Tile: Use a mild cleaner or steam cleaner for grout and tiles. Example: Clean new bathroom floor tiles with a diluted vinegar solution and a microfiber mop, focusing on grout lines.
Carpet: Vacuum thoroughly with a HEPA-filtered vacuum; consider steam cleaning for deep dust removal. Example: Rent a steam cleaner to refresh a new carpet in a bedroom, removing construction dust embedded in fibers.
Dry thoroughly: Ensure floors are dry to prevent water damage or slip hazards. Example: After mopping a new tile floor, dry with a clean towel to avoid water spots.
Inspect and re-clean: After dusting and surface cleaning, check for missed spots, such as dust on window sills or smudges on glass. Example: Re-wipe a new window frame where dust was overlooked during dusting.
Maintain air quality: Run a HEPA-filtered air scrubber during cleaning to capture airborne dust, especially in larger spaces. Example: Use a rented air scrubber in a newly renovated open-plan kitchen to keep air clean during floor care.
Dispose of waste: Collect dust and small debris in heavy-duty bags and dispose of according to local regulations. Example: Seal drywall dust in a contractor bag for safe disposal after vacuuming.
Bathroom and Kitchen Specific Cleaning Techniques
Bathroom and Kitchen Specific Cleaning Techniques
Dust in bathrooms can cling to surfaces and mix with moisture, making cleaning trickier, especially in a new space where protecting finishes is critical.
Clean grout lines: Use a gentle, non-abrasive grout cleaner or a DIY mix of baking soda and water to remove dust without damaging new grout.
Example: Apply a paste of baking soda and water to shower tile grout with a soft toothbrush, scrub gently, rinse thoroughly with warm water, and dry with a microfiber cloth to prevent mold or water spots.
Wipe down surfaces: Use a mild, non-acidic cleaner (e.g., diluted dish soap or a pH-neutral cleaner like Method All-Purpose) for tiles, glass, and countertops. Example: Spray a 1:10 dish soap-water solution on a new porcelain tile wall, wipe with a damp microfiber cloth, and dry to avoid streaks.
Polish fixtures: Clean faucets, showerheads, and handles with a gentle cleaner to remove dust and fingerprints. Example: Use a cloth dampened with a 1:1 vinegar-water solution on chrome faucets, then buff dry with a microfiber cloth for a spotless shine.
Clean glass surfaces: Use a streak-free glass cleaner or a vinegar-water mix for shower doors and mirrors. Example: Spray a new glass shower door with a 1:1 vinegar-water solution, wipe with a microfiber cloth, and dry to remove construction dust.
Ventilation maintenance: Vacuum or wipe exhaust fan covers to ensure dust-free operation and prevent mold. Example: Use a vacuum with a brush attachment to clean the dust from a new bathroom fan cover, then wipe with a damp cloth.
Kitchens: Addressing Dust and Residues
In kitchens, dust can combine with cooking residues or adhesive from protective coverings, requiring targeted cleaning to maintain the new space’s integrity.
Recommended Degreasers:
Citrus-Based Degreaser (e.g., Simple Green or Krud Kutter): These are gentle yet effective at cutting through adhesive residue and light dust. Example: Spray Simple Green on a new countertop where protective film left sticky residue, let it sit for 30 seconds, then wipe with a microfiber cloth.
Vinegar-Water Solution (DIY): Mix 1:1 white vinegar and water for a natural option. Example: Use this on a stainless steel sink to remove fingerprints and dust without streaking.
Dawn Dish Soap (Diluted): A few drops in warm water works for light cleaning on appliances and fixtures. Example: Wipe down a new fridge with a diluted Dawn solution to remove manufacturing oils.
How to Apply:
Test on a small, inconspicuous area first (e.g., inside corner of a countertop).
Spray or apply with a soft cloth, let sit briefly (15–30 seconds), then wipe clean with a damp microfiber cloth.
Dry immediately with a dry cloth to prevent water spots on new surfaces.
Avoid: Harsh chemical degreasers (e.g., industrial solvents) or abrasive scrubbers, as they can scratch or dull new finishes like quartz, stainless steel, or cabinetry.
Pick a citrus-based product like Krud Kutter for most surfaces in a new kitchen—it’s versatile and won’t harm the finish. Always rinse and dry to keep everything pristine.
Clean inside cabinets and drawers: Dust settles in these enclosed spaces during construction. Vacuum interiors with a brush attachment, then wipe with a damp cloth. Example: For new cabinetry, use a mild all-purpose cleaner to wipe shelves and drawer interiors to remove sawdust.
Polish appliances: Clean stainless steel appliances with a specialized cleaner to remove dust and fingerprints. For instance, use a stainless steel polish on a new refrigerator to ensure a streak-free shine.
Sink and fixtures: Scrub the sink with a non-abrasive cleaner and polish faucets. Example: Use a baking soda paste on a new stainless steel sink, scrub gently, rinse, and dry to prevent water spots.
Windows, Mirrors, and Small Fixtures
Final touches include cleaning windows inside and out, polishing mirrors and glass, and wiping smaller items like doorknobs, switch plates, and decorative features. How should you handle electronics? Use appropriate cleaners that won’t damage sensitive surfaces.
Clean windows inside and out: Use a streak-free glass cleaner or a DIY 1:1 vinegar-water solution. Example: Spray a new living room window with a vinegar-water mix, wipe with a microfiber cloth in a circular motion, and dry with a lint-free cloth for a crystal-clear finish.
Polish mirrors and glass: Apply a glass cleaner or diluted vinegar to mirrors and glass surfaces like shower doors. Example: For a new bathroom mirror, spray with a commercial glass cleaner, wipe with a microfiber cloth, and buff dry to remove dust and fingerprints.
Wipe smaller fixtures: Use a mild cleaner (e.g., diluted dish soap) for doorknobs, switch plates, and decorative features. Example: Wipe a new brass doorknob with a damp cloth and a drop of dish soap, then dry with a soft cloth to prevent water spots.
Inspect and re-clean: Walk through the space to check for missed spots, such as dust on baseboards or smudges on glass. Example: Re-wipe a window sill where construction dust was overlooked during the initial cleaning.
Handling Electronics
Electronics require appropriate cleaners that won’t damage sensitive surfaces to remove dust and fingerprints without compromising functionality.
Use safe cleaners: Opt for electronics-specific wipes or a slightly damp microfiber cloth with distilled water. Example: Gently wipe a new smart thermostat screen with an electronics cleaning wipe to remove dust without scratching.
Avoid liquids near openings: Do not spray cleaners directly onto electronics; instead, apply to a cloth first. Example: For a new wall-mounted TV, dampen a microfiber cloth with distilled water, wipe the screen gently, and dry immediately to avoid moisture seepage.
Clean cables and ports: Use a dry, soft brush or compressed air to remove dust from ports and cables. Example: Blow dust from a new speaker’s USB port with a can of compressed air, keeping the nozzle at least 2 inches away.
Test after cleaning: Power on electronics to ensure no damage occurred during cleaning. Example: After wiping a new control panel for smart lighting, test it to confirm functionality.
Recommended Cleaners:
Electronics Wipes (e.g., Windex Electronics): Safe for screens and panels. Example: Use on a new touchscreen control for a home automation system.
Distilled Water with Microfiber Cloth: Prevents mineral buildup on sensitive surfaces. Example: Clean a new laptop screen used for project management during renovation.
Compressed Air: Ideal for ports and crevices. Example: Clear dust from a new gaming console’s vents.
Avoid: Alcohol-based cleaners (can damage coatings), paper towels (can scratch), or excessive moisture near electronics.
Renting Professional-Grade Equipment
Renting professional-grade equipment can improve DIY results, especially for larger projects, by enhancing efficiency and air quality.
HEPA-filtered air scrubbers: These remove fine construction dust from the air, improving indoor air quality. Example: Rent a HEPA air scrubber for a newly renovated open-plan living area to capture drywall dust particles during final cleaning.
Commercial vacuums: These offer stronger suction and better filtration than household models, ideal for large spaces. Example: Use a rented commercial vacuum with a HEPA filter to clean new hardwood floors in a renovated home, ensuring no dust is left behind.
Steam cleaners: Effective for removing adhesive residues and cleaning grout without harsh chemicals. Example: Rent a steam cleaner to remove sticky residue from protective film on a new kitchen backsplash or to refresh bathroom grout lines.
How to Use:
Follow rental instructions for safe operation, especially for steam cleaners to avoid burns or surface damage.
Test equipment on a small area first (e.g., a corner of a tile floor) to ensure compatibility with new surfaces.
Use HEPA scrubbers during and after cleaning to maintain air quality, especially in spaces with new HVAC systems.
Where to Rent: Check local hardware stores (e.g., Home Depot, Lowe’s) or equipment rental services like Sunbelt Rentals. Example: Rent a commercial vacuum from Home Depot for a weekend to tackle a large post-renovation cleanup.
Common mistakes in DIY cleaning include rushing the job, using the wrong cleaning products, and skipping a systematic approach. What should you avoid? Sweeping hard surfaces instead of vacuuming spreads dust rather than removing it. Using too much water on wood floors can cause damage. Failing to change vacuum bags or clean filters reduces equipment performance and may recirculate dust instead of removing it.
Hiring a Professional after renovation cleaning service
Professional post-renovation cleaning services use specialized expertise, commercial-grade equipment, and systematic methods to efficiently transform a dust-covered construction site into a clean, safe living space. Knowing what these services include, how to assess providers, and what to expect from the process helps homeowners make informed decisions about this important investment.
Cleaning companies have specific knowledge for handling construction debris and hazardous materials that most homeowners lack. Their crews distinguish between types of construction dust and apply the most effective cleaning methods for each. They are trained to recognize and safely manage materials like silica dust, lead paint residue, and asbestos fibers, which may appear in older renovations. They also understand how different cleaning chemicals interact with various surfaces, protecting new finishes while ensuring a thorough clean (experience).
Commercial-grade equipment is one of the key advantages of professional cleaning services. Industrial HEPA vacuum systems offer stronger suction and better filtration than consumer models. Specialized attachments allow access to hard-to-reach areas that household tools can’t clean effectively. Professional floor polishers restore the look of new hardwood or tile, and commercial steam cleaners remove stubborn adhesive residues without damaging surfaces. Air scrubbers improve air quality during cleaning, and truck-mounted vacuum systems deliver continuous high-powered suction without frequent emptying.
What to Expect from the Process?
Time and effort savings are important for busy homeowners. Professional crews can complete in one to three days what might take a homeowner several weekends, depending on the project’s scope. This efficiency comes from superior equipment, experience, and systematic methods that boost productivity and ensure thorough results. For homeowners eager to return to their renovated space or those with demanding schedules, professional services enable a quicker return to normal life.
Professional services often achieve a level of thoroughness beyond what most homeowners can manage alone. Trained crews use detailed checklists to ensure no areas are missed, and their methods prevent cross-contamination between clean and unclean zones. Many companies offer multi-phase cleaning: an initial rough clean to remove bulk debris, detailed surface and fixture cleaning, and final polishing to make the space move-in ready. Quality checks, such as supervisory inspections and customer walkthroughs, help maintain consistent results.
Cleaning typically takes 1–3 days, depending on the size and complexity of the renovationw, homeowners can take up to several weekends to clean everything, depending on how messy everything is. For example, a 2,000-square-foot home with a full remodel may require two days for a thorough clean.
Preparation:
– Homeowners may need to provide access and remove personal items. For example, clearing furniture from a new living room to allow full access for cleaning crews.
– Discuss specific concerns, such as delicate surfaces or hazardous materials. For example, informing the crew about a new marble countertop to ensure the use of acid-free cleaners.
Process:
– Crews start with debris removal, followed by top-to-bottom dusting, surface cleaning, floor care, and final touches. For instance, in a new kitchen, crews vacuum cabinets, wipe countertops, and mop floors in that order.
– Hazardous materials are handled according to regulations (e.g., wet-wiping for lead dust). For example, in an older home, crews may seal off areas to contain asbestos dust during cleaning.
Inspection:
– Providers often conduct a walkthrough to ensure satisfaction. For example, after cleaning a new bathroom, the crew may review grout lines and fixtures with the homeowner to confirm cleanliness.
Post-cleaning:
– Expect a dust-free, move-in-ready space with clean air and pristine surfaces. For example, a new bedroom should have spotless windows, dust-free floors, and no construction residue.
– Air quality should be improved, especially if air scrubbers were used. For example, an HVAC system in a renovated home should operate without circulating dust after professional cleaning.
Costs:
– Vary by region and project size but typically range from $0.50–$2 per square foot. For example, a 1,500-square-foot home might cost between $750 and $3,000, depending on services like duct cleaning. For exact pricing, contact providers directly, as specific cost data is not available.
Cost for professional post-renovation cleaning varies based on project scope, property size, and regional labor rates. For a typical 2,000-square-foot home, prices range from $475 to $1,200, usually calculated at $0.15 to $0.60 per square foot. Costs depend on the extent of construction, types of materials, accessibility of areas, and added services such as carpet or HVAC duct cleaning. Projects with multiple levels, custom millwork, or specialized surfaces often require higher pricing.
How to Assess Professional Cleaning Providers?
Check credentials and training:
- Verify certifications for handling hazardous materials, such as lead or asbestos (e.g., EPA Lead-Safe Certification). For example, ask a provider for proof of lead-safe training if renovating an older home built before 1978.
- Confirm experience with post-renovation cleaning. For example, request references from previous clients with similar new-construction projects.
Evaluate equipment:
- Ensure the use of HEPA-filtered vacuums and air scrubbers. For example, confirm the provider uses a HEPA vacuum for a new hardwood floor to prevent scratches and ensure dust removal.
- Ask about surface-safe tools and cleaners. For example, verify they use microfiber cloths and pH-neutral cleaners for delicate new surfaces like quartz countertops.
Review scope of services:
- Request a detailed checklist of tasks (e.g., duct cleaning, window washing). For example, ensure the provider includes HVAC vent cleaning for a new system to remove construction debris.
- Confirm handling of hazardous materials if relevant. For instance, for an older home, ask how they manage potential asbestos fibers during cleaning.
Read reviews and get quotes:
- Check online reviews on platforms like Yelp or Google for reliability and quality. For example, look for reviews praising thoroughness in post-renovation projects.
- Obtain multiple quotes and compare services, not just price. For example, choose a provider offering HEPA air scrubbers over a cheaper one with basic vacuums.
Insurance and liability:
- Verify the provider is insured to cover potential damage to new finishes. For example, ensure coverage if a cleaner accidentally scratches a new stainless steel appliance.
Professional cleaning companies typically use a structured multi-phase process to ensure thorough results.
The initial rough cleaning phase removes bulk debris, dust buildup, and visible construction residues. This includes removing protective coverings, basic surface wiping, and preliminary floor cleaning. The detailed cleaning phase targets fine dust, deep cleans fixtures and built-ins, and addresses floors based on surface type. The final touch-up phase includes window cleaning, polishing fixtures and hardware, and a quality inspection to confirm move-in readiness.
Scheduling is important when coordinating cleaning with other post-renovation tasks.
Most companies prefer to start after construction is fully complete and contractors have cleared the site.
In phased interior design and renovation projects, cleaning specific areas may be possible, but this requires coordination to avoid re-contamination, including a higher price. Allocate enough time for cleaning, as rushing the process can reduce quality and lead to the need for repeat visits.
Why Hire a Commercial Cleaner for a Residential Post-Renovation?
Commercial cleaners use specialized expertise and equipment to address fine dust, debris, and hazardous residues, making them well-suited for thorough residential post-renovation cleaning.
Expertise: Commercial cleaners are trained to handle construction dust (e.g., silica, drywall) and hazardous materials (e.g., lead in older homes), ensuring a safe, thorough clean. Example: A commercial crew can safely remove drywall dust from a renovated home kitchen using HEPA vacuums.
Equipment: They use industrial-grade tools like HEPA-filtered vacuums, air scrubbers, and steam cleaners, which are ideal for removing fine particles and adhesive residues. Example: A commercial cleaner uses a HEPA air scrubber in a new home living room to clear airborne dust.
Efficiency: Their systematic approach (debris removal, top-to-bottom dusting, surface cleaning, floor care) saves time. Example: A 1,500-square-foot home can be cleaned in 1–2 days, compared to a week for DIY.
Considerations for Hiring Commercial Cleaners for a Residential House
Service Scope:
Confirm adaptation to residential surfaces (marble, hardwood, quartz) using appropriate cleaners (pH-neutral vs. industrial). Verify inclusion of home-specific tasks: cabinet interiors, fixture polishing, drawer cleaning.
Cost:
Commercial rates: $0.50–$2/sq ft vs. residential $0.33–$1/sq ft. 1,500 sq ft home: $750–$3,000 commercial vs. $500–$1,500 residential. Request detailed quotes to avoid overpaying for unnecessary industrial-grade services.
Certifications:
Verify EPA Lead-Safe certification for pre-1978 homes. Check residential post-renovation experience. Review feedback on Yelp, Google for home surface handling.
Scheduling:
Confirm residential job priority and availability. Ensure scaled approach appropriate for home size, not commercial equipment/processes.
Differences When Using Commercial Cleaners for Residential vs. Commercial Spaces
Scale/Equipment:
- Commercial: 10,000+ sq ft spaces use industrial tools (ride-on scrubbers, multiple air units)
- Residential: 1,500 sq ft spaces use handheld HEPA vacuums, microfiber cloths
Regulatory Compliance:
- Commercial: OSHA/EPA standards required, certified asbestos removal
- Residential: Minimal regulations, lead-safe practices for pre-1978 homes only
Cleaning Focus:
- Commercial: Public safety, sanitation, high-traffic durability (food-safe disinfectants)
- Residential: Comfort, aesthetics, delicate surface protection (gentle marble cleaners)
Cost:
- Commercial: $5,000 for 5,000 sq ft office
- Residential: $1,000 for 1,500 sq ft home
Hiring a commercial cleaning companies phoenix az for a residential post-renovation is not only feasible but can be highly effective due to their expertise and equipment, especially for complex renovations or older homes with hazardous materials.
Ensure they tailor their approach to your home’s scale and surfaces to avoid overkill or damage. By vetting providers and clarifying needs, you can achieve a clean, safe, and move-in-ready home. For pricing or specific providers, contact local services directly, as costs vary by region and project.
DIY vs. Hiring a Company: Pros and Cons
Professional Post-Renovation Cleaning: Pros and Cons
Choosing between DIY post-renovation cleaning and hiring professionals requires weighing cost, time, skill level, and health risks. Understanding the pros and cons of each option helps homeowners make choices that match their needs and priorities.
DIY cleaning primarily offers cost savings, especially for smaller projects or those with flexible schedules. Expenses are limited to supplies and equipment rental, typically ranging from $200 to $500. This can be significantly less than professional services, which may cost $800 to $1,500 for similar work. DIY also gives homeowners full control over the process, including flexible scheduling based on their availability and energy.
Pros:
Specialized expertise: Professionals are trained to handle construction dust (e.g., silica, drywall) and hazardous materials (e.g., lead, asbestos), ensuring safety. For example, in an older home renovation, pros use wet-wiping techniques to safely remove lead dust from a new living room.
Efficiency: Crews complete cleaning in 1–3 days, saving significant time. For example, a 2,000-square-foot home can be fully cleaned in 2 days, compared to a week or more for DIY.
Commercial-grade equipment: Access to HEPA vacuums, air scrubbers, and steam cleaners ensures thorough dust removal. For example, pros use a HEPA air scrubber in a new open-plan kitchen to eliminate airborne particles before move-in.
Surface protection: Experts use appropriate cleaners to avoid damaging new finishes. For example, a crew uses a pH-neutral cleaner on a new marble bathroom vanity to prevent etching.
Health safety: Proper handling of dust and hazardous materials reduces respiratory risks. For example, professionals vacuum silica dust from a new garage with a HEPA-filtered system, minimizing inhalation risks.
Cons:
Higher cost: Professional services range from $0.50–$2 per square foot, totaling $800–$1,500 for a typical home. For example, a 1,500-square-foot home might cost $1,200, significantly more than $300 for DIY supplies and rentals.
Less control: Homeowners rely on the provider’s methods and schedule. For example, you may need to adjust your availability for a cleaning crew’s 9 AM–5 PM slot.
Vetting required: Finding a reliable provider takes effort, and poor service can lead to subpar results. For example, a low-rated company might overlook dust in new HVAC vents, requiring a re-clean.
Scheduling constraints: Professionals may have limited availability, delaying move-in. For example, a busy cleaning service might book your new home a week out, slowing your timeline.
What to Expect from Professionals:
Comprehensive service: Includes debris removal, top-to-bottom dusting, surface cleaning, floor care, and final touches. For example, a crew cleans a new bathroom’s grout, polishes fixtures, and vacuums floors in one session.
Hazardous material handling: Safe management of risks like lead or asbestos. For example, for a 1950s home remodel, pros test for and remove asbestos fibers per regulations.
Walkthrough: A final inspection ensures satisfaction. For example, after cleaning a new kitchen, the crew reviews countertops and cabinets with you to confirm cleanliness.
DIY Post-Renovation Cleaning: Pros and Cons
DIY cleaning can involve hidden costs that many homeowners overlook. Thorough post-renovation cleaning often requires 20 to 40 hours for a moderate-sized project. When personal time is valued at a reasonable wage, the labor cost can equal or exceed that of hiring professionals. Equipment rental for HEPA vacuums, air scrubbers, and specialized tools can also add up, especially if the project takes longer than expected.
Post-renovation cleaning is often more complex than anticipated. Effective dust control requires knowledge of airflow, proper equipment use, and safety protocols unfamiliar to most homeowners. Poor cleaning techniques can worsen air quality by spreading dust instead of removing it, and using the wrong products can damage new finishes. The steep learning curve means initial efforts are often inefficient and may need to be repeated to meet acceptable standards.
Recommendations
Choose DIY if:
- You’re renovating a small space (e.g., one bathroom or kitchen).
- You have time, basic cleaning skills, and access to equipment rentals (e.g., Home Depot for HEPA vacuums).
- The renovation didn’t involve hazardous materials like lead or asbestos.
- Example: Clean a new 200-square-foot bathroom yourself with a rented HEPA vacuum, microfiber cloths, and a vinegar-water solution for $150 in supplies.
Choose Professional if:
- The renovation is large (e.g., whole-home) or includes hazardous materials.
- You need a fast, thorough clean to meet move-in deadlines.
- You lack the time, equipment, or expertise for a safe clean.
- Example: Hire a service for $1,000 to clean a 1,500-square-foot home with a renovated kitchen and bathrooms, ensuring all dust and residues are safely removed.
Hybrid Approach:
- DIY smaller tasks (e.g., wiping fixtures) and hire pros for specialized tasks (e.g., HVAC duct cleaning or hazardous material removal).
- Example: Clean new doorknobs yourself but hire pros to clean ducts in a renovated older home.
DIY and Hiring Post-Renovation Cleaning
Professional cleaning services come at a premium, which can strain budgets already stretched by renovation costs. Homeowners give up direct control over the process, including scheduling and attention to personal preferences. Finding reliable providers requires research, and service quality can vary. Some homeowners prefer the satisfaction of completing the entire project themselves.
Key decision factors include project size—larger renovations often favor professional services due to efficiency and equipment needs. Budgets should account for both direct costs and the value of time, as DIY savings may be offset by hidden expenses. Health concerns are critical for vulnerable individuals, and limited time may make professional services necessary for a quick return to normal living.
Hybrid approaches offer a balanced solution, combining DIY efforts with professional services. Homeowners might handle debris removal and basic cleaning, while hiring professionals for specialized tasks such as HVAC cleaning or final detailing. Some complete the rough cleaning themselves and rely on professionals for detailed phases that require advanced equipment and expertise. Others clean areas they feel confident managing and leave more complex spaces, like kitchens or bathrooms, to professionals.
Some tasks are better suited to DIY efforts, while others benefit from professional handling. Basic debris removal, surface wiping, and simple floor cleaning can often be managed effectively by motivated homeowners using the right tools.
Joshua Woodworth is a representative of Oranje, a Phoenix-based company specializing in high-quality commercial cleaning and janitorial services for offices and businesses. With a focus on reliability, attention to detail, and client satisfaction, Joshua brings industry insight and a passion for creating cleaner, healthier work environments. At Oranje, he helps businesses maintain pristine spaces that support productivity and professionalism.