Larger tiles can make a small bathroom appear more spacious, while smaller tiles offer more grout lines for better traction. For smaller bathrooms, consider using standard tile dimensions such as 30 × 60 (11 x 23in), 60 × 60 (23x23in), or 30 × 90 (11×35.5in) cm to minimize waste and cutting. Large tiles can be aesthetically interesting but may require more cutting, leading to higher costs.
During a major bathroom remodel, one of the first things homeowners decide on is the flooring. This is because the flooring sets the foundation for the entire space and can be difficult to work around once other elements are in place.
Stick to a limited color palette, typically within 2-3 colors, to maintain a cohesive look. If using patterned tiles, balance them with plain tiles to avoid a visually overwhelming space. In colder climates, consider the thermal properties of the tiles to avoid a cold floor
By installing the flooring first, homeowners can avoid complications such as misaligned fixtures and cabinetry that may require adjustments later on. However, some homeowners find it challenging to choose the best flooring for their bathrooms.

George is a seasoned interior designer and property marketing strategist with over 13 years of experience. He specializes in transforming properties into visually stunning spaces, helping clients recognize the potential and beauty in each property. With an impressive international client base of exciting projects throughout Europe and America.
Table of Contents
HOW TO SELECT THE Best Bathroom Floor Tile Materials?
For small bathrooms, opting for light-colored, larger tiles can create an illusion of space. In large bathrooms, you have the opportunity to use luxurious materials like natural stone or incorporate heated flooring for added comfort. Renters should consider non-permanent solutions like peel-and-stick tiles or interlocking floor mats that enhance aesthetics without altering the property.
For Small Bathrooms
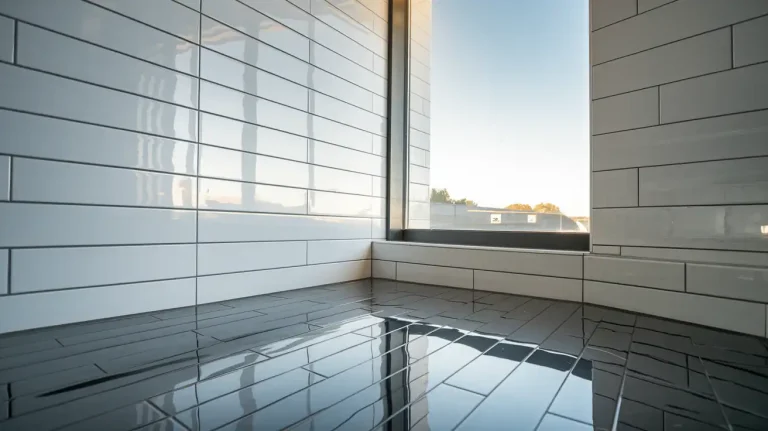
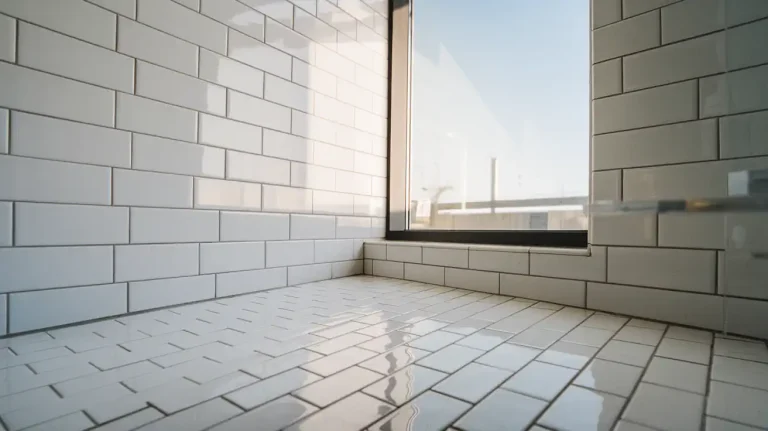
For small bathrooms, light-colored porcelain or ceramic tiles are excellent choices because they make the space appear larger and more open. These materials are durable, water-resistant, and easy to clean. Opting for a glossy finish can reflect light and enhance the sense of space. Large-format tiles, such as those at least 12×24 inches in size, can also help create a seamless look with fewer grout lines, making the room feel bigger. Alternatively, mosaic tiles add texture and interest without overwhelming the space, and installing tiles in a diagonal layout can trick the eye into seeing a larger floor area.
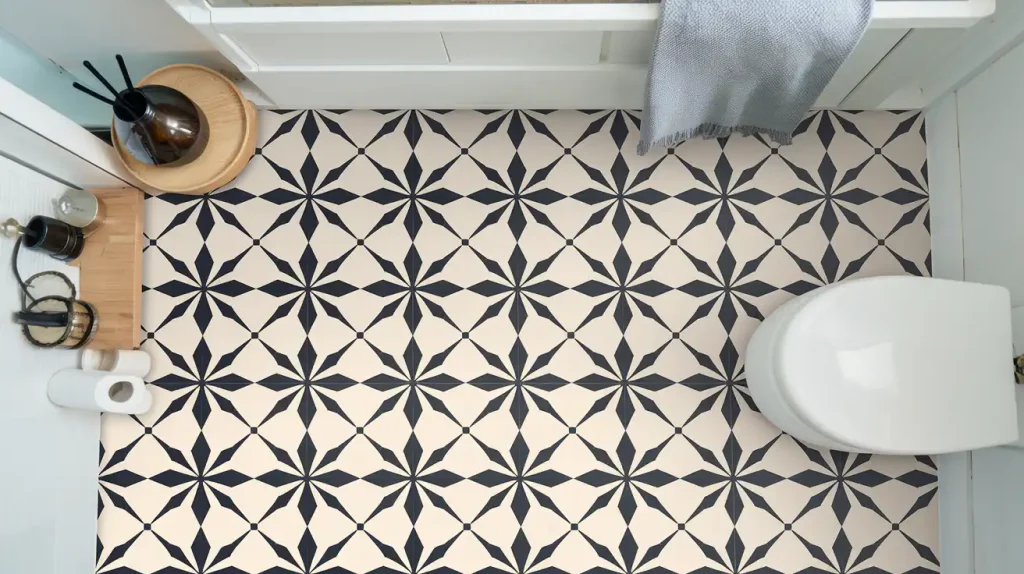
For Large Bathrooms
In large bathrooms, you have the flexibility to use luxurious materials like natural stone tiles—marble, slate, or granite—which add a high-end feel with their unique patterns and natural variations. These stones require sealing to prevent stains and maintain their appearance. Porcelain tiles are another excellent option for large bathrooms due to their extreme durability and availability in large sizes. They can mimic natural stone or wood, and choosing textured options enhances slip resistance. Incorporating heated tile flooring is an added luxury that enhances comfort in larger spaces; radiant heating systems can be installed beneath tiles, especially porcelain and ceramic. Wood-look tiles, which are porcelain or ceramic tiles designed to resemble hardwood, are ideal for creating a spa-like atmosphere.
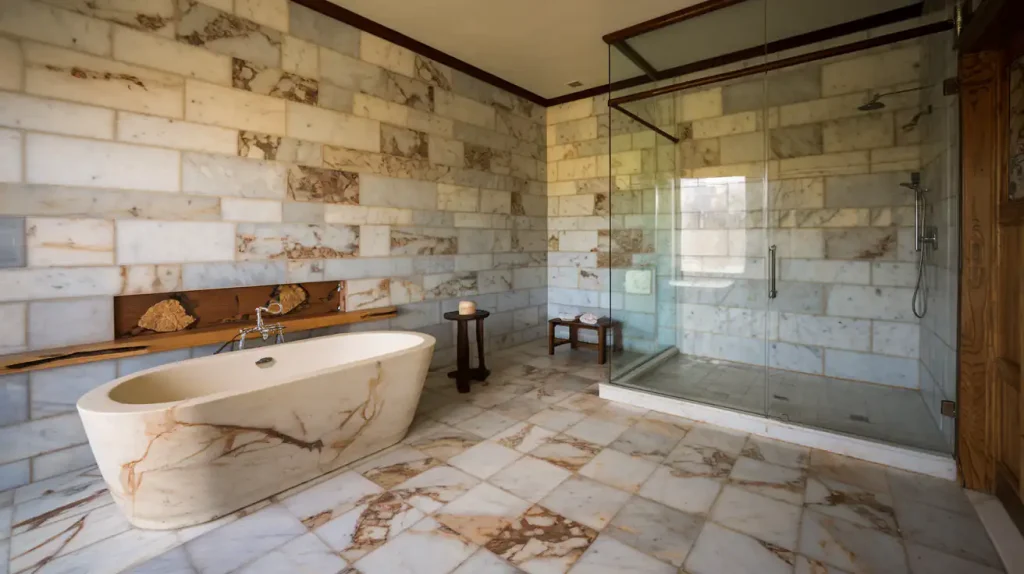
For Rented Bathrooms
For rented bathrooms, it’s important to choose materials that won’t damage the existing floors and can be removed easily. Peel-and-stick vinyl tiles are a practical solution because they are easy to install and remove without causing damage. They are water-resistant and come in various designs to suit your style. Interlocking floor tiles made from materials like PVC or EVA foam require no adhesive and simply snap together, offering water resistance and slip resistance suitable for bathrooms. Removable carpet tiles add warmth and are easy to replace or remove; choosing low-pile options designed for high-moisture areas is advisable. Temporary laminate flooring that floats over the existing floor without nails or glue is another option, but it should be installed properly to prevent moisture from seeping underneath.

There are additional considerations when selecting bathroom floor tiles. Slip resistance is crucial to prevent accidents, so look for tiles with a high slip-resistance rating, measured by the Coefficient of Friction. Maintenance is another factor; consider how much time you’re willing to spend on upkeep. Natural stones require more maintenance, whereas porcelain and ceramic are low-maintenance. Budget is important as materials vary widely in cost; porcelain and ceramic are generally more affordable than natural stone, and peel-and-stick options are budget-friendly for renters. Finally, aesthetics play a significant role; choose colors and patterns that complement the overall design of your bathroom. Neutral tones offer versatility, while bold patterns can make a statement.
With so many types of flooring for bathrooms available, it can be challenging to know where to start. Trying a virtual bathroom remodel can also help you visualize how different flooring options will look in your space before making a final decision. In this blog, we’ll delve into the pros and cons of each option and guide you toward finding the best fit for your space.
What are the different types of bathroom flooring?
While there are many types of tiles, we will focus on the four most popular bathroom flooring options that professional bathroom remodelers recommend.
Here are the different types of bathroom flooring, broken down into their materials, characteristics, and features.
- Porcelain tiles are made from ceramic and are water-resistant.
- Vinyl flooring is made from PVC and is flexible.
- Natural stone, such as granite and marble, is porous.
- Laminate flooring is a synthetic, layered material.
- Engineered hardwood consists of a plywood base with a wood veneer.
- Stained concrete or micro cement, made from durable sub-concrete products.
- Engineered bamboo is made from sustainable bamboo strips.

1. Porcelain Tiles
Porcelain tiles are known for their exceptional durability and water resistance, making them a great option for bathrooms. It is a type of ceramic made from refined clay that’s fired at extreme temperatures, which makes the tile more dense, less porous, and highly resistant to moisture and stains.
| Pros of Porcelain Tiles | Cons of Porcelain Tiles |
|---|---|
| Extremely durable and long-lasting. | Can be more expensive than other flooring options. |
| Highly water-resistant making it perfect for bathrooms and wet areas. | Heavier and harder to install often requiring professional installation. |
| Available in a wide range of colours styles and finishes to suit any design. | Cold and hard underfoot which may not be ideal for comfort. |
| Easy to clean and maintain withstanding stains and dirt. | Can be slippery when wet if not textured or treated with a slip-resistant finish. |
| Scratch and chip-resistant ideal for high-traffic areas. | Requires a solid subfloor due to its weight. |

2. Vinyl Flooring
Vinyl flooring is a type of synthetic flooring material made from PVC, making it durable, flexible, and highly resistant to water. It’s usually available in sheets, tiles, and luxury planks that mimic wood or stone.
It’s also relatively affordable and low maintenance, only requiring light cleaning and the occasional wipe-down to maintain its look.
| Pros of Vinyl Flooring | Cons of Vinyl Flooring |
|---|---|
| Excellent water resistance perfect for moisture-prone areas. | Can be damaged by sharp objects leading to dents or tears. |
| Low maintenance requiring just regular sweeping and mopping. | Limited lifespan compared to more durable options like tile or hardwood. |
| Budget-friendly offering a cost-effective alternative to hardwood or tile. | Can be difficult to recycle contributing to environmental waste. |
| Available in a variety of designs and textures. | Lower resistance to heat; can warp in extremely high temperatures. |
| Soft and warm underfoot offering a more comfortable surface than tile. | May lack the premium look of natural wood or stone. |
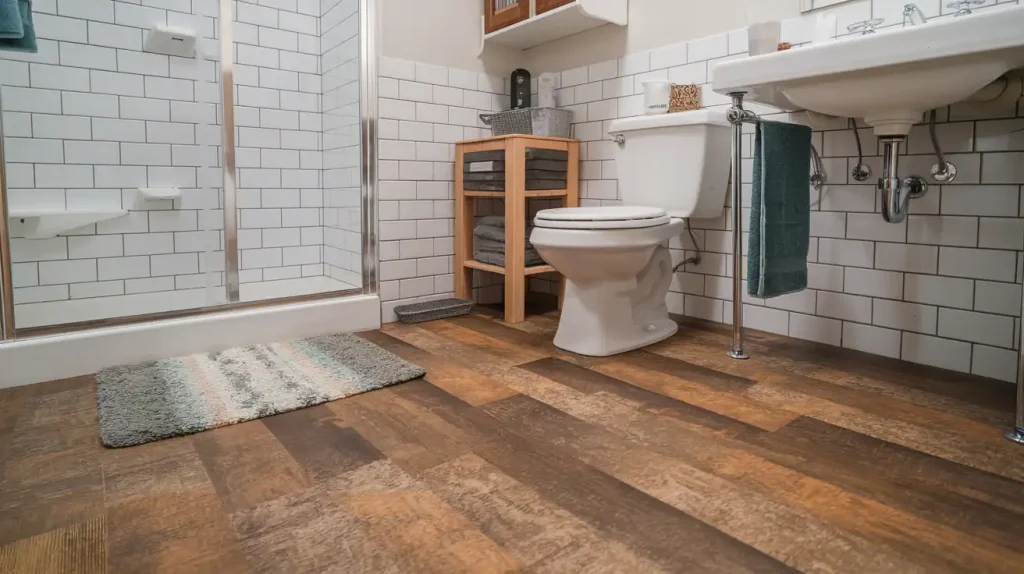
3. Natural Stone
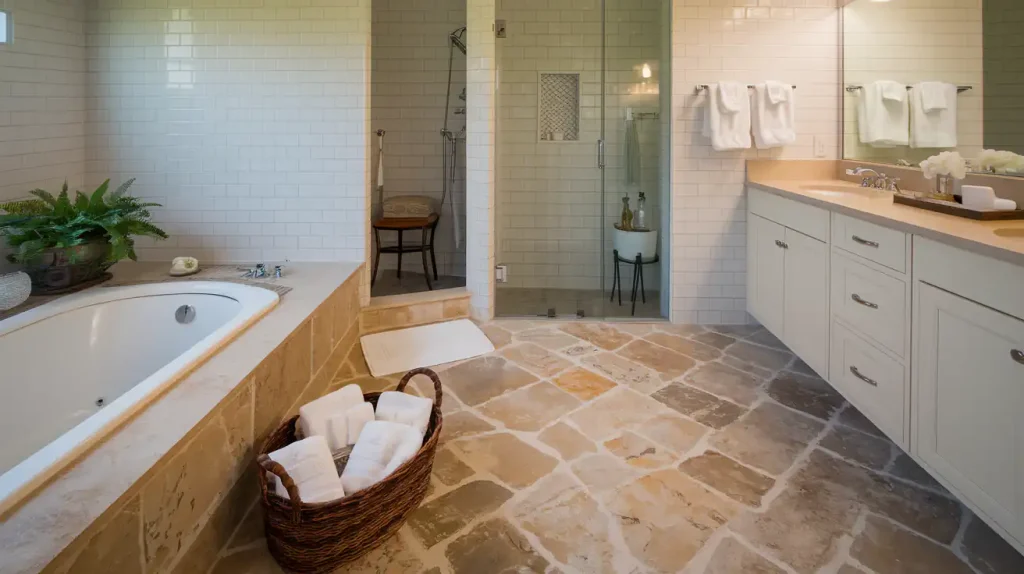
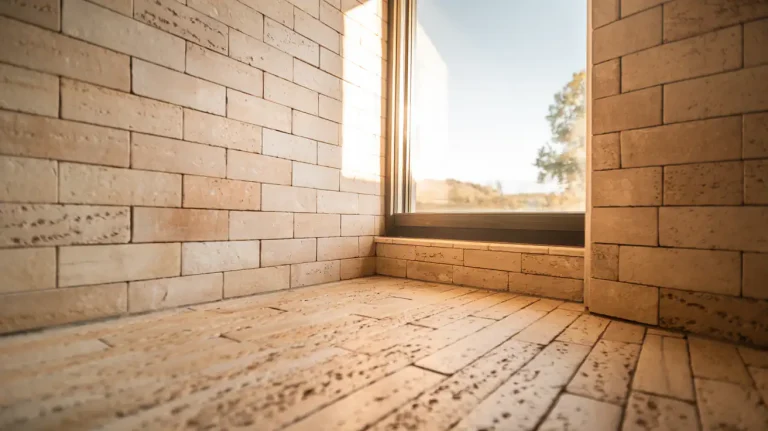
Natural stone flooring typically includes options like marble, granite, limestone, slate, and travertine. Natural stone can withstand high humidity levels and retain heat well, making it compatible with radiant floor heating systems. It’s also a great option for homeowners who prefer a natural, organic feel with a long-lasting, durable surface.
| Pros of Natural Stone Flooring | Cons of Natural Stone Flooring |
|---|---|
| Timeless and luxurious aesthetic. | More expensive than synthetic materials like vinyl or laminate. |
| Extremely durable and long-lasting with proper maintenance. | Needs regular maintenance including sealing to prevent water damage. |
| Unique one-of-a-kind patterns and colours in every piece. | Can be slippery when wet unless treated with a non-slip finish. |
| Can be used with radiant floor heating to stay warm underfoot. | Cold underfoot unless paired with heating systems. |
| Naturally cool helping to regulate room temperature in warmer climates. | Susceptible to etching or staining from acidic substances like vinegar or citrus. |
4. Laminate Flooring
Laminate flooring is a layered synthetic material that replicates the look of wood or stone. It has a strong HDF core, a printed design layer, and a scratch-resistant top coating. While traditional laminate wasn’t ideal for moisture-prone areas, newer waterproof versions make it a durable, budget-friendly option for bathrooms.
| Pros of Laminate Flooring | Cons of Laminate Flooring |
|---|---|
| More affordable than real hardwood or stone. | Sensitive to moisture requiring careful protection in bathrooms. |
| Resistant to stains scratches and fading. | Can wear down in high-traffic areas over time. |
| Easy to install even for those with little experience. | Lacks the genuine feel of real wood or stone. |
| Available in a wide variety of styles including wood and stone looks. | Not easily refinished or repaired once damaged. |
| Low maintenance requiring only basic cleaning. | Can be slippery without a textured surface. |

What do professional bathroom remodelers recommend when selecting tiles?
While DIY tile installation is possible, hiring a professional bathroom remodelers ensures proper installation and reduces potential future issues.
Tiles with a higher COF rating offer better grip, reducing the risk of slips and falls, especially on wet bathroom floors. Opting for smaller mosaic tiles with more grout lines can also enhance slip resistance. Avoid using polished or glossy tiles on bathroom floors, as their lower COF makes them slippery when wet.
Choose appropriate materials: Opt for tiles that are suitable for bathroom use, such as porcelain, ceramic, or natural stone that has been properly sealed.
Consider slip resistance: For flooring, select tiles with adequate slip resistance to prevent accidents in wet areas.
Think about maintenance: Choose tiles that are easy to clean and maintain, especially in high-moisture environments.
Pay attention to size: Larger tiles can make a small bathroom appear more spacious, while smaller tiles offer more design flexibility.
Consider the overall design: Select tiles that complement your bathroom’s style and color scheme.
Don’t forget grout: Choose a grout color that complements your tiles and consider using a darker grout for easier maintenance.
Buy extra: Purchase about 10-15% more tiles than you need to account for cuts, breakage, and future repairs.
Check for consistency: Ensure all tiles are from the same batch to avoid color variations.
Consider the weight: Some tiles are heavier than others, which may affect installation requirements.
Think about longevity: Invest in high-quality tiles that will stand the test of time and frequent use.
Test samples: Get samples to see how the tiles look in your bathroom’s lighting and with other elements.
Mind your budget: Balance quality with cost-effectiveness to stay within your renovation budget.
Consider eco-friendly options: Look for tiles made from recycled materials or produced using sustainable methods.
Pay attention to ratings: Check the PEI (Porcelain Enamel Institute) rating for durability and the COF (Coefficient of Friction) for slip resistance.
How to combine bathroom floor tiles patterned?
Start with a Focal Point such as the Area rug effect. Use a distinct pattern within a border of simpler tiles to create an “area rug” effect. This anchors the space and adds visual interest. Highlight a shower niche or alcove with a contrasting or complementary pattern, turning it into a design feature.
Play with Scale and Proportion, use Large vs. Small for a balance. Install larger, bolder pattern with a smaller, more intricate one, this prevents visual overwhelm.
60/30/10 Rule: Consider this design principle: 60% dominant pattern, 30% secondary pattern, 10% accent color or texture.
Geometric patterns (hexagons, chevrons, squares) often work well together, especially when they share a common color palette or design element. Combine floral or nature-inspired designs with geometric patterns for a more eclectic, bohemian feel.
Mixing Shapes: Explore combining different tile shapes (hexagons with subway tiles, for example) to introduce unique textures and visual interest.
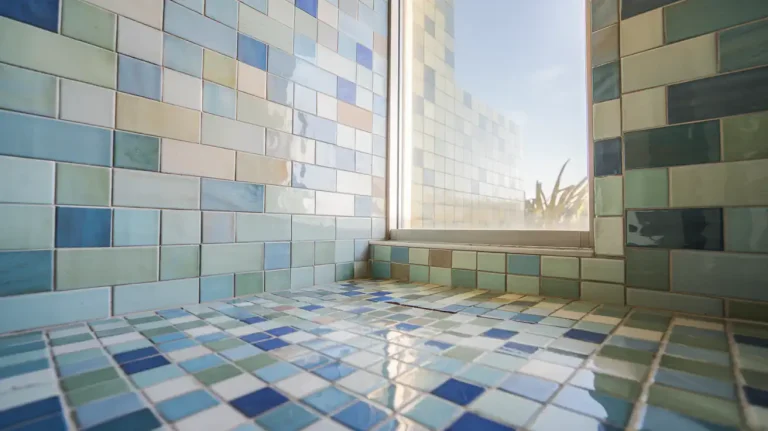
Opt for patterns that share at least one or two common colors to create a sense of harmony. Use different patterns within the same color family (various shades of blue, for instance) for a sophisticated, tonal look.
Inject personality by pairing a bold, colorful pattern with a more neutral one for a striking contrast.
Grout Color
Blending In: Choose a grout color that closely matches the dominant tile color to create a seamless look and emphasize the patterns.
Contrasting Definition: Opt for a contrasting grout color to emphasize the tile shapes and create a bolder, more graphic effect.
Plan and Visualize:
Sample Boards: Create a sample board with your chosen tiles and grout colors. This helps visualize how they work together in real life.
Layout Sketches: Sketch out different pattern combinations on paper or use online design tools to experiment with layouts before committing.
3D rendering: Use one of the 3d apps such as TALLBOX, SketchUp or Blender to visualize the floor layout in 3D.
Don’t Be Afraid to Experiment (But Seek Professional Help When Needed):
Start Small: If you’re new to pattern mixing, start with a smaller area like a shower floor or backsplash before tackling the entire bathroom.
Consult a Designer: For more complex projects, consider consulting an interior designer. They can help you create a cohesive and stylish design that meets your vision and budget.
Ideas for washroom floor tiles
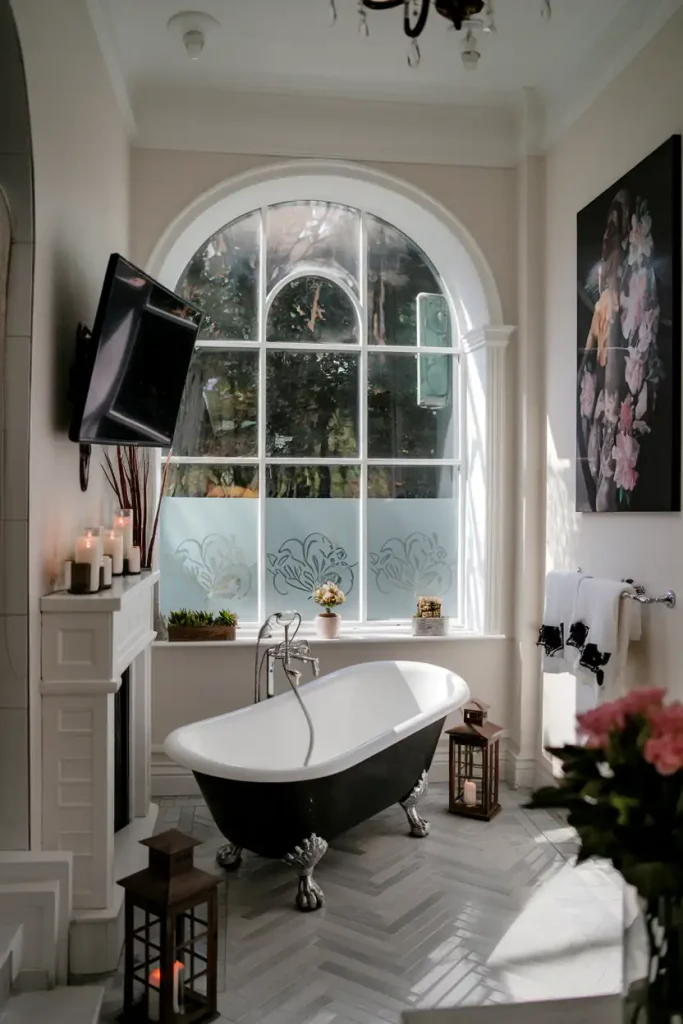
Idea 1: Timeless Elegance with a Touch of Drama (Inspired by black clawfoot tub):
- Flooring: Opt for a classic black and white mosaic tile in a geometric pattern like a basketweave or a smaller scale pinwheel. The black and white palette complements the tub and adds a touch of timeless elegance, while the pattern creates visual interest.
- Walls: Keep the walls light and airy with large-format white marble-look tiles. Consider adding a dramatic accent wall behind the vanity or within a shower niche using a black tile with a subtle texture or a honed (matte) finish for a modern twist on the traditional.
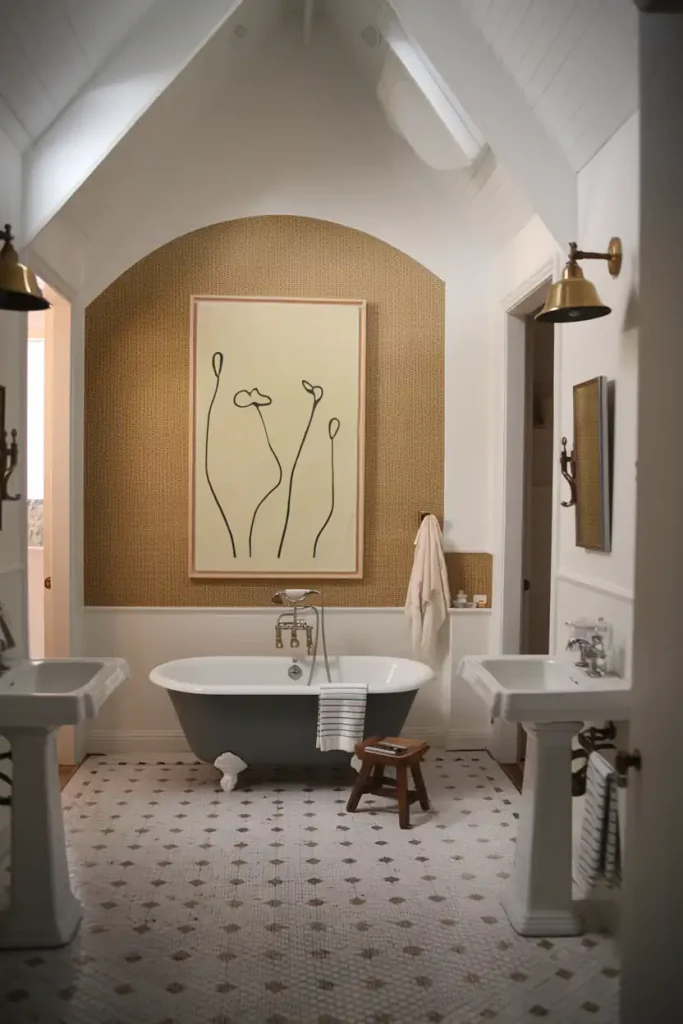
Idea 2: Modern Serenity with Warm Minimalism (Inspired by blue-gray tub):
- Flooring: Choose large-format rectangular tiles in a warm, neutral tone like a light greige or a soft taupe. This complements the wooden accents in the room and adds a touch of warmth to balance the cooler tones of the tub and fixtures. Consider laying the tiles in a stacked or herringbone pattern for visual interest.
- Walls: Use a pale blue or green tile or even better – cork with a handmade-look finish for a subtle nod to the blue-gray tub and to add a hint of color. Apply this tile as an accent wall behind the tub or within a shower enclosure, keeping the remaining walls a crisp white to maintain a sense of airiness and openness.
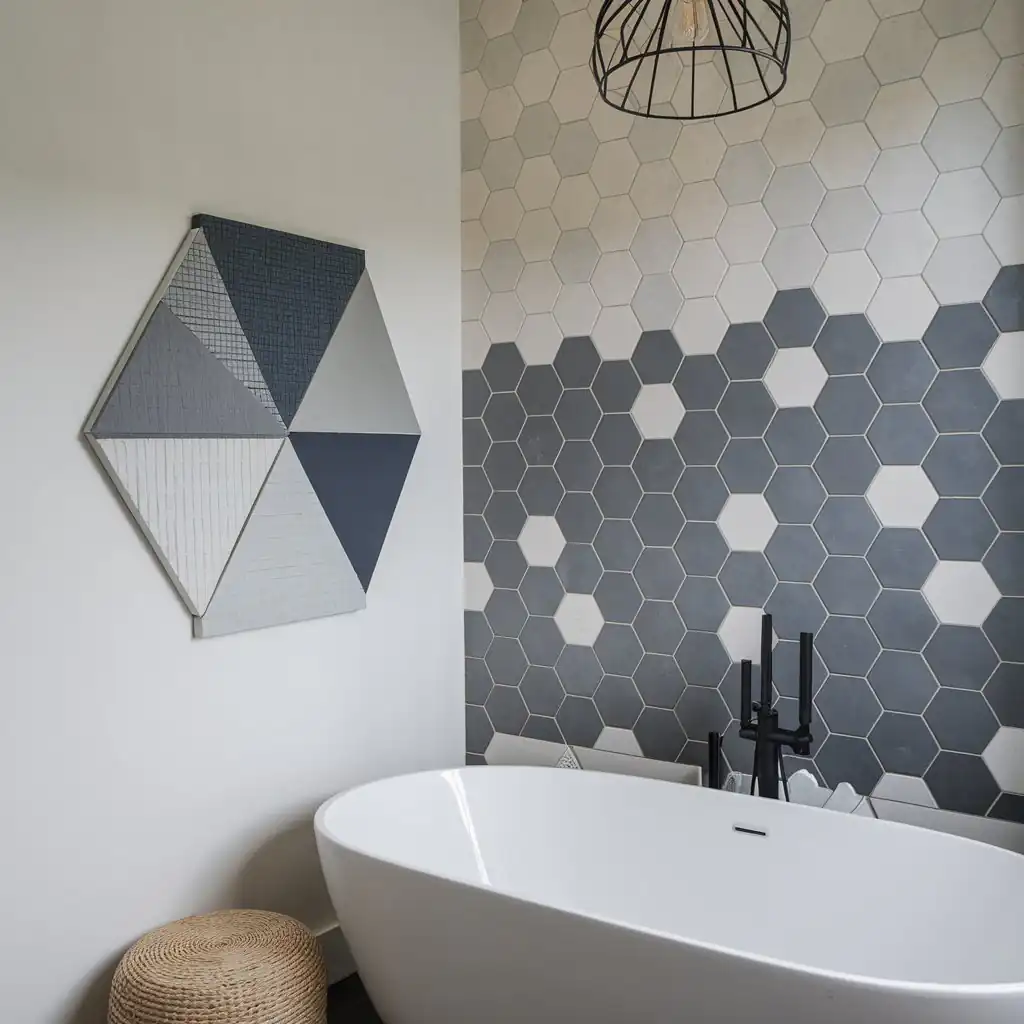
Ideas to use hex tile bathroom
Modern Farmhouse Charm
- Flooring: Use large-format hexagon tiles in a matte white or cream porcelain for a fresh, clean look. This provides a neutral backdrop for adding farmhouse accents.
- Walls: Consider a classic subway tile in a white or light grey for the majority of the walls. To add a touch of farmhouse charm, create a focal point by using hexagon tiles in a contrasting color or pattern (like a black and white mosaic) within a recessed shower niche or behind the vanity.
- Accents: Complete the look with black matte fixtures, wood accents (like open shelving), and vintage-inspired lighting.

Chic and Geometric Contrast
- Flooring: Opt for small-scale hexagon tiles in a bold, graphic pattern. Black and white is always a classic choice, but consider a monochromatic scheme with varying shades of grey for a modern edge.
- Walls: Keep the walls simple and elegant with large-format rectangular tiles in a solid color like white or a very light grey. This lets the floor make a statement while creating a sense of spaciousness.
- Accents: Introduce metallic accents through fixtures and hardware (brushed gold or matte black would work well). A large, minimalist mirror will further enhance the sleek aesthetic.
Ideas to use black white tile bathroom
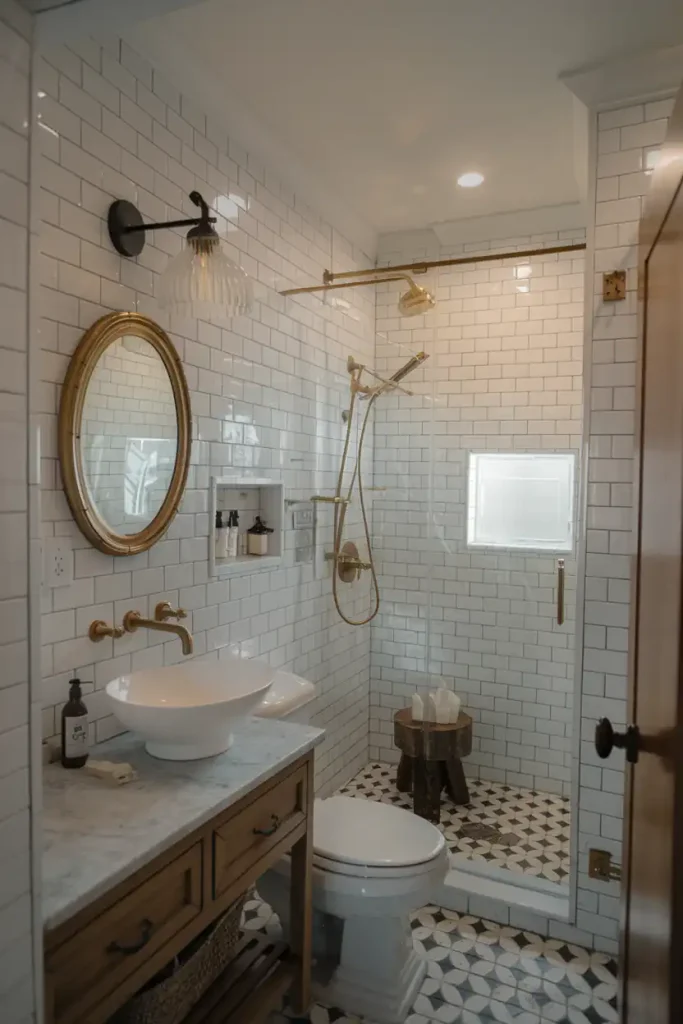
Idea 1: Modern Geometric Statement (Inspired by the compact bathroom with gold fixtures):
- Tile Choice: Go for large-format black and white cement tiles in a bold geometric pattern. Hexagons, chevrons, or even a more intricate Moroccan-inspired design would make a statement.
- Layout: Consider laying the tiles in a diagonal pattern to further enhance the geometric effect and add visual interest.
- Why it Works: The bold pattern complements the modern vibe of the gold fixtures and marble, while the large format tiles help to visually expand the space.
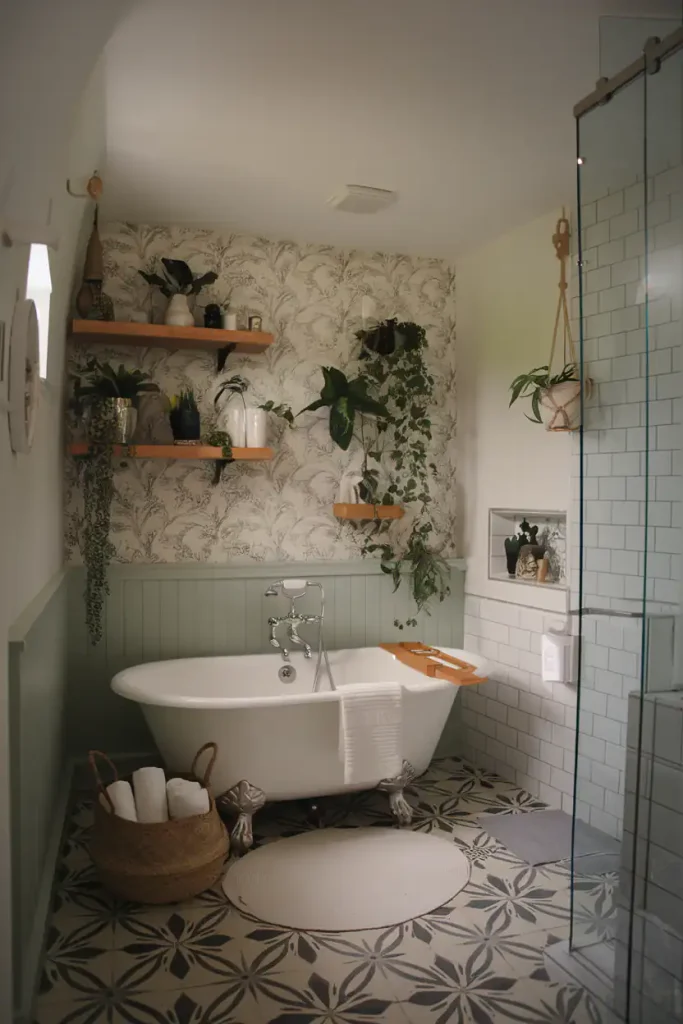
Idea 2: Classic with a Botanical Twist (Inspired by the bathroom with green walls and plants):
- Tile Choice: Choose a classic black and white hexagon tile in a smaller format. This provides a timeless backdrop for the botanical elements while still adding a touch of pattern.
- Layout: Lay the hexagon tiles in a traditional honeycomb pattern for a clean and classic look.
- Border: For a unique touch, consider adding a border of narrow black rectangular tiles around the perimeter of the room. This helps to ground the floor and creates a subtle contrast with the hexagon tiles.
- Why it Works: The hexagon tiles and the border reference traditional design elements, complementing the botanical theme, while the black and white palette adds a modern edge.
ideas for rock tiles into a shower and bathroom
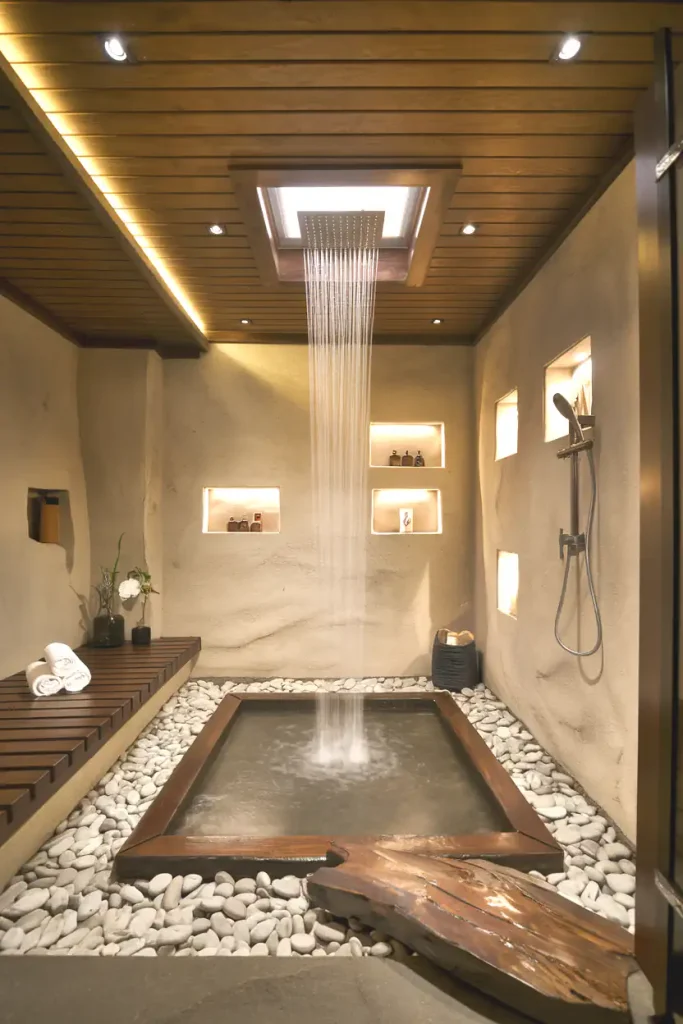
Idea 1: Zen Retreat with Natural Textures (Inspired by pebble shower floor):
- Shower Floor: Use smooth, flat river rocks for the shower floor. Opt for a variety of sizes and shades within a neutral palette (whites, grays, blacks) to create a natural, organic look. Consider a slight slope for drainage, and ensure the rocks are sealed to prevent water damage.
- Walls: Complement the rock floor with large-format, textured porcelain tiles that mimic the look of natural stone. Choose a warm, neutral shade like a light beige, taupe, or even a pale sage green.
- Accents: Introduce natural wood elements through a teak shower bench, shelving, or a small stool. Accentuate the zen vibe with minimalist fixtures in brushed nickel or oil-rubbed bronze.
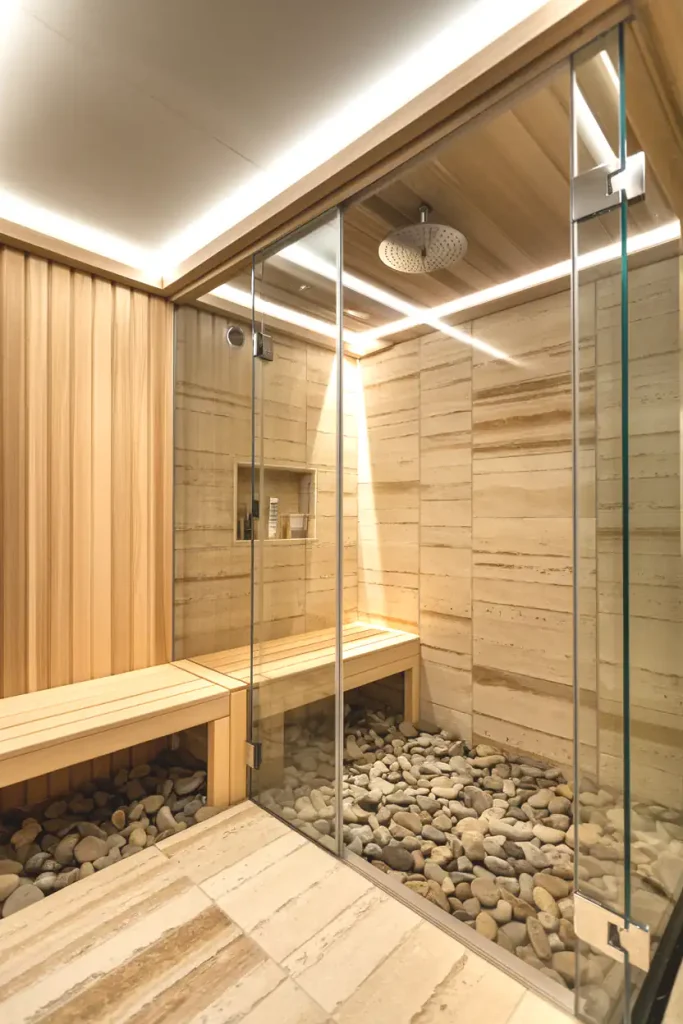
Idea 2: Modern Spa Sanctuary with Stone Sophistication (Inspired by sauna and shower combination):
Shower Floor & Niche: Combine a large-format, rectangular porcelain tile that mimics the look of natural slate (in shades of charcoal grey or dark beige) with a contrasting smaller-scale pebble tile. Use the slate-look tile for the majority of the shower floor and create a border or a recessed niche using the pebble tile for visual interest and a tactile element.
Walls: Opt for oversized rectangular porcelain tiles that replicate the look of vein-cut travertine or limestone in a light, warm beige or cream. The large format will create a seamless, luxurious look.
Accents: Incorporate sleek glass shower doors and modern fixtures in polished chrome or brushed nickel. Add warmth with a teak bench or bath mat and minimal spa-like accents like a potted orchid or a natural stone soap dispenser.
Key Takeaways
To choose the best tile for your bathroom floor, you’ll have to consider whether they’re waterproof or water-resistant, low-maintenance, durable, slip-resistant, and good value. These bathroom flooring options we’ve listed above do just that.
It’s crucial to consider the unique characteristics and cons of each option as well. Ultimately, selecting the right bathroom flooring is about finding the right blend of functionality and design.
How do I choose the right bathroom flooring for my bathroom?

To select the optimal bathroom flooring, prioritize durability, water resistance, and design compatibility with your bathroom. For instance, if you prefer a low-maintenance and budget-friendly flooring, consider vinyl, while those seeking a luxurious feel may opt for natural stone flooring.
Keep in mind that durability, maintenance, and water resistance are crucial factors in choosing bathroom flooring.
For example, if you have a high-traffic family bathroom, porcelain tiles might be a more suitable option due to their exceptional durability and resistance to wear and tear.
On the other hand, if you seek a more comfortable and warm underfoot option, laminate flooring could be a fitting choice. By weighing factors such as cost, maintenance, and design preferences, you can determine the most suitable bathroom flooring type for your space.
Here are some steps to help you make a well-informed decision:
- Assess your needs and preferences: Consider factors such as the size of your bathroom, your lifestyle, and the overall design aesthetic you want to achieve.
- Research materials: Look into various bathroom flooring options, such as porcelain tiles, vinyl flooring, natural stone, and laminate flooring. Understand their advantages, disadvantages, and cost differences.
- Consider durability and maintenance: Ensure that the flooring material you choose is durable, easy to clean, and meets your maintenance requirements.
- Evaluate water resistance: Since bathrooms are prone to moisture, choose a flooring material that is highly water-resistant or waterproof.
- Check slip resistance: Prioritize flooring materials that offer good slip resistance to prevent accidents.
- Consider comfort: Look for flooring materials that provide warmth and comfort, especially if you live in a colder climate.
- Set a budget: Determine how much you are willing to spend on your bathroom flooring project, considering both the material and installation costs.
- Consult with professionals: Speak with experts such as interior designers, flooring installers, or remodeling contractors to get professional advice and guidance.
- Visit showrooms and sample materials: Explore different flooring options in-person, and request samples to see how they look in your bathroom.
- Make a final decision: After considering all factors, choose the bathroom flooring material that best suits your needs, budget, and aesthetic preferences.
What are the benefits of porcelain bathroom flooring?
Porcelain bathroom flooring is highly durable and water-resistant. It offers a wide range of design options, mimicking materials like stone and wood. For instance, porcelain tiles can withstand heavy foot traffic and are easy to clean, making them ideal for busy bathrooms
Is vinyl bathroom flooring waterproof?
Yes, vinyl bathroom flooring is waterproof. It is designed to handle high moisture levels, making it perfect for bathrooms. For example, luxury vinyl planks (LVP) and tiles (LVT) provide excellent water resistance and come in various style
How durable is natural stone bathroom flooring?
Natural stone bathroom flooring is extremely durable and can last for decades with proper maintenance. It stands up well to moisture and wear. For instance, marble and granite are popular choices for their longevity and timeless appeal.
What are the advantages of laminate bathroom flooring?
Laminate bathroom flooring is affordable and easy to install. It offers a variety of designs that mimic wood and stone. For example, waterproof laminate is suitable for high-moisture areas and provides a stylish, low-maintenance option.
Can I use hardwood flooring in a bathroom?
Yes, you can use hardwood flooring in a bathroom, but it requires careful maintenance to prevent water damage. Engineered hardwood is a better option due to its moisture resistance. For instance, using a high-quality sealant and ensuring proper ventilation can help protect the wood.
What bathroom flooring styles are trending 2024 - 2025?
Currently, three major bathroom flooring styles are gaining popularity: wood-look, patterned, and large-format tiles.
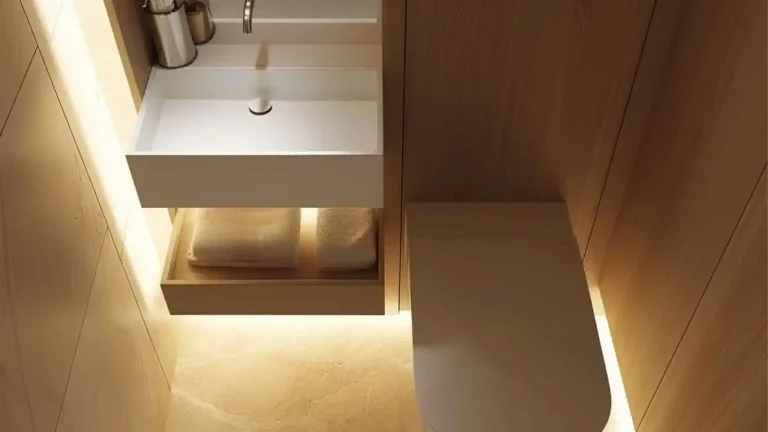
1. Large Format Tiles
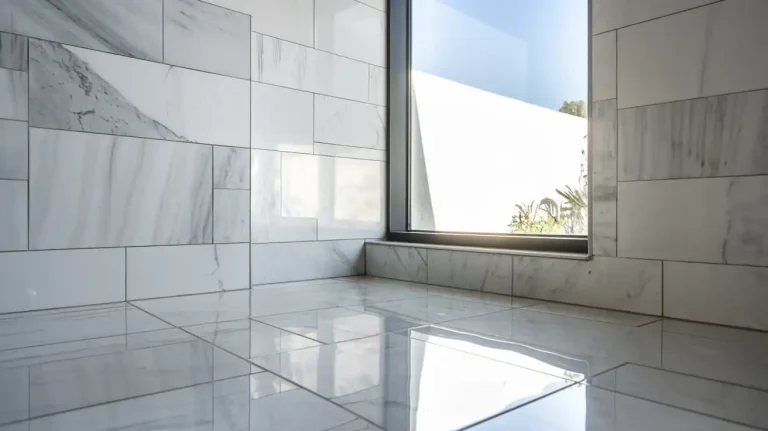
Large format tiles, also known as slab tiles, are a popular choice for bathroom flooring. These tiles are larger than traditional tiles and can create a seamless, spa-like look in the bathroom.
2. Herringbone Pattern
The herringbone pattern is a classic design that is making a comeback in bathroom flooring. This pattern features rectangular tiles arranged in a zig-zag pattern, creating a visually interesting and dynamic look.
3. Hexagonal Tiles
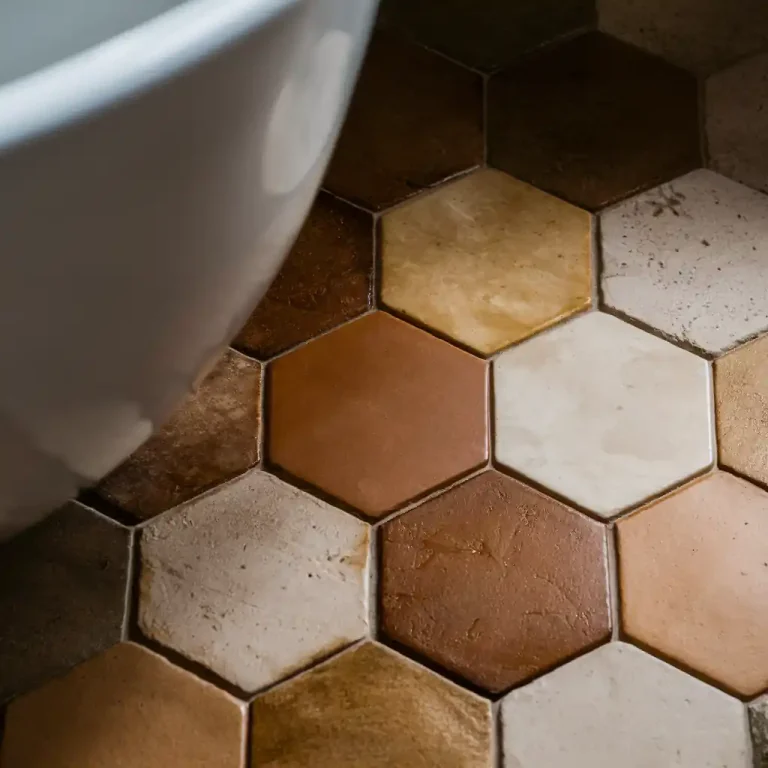
Hexagonal tiles, also known as hex tiles, are a popular choice for bathroom flooring. These tiles are shaped like hexagons and can create a unique, geometric look in the bathroom.
4. Natural Stone Mosaics
Natural stone mosaics are a popular choice for bathroom flooring. These mosaics feature small pieces of natural stone, such as marble or granite, arranged in a pattern to create a beautiful and unique look.
5. Wood-Look Flooring
Wood-look flooring, such as luxury vinyl tile (LVT) or laminate flooring, is a popular choice for bathroom flooring. These floors mimic the look of natural wood but are more durable and resistant to moisture.
6. Geometric Patterns
Geometric patterns, such as chevrons or geometric mosaics, are a popular choice for bathroom flooring. These patterns feature geometric shapes, such as triangles or hexagons, arranged in a repeating pattern to create a visually interesting look.
7. Marble-Inspired Flooring
Marble-inspired flooring, such as marble-look porcelain tile or marble-inspired laminate flooring, is a popular choice for bathroom flooring. These floors mimic the look of natural marble but are more durable and resistant to moisture.
What tiles to use for organic bathroom style?
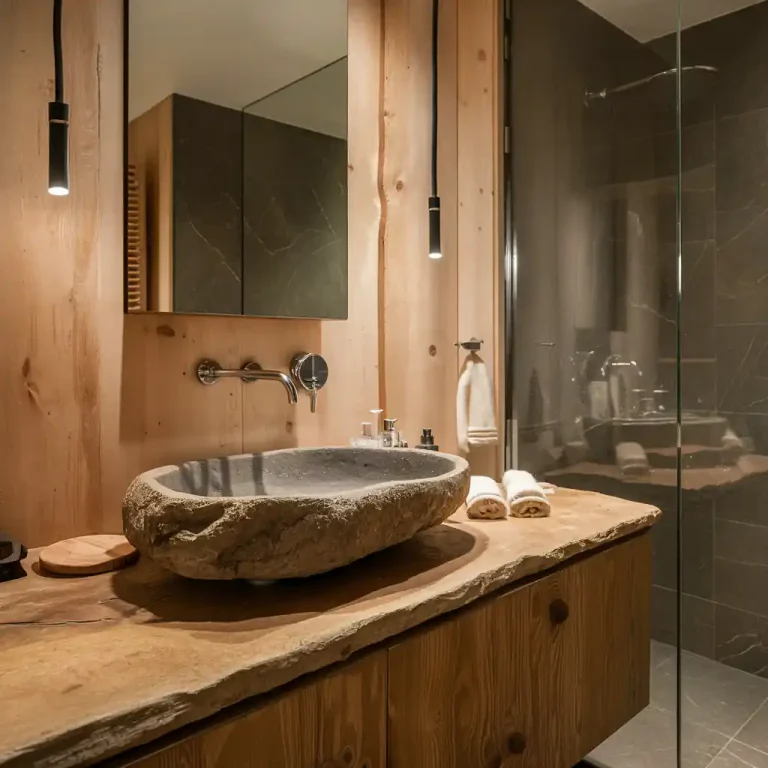
To create an organic-style bathroom, consider using natural stone tiles, such as marble, travertine, or slate, as they provide a timeless and luxurious aesthetic with unique patterns and textures. For a more rustic or earthy look, you can opt for terracotta or reclaimed wood-look tiles. Ceramic or porcelain tiles with a stone or wood-like appearance can mimic the natural materials while offering increased durability and water resistance.
Other options are allowing for great organic bathroom style:
Natural Stone Tiles: Materials like slate, travertine, and marble bring a raw, natural beauty to the space. Their unique patterns and textures add character.
Terracotta Tiles: These tiles offer a warm, rustic look. They are perfect for creating a cozy, earthy atmosphere.
Wood-Look Tiles: Porcelain or ceramic tiles that mimic the appearance of wood can provide the warmth of wood without maintenance issues in a wet environment.
Pebble Tiles: These are great for shower floors or accent walls. They give a spa-like feel and a tactile experience underfoot.
Subway Tiles in Earthy Tones: Classic subway tiles in shades like sage green, soft beige, or warm gray can add a subtle, organic touch.
Matte Finish Tiles: Tiles with a matte finish rather than a glossy one can enhance the natural, understated look.
Handmade or Artisan Tiles: These often have slight variations and imperfections that add to the organic, handcrafted feel.
Large Format Tiles: Using larger tiles can create a seamless look with fewer grout lines, contributing to a clean, natural aesthetic.
What interior designers use to visualize bathroom schemes?
Interior designers employ a variety of tools and techniques to visualize bathroom schemes. These aids range from traditional methods like hand sketches and mood boards to cutting-edge software and 3D renderings done with applications such as Blender, SketchUp, 3Ds Max, Cinema 4D, Maya and others.
As a first step for instance, bathroom designers might initially use pencil and paper to draft a rough layout, then transition to computer-aided design (CAD) programs to model and create detailed floor plans, add textures, lighting and elevations. In the end if included in their contract, they might generate photorealistic 3D visualizations to help clients envision the finished space in vivid detail.
When do you have to select bathroom flooring? (during renovation)
Choosing bathroom flooring is a key part of the renovation process. It’s best to select your flooring early in the planning stage. This way, you can ensure it complements other design elements like wall tiles, fixtures, and cabinetry. Here’s a general timeline for selecting and installing bathroom flooring:
Planning Phase: Decide on the type and design of your flooring. This helps in coordinating with the overall bathroom design.
Before Installing Fixtures: Install the flooring before placing major fixtures like the toilet, vanity, and bathtub. This ensures a seamless look and avoids awkward cuts around these items.
After Plumbing and Electrical Work: Ensure all plumbing and electrical work is completed before installing the flooring to prevent any damage or need for rework.
Protect During Wall Work: If you install the floor first, protect it well during wall work to avoid damage from falling tiles or mortar.
By following this sequence, you can achieve a smooth and efficient renovation process. Do you have a specific type of flooring in mind for your bathroom?
How to spot if bathroom flooring materials is bad?
To identify if bathroom flooring materials are bad, look for signs of water damage, warping, or discoloration, and check for any uneven or soft spots. Inspect the flooring for any cracks, gaps, or loose tiles, which can indicate poor installation or deterioration.
For example, if you notice that your bathroom’s laminate flooring is buckling or has visible water stains, it may be a sign that the material is not suitable for a humid environment. Similarly, if you have ceramic tiles with cracked grout or loose edges, it could indicate that the flooring was not installed correctly or has been damaged over time.
- Water Damage or Stains: If the flooring material is prone to water damage or stains, it may not be suitable for a bathroom. Look for signs of discoloration, warping, or buckling.
- Slipperiness: Bathroom floors can be slippery, but if the material is excessively slippery, it can be a safety hazard. Check if the floor is textured or has a non-slip coating.
- Cracks or Breaks: If the flooring material is prone to cracking or breaking, it may not be durable enough for a bathroom. Look for signs of cracks, chips, or broken tiles.
- Mold or Mildew: Bathroom floors are prone to moisture, which can lead to mold and mildew growth. Check if the flooring material is resistant to mold and mildew.
- Fading or Discoloration: If the flooring material fades or discolors quickly, it may not be suitable for a bathroom. Look for signs of fading or discoloration, especially in areas exposed to direct sunlight.
- Poor Adhesion: If the flooring material does not adhere well to the subfloor, it can lead to unevenness, cracks, or other issues. Check if the flooring material is properly bonded to the subfloor.
- Lack of Durability: Bathroom floors are subject to heavy foot traffic and moisture, so the flooring material should be durable enough to withstand these conditions. Check if the flooring material is resistant to scratches, dents, and other forms of wear and tear.
Some specific issues to look out for in common bathroom flooring materials are:
- Ceramic or Porcelain Tiles: Look for cracks, chips, or uneven grouting. Check if the tiles are properly sealed to prevent water damage.
- Natural Stone: Check for etching, staining, or discoloration. Look for signs of unevenness or poor adhesion to the subfloor.
- Luxury Vinyl Tiles (LVT): Check for signs of wear and tear, such as scratches or dents. Look for unevenness or poor adhesion to the subfloor.
- Laminate Flooring: Check for signs of water damage, warping, or buckling. Look for unevenness or poor adhesion to the subfloor.
When evaluating bathroom flooring materials, consider factors such as durability, maintenance, and aesthetics to ensure you choose a high-quality material that meets your needs.
How to use bathroom visualizer?
1. Find the Right Visualizer:
Retailer Websites: Many bathroom fixture retailers (e.g., Home Depot, Lowe’s, Kohler, American Standard) offer free online visualizers on their websites.
Manufacturer Sites: Brands specializing in tiles, vanities, or showers might also have dedicated visualizers for their products.
Independent Design Platforms: Look for independent design platforms such as TALLBOX or apps that specialize in home renovation visualization.
2. Choose Your Starting Point:
Templates: Most visualizers offer pre-designed bathroom templates in various styles and layouts. Choose one that closely resembles your space or desired look.
Upload Your Own Photos: Some visualizers allow you to upload photos of your existing bathroom to create a more personalized starting point. Ensure the photos are well-lit and show a clear view of the room.
3. Customize Everything:
Fixtures: Experiment with different styles and brands of toilets, sinks, vanities, bathtubs, and showers.
Tiles & Flooring: Explore various tile patterns, colors, and sizes for walls, floors, and accent areas.
Colors & Finishes: Choose paint colors, cabinet finishes, and hardware styles to complement your chosen fixtures and tiles.
Lighting: Some visualizers even let you play with different lighting options to see how they impact the overall ambiance.
4. Adjust Dimensions (If Possible):
Room Size: Some more advanced visualizers allow you to input room dimensions or adjust wall positions for greater accuracy.
Fixture Placement: Fine-tune the placement of fixtures and furniture to ensure they fit comfortably within the space.
5. View from Different Angles:
3D Views: Rotate, zoom in/out, and view your design from multiple perspectives to get a realistic feel for the space.
Virtual Tours: Some tools offer virtual walkthroughs so you can experience your designed bathroom as if you were really there.
6. Save & Share Your Designs:
Create an Account: Most platforms require you to create a free account to save your designs and access them later.
Share with Pros: Share your saved designs with contractors, designers, or suppliers to streamline the communication and planning process.
Tips for Getting the Most Out of Visualizers:
Start with a Plan: Have a general idea of your style preferences, budget, and desired functionality before diving into the visualizer.
Take Your Time: Don’t rush the process. Experiment with different options, compare designs, and refine your vision as you go.
Set Realistic Expectations: Visualizers are great for getting a general sense of design possibilities, but they may not be perfectly accurate in terms of scale, lighting, or material representation.
Use Them for Inspiration: Even if you’re working with a professional designer, visualizers can be valuable tools for communication and inspiration. Share your ideas with your designer to help them understand your vision.