To integrate a dining set in a small or tiny kitchen, make sure to protect circulation first: keep about 36 inches behind chairs for walk-throughs (about 30 inches where no one passes) and allow roughly 24 inches of table edge per diner. Then choose fold-, tuck-, or double-duty pieces—wall-mounted drop-leafs, round pedestals, banquettes, 12–15 inch peninsula overhangs, rolling islands, or gatelegs.

George is a seasoned interior designer and property marketing strategist with over 13 years of experience. He specializes in transforming properties into visually stunning spaces, helping clients recognize the potential and beauty in each property. With an impressive international client base of exciting projects throughout Europe and America.
If your kitchen is short on square footage but big on life, a dining spot is still within reach. The trick is to plan for flow first, then pick furniture that earns its keep. As a rule of thumb, give yourself about 36 inches behind chairs for pass-throughs (you can squeeze to around 30 inches if no one needs to walk behind), and about 24 inches of table edge per person so meals feel comfortable rather than cramped.
From there, smart choices make small spaces feel generous. Wall-mounted drop-leaf tables disappear between meals; round pedestal tables keep corners from catching hips; a slim peninsula with a 12–15 inch overhang turns counter space into a breakfast bar; and banquette seating hugs the wall while hiding storage. If you need true multitaskers, consider a rolling island that parks as prep by day and pulls out as a table at night, or a compact gateleg that expands only when guests arrive. Add tuckable stools, airy bases, and lighter finishes to keep sightlines open—and your small kitchen suddenly serves dinner as gracefully as it does weekday prep.
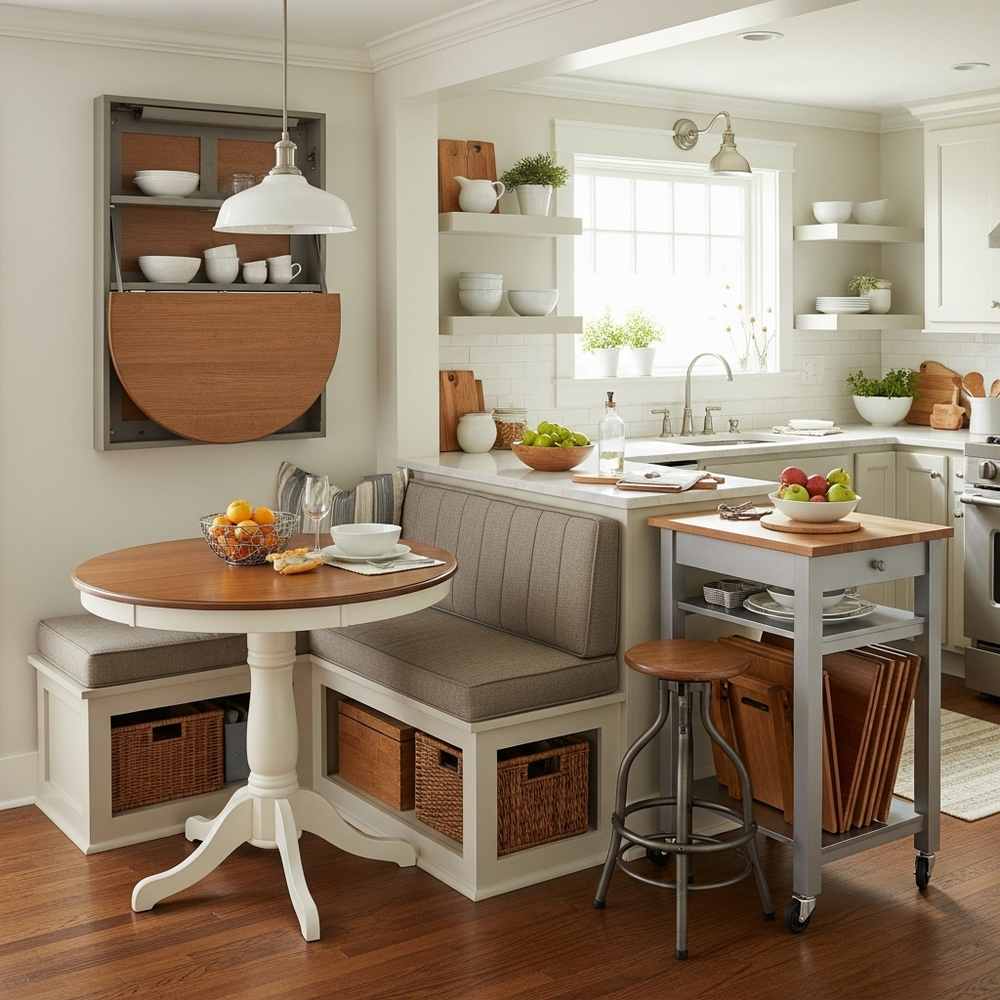
Space assessment & clearances
From there, smart choices make small spaces feel generous. Wall-mounted drop-leaf tables disappear between meals; round pedestal tables keep corners from catching hips; a slim peninsula with a 12–15 inch overhang turns counter space into a breakfast bar; and banquette seating hugs the wall while hiding storage.
If you need true multitaskers, consider a rolling island that parks as prep by day and pulls out as a table at night, or a compact gateleg that expands only when guests arrive. Add tuckable stools, airy bases, and lighter finishes to keep sightlines open—and your small kitchen suddenly serves dinner as gracefully as it does weekday prep.
Start with measurements: protect walkways (36 inches behind chairs; 30 inches if no through-traffic) and allocate 24 inches of table edge per diner.
- Walk-behind clearance: 36 inches target; 30 inches acceptable where no one needs to pass.
- Place setting width: ~24 inches per person along the table edge.
- Table heights: Standard 29–30 inches; counter-height 36 inches.
- Knee room: Aim for 10–12 inches between seat top and underside of table/overhang.
- Peninsula overhang: 12–15 inches to create a breakfast bar/ledge for stools.

Measure appliance swing zones and doorways; note tight spots where round tables or benches reduce bump points.
Layout types (and what fits)
Match the dining solution to your kitchen geometry: end-of-run ledges in galleys, corner nooks in L-shapes, and peninsulas in U- or one-wall layouts.
- Galley: Wall-mounted table or fold-down drop-leaf flush to one side; console-to-dining table that pulls into the adjacent room for guests.
- L-shape: Corner nook with a banquette; small round pedestal table improves flow around the inner corner.
- U-shape: Peninsula with a 12–15 inch overhang for a breakfast bar; add tuckable stools.
- One-wall/studio: Gateleg or extendable table that parks as a console; rolling island or cart that shifts between prep and dining.
- Eat-in alcove: Banquette with storage under the seat; round or soft-square top for compact footprints.
Table formats that work small
Favor formats that fold, nest, mount, or extend so surface appears only when needed.
- Wall-mounted table / fold-down drop-leaf: Disappears when folded; ideal for very tight galleys.
- Gateleg (extendable): Narrow console footprint; opens to seat 2–6 as needed.
- Round pedestal table: No corner collision; pedestal base frees legroom for compact footprints.
- Peninsula ledge: Counter run with 12–15 inch overhang creates a dining perch.
- Rolling island or cart: Locks in place; doubles as prep and table; parks away post-meal.
- Nesting tables: Stack under each other; pull out the second surface for serving.
- Console-to-dining: Slim console extends for dinner parties, then slides back to the wall.
- Glass or clear acrylic tops: Keep sightlines open; visually lighter than opaque surfaces.
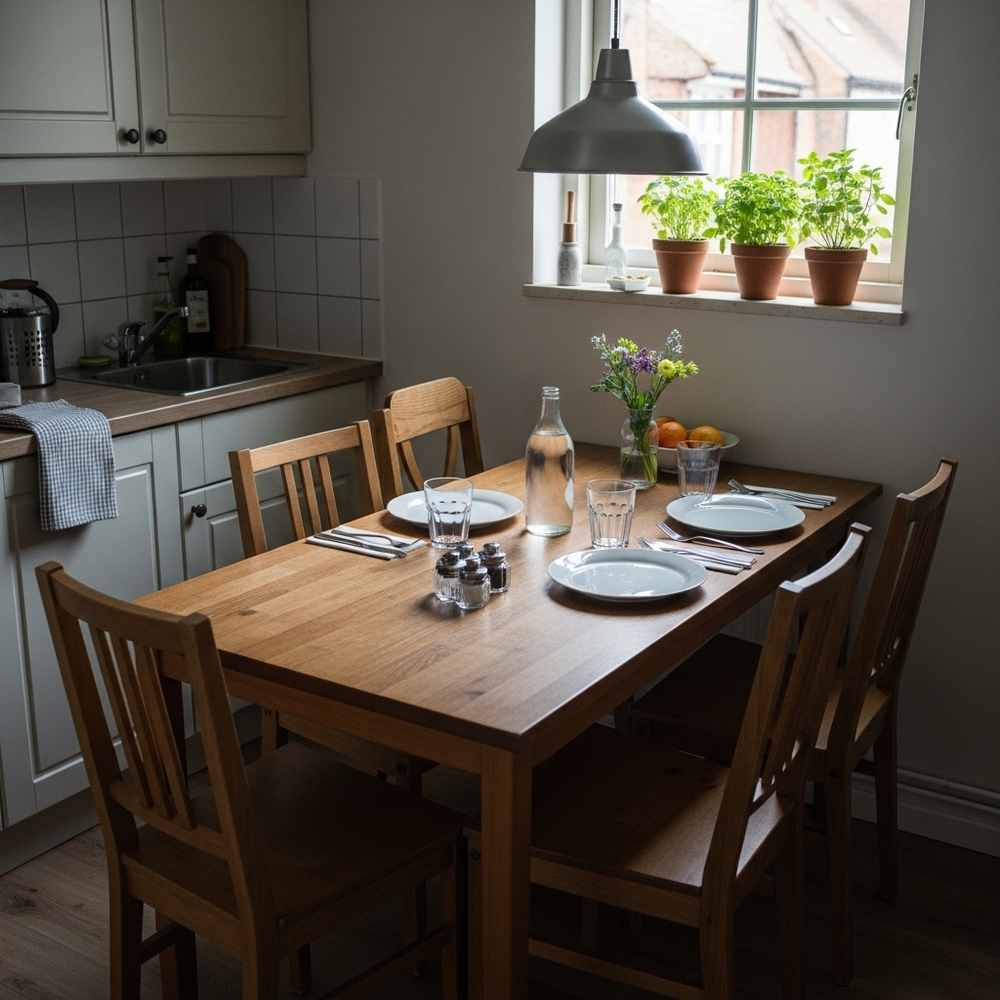
Seating solutions
Use seating that tucks or hugs walls: banquettes reduce clearance needs; backless stools slide fully under ledges.
- Banquette with storage: Seats sit flush to the wall; lift-up seats or drawers add hidden capacity.
- Corner nook: Wrap seating around two sides to reclaim dead corners.
- Tuckable stools: Backless, armless, or low-back designs push under tables and peninsulas.
- Counter-height vs standard height: Counter-height aligns with 36-inch counters for continuous prep/dine surfaces; standard (29–30 inches) feels more relaxed and fits most chairs.
- Light legs: Slim, open frames (or pedestal bases) keep the floor visible, boosting the sense of space.
Multifunction furniture
Choose pieces that do double duty: prep by day, dining by night.
- Rolling island/cart: Add a butcher-block top; roll out as a two-top table, back in for storage.
- Extendable tables: Leaf-in for guests, leaf-out for weekdays.
- Console-to-dining: Use as a desk or serving console; convert for meals.
- Drop-leaf hybrids: One leaf up against a wall for solo dining; both up for company.

Storage integration
Let the dining zone carry storage so other cabinets stay uncluttered.
- Banquette bases: Deep drawers for cookware; flip-up lids for linens and small appliances.
- Seat backs: Shallow shelves or rails for spices and cookbooks.
- Under-table: Slim baskets for placemats; hooks for foldable stools.
- Peninsula ends: Add cubbies for napkins and trays near the breakfast bar.
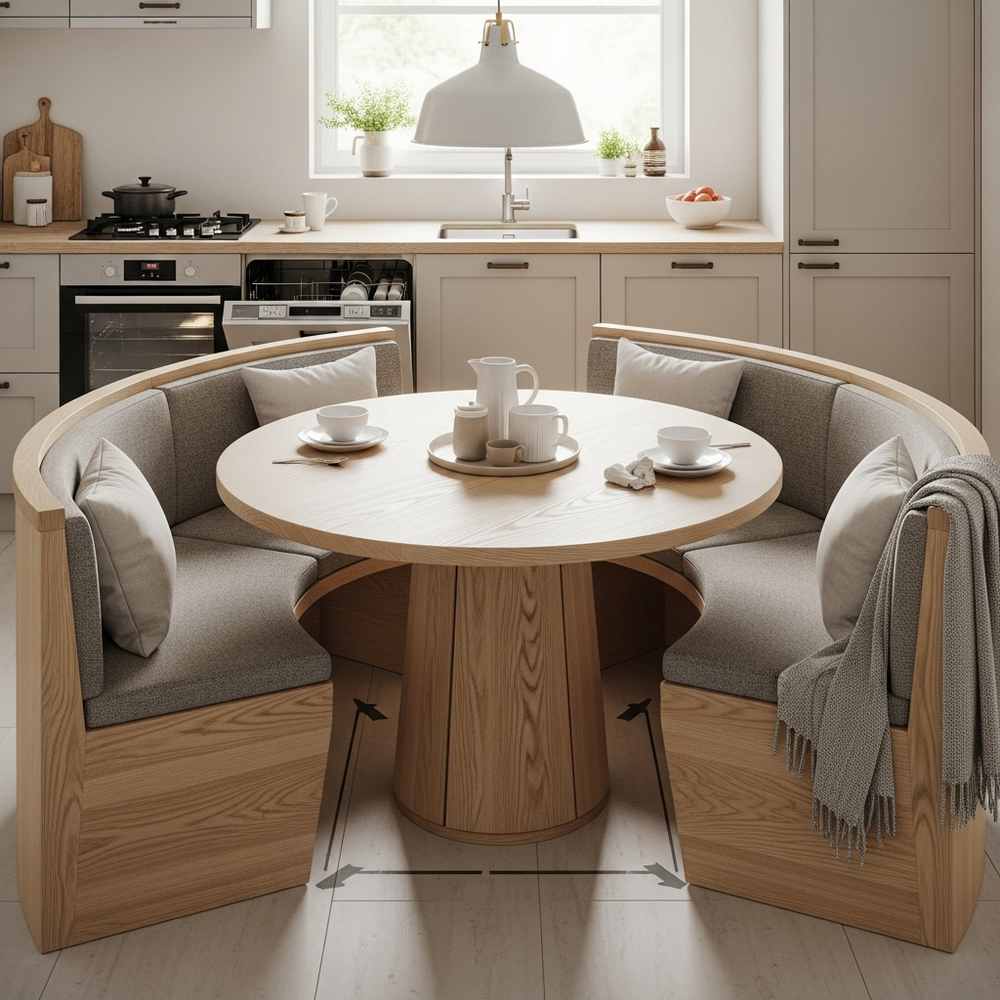
Circulation & ergonomics
Round tops and benches ease movement; align seating away from appliance swing paths.
- Keep chair backs outside oven/dishwasher door arcs.
- Prefer round or soft-square tops to reduce hip bumps.
- Center pedestal bases under small rounds so legs don’t collide.
- Use 10–12 inches knee clearance under ledges and tables.
How to select the Right Dining Table Set?
At the heart of every dining room lies the Dining Table Set. 3D interior design allows you to preview how different shapes—rectangular, round, or oval—fit within your room.
You can experiment with materials like glass, wood, or marble and check which complements your flooring and walls. Additionally, you can visualize the impact of chair styles, upholstery fabrics, and seating arrangements before purchase. This ensures your dining table not only fits perfectly but also enhances the overall aesthetic of the room.
Every dining room should have a focal point. It could be a chandelier above the dining table, a bold art piece, or a beautifully designed wall. 3D design allows you to test focal points until you find one that draws attention while harmonizing with other elements.
Lighting & visual tricks
Lighten the look to make small feel bigger: airy materials, focused lighting, and visual continuity.
- Pendants on dimmers: Define the dining zone; hang 28–34 inches above the tabletop.
- Plug-in sconces/pendants: Rental-friendly task light without hardwiring.
- Clear acrylic/glass: Tops and chairs that “disappear” maintain open sightlines.
- Rugs: Use a low-pile, wipeable rug just large enough for chairs to slide without catching.
- Monotone palette: Match table finishes to cabinetry or counters for a calm, continuous read.
Style cohesion
Echo your kitchen’s finishes so the dining zone feels integrated, not added.
- Repeat one metal (pulls, stool legs, pendant canopy) for unity.
- Pick one wood tone; vary texture, not color, to reduce visual noise.
- Use similar profiles: Shaker doors → simple, straight-leg table; slab doors → sleek pedestal or tulip base.
Rental-friendly options
Favor freestanding, no-drill, and reversible choices.
- Wall-free drop-leafs: Gateleg or console-to-dining instead of screw-in fold-downs.
- Clamp-on overhangs: Temporary ledges for a breakfast bar without permanent brackets.
- Rolling carts: Locking casters add a mobile table/prep surface.
- Plug-in lighting: Swagged pendants and adhesive cord clips for zone lighting.
- No-drill banquette: Storage benches placed against walls with anti-tip straps.
- Removable finishes: Peel-and-stick wallcovering to define the nook.
Budget & DIY
Stretch dollars with adaptable secondhand finds and simple builds.
- Secondhand gateleg: Common, inexpensive, and compact; refinish to match cabinets.
- DIY wall-mounted drop-leaf: A plywood top + folding shelf brackets; add a ledger strip for strength (owner-permitting).
- Overhang add-on: Bolt corbels/brackets to create a 12–15 inch peninsula ledge on an existing base (check fastener and load specs).
- Console-to-dining hack: Add folding leaves to a slim console and casters for mobility.
- Chair swap: Replace bulky chairs with stackable or tuckable stools to free floor area.
Q&A
How much space do I need behind dining chairs in a small kitchen?
Direct: Aim for about 36 inches for pass-throughs; you can reduce to roughly 30 inches if no one needs to walk behind the chairs.
This keeps doors and drawers functional while preventing chair traffic jams.
How much table width should I allow per diner?
Direct: Plan about 24 inches of table edge per person for comfortable place settings.
For two diners side by side, target ~48 inches of usable edge length.
Are round tables better for tight kitchens?
Direct: Yes—round tables improve flow by eliminating corners and work well with a pedestal base that frees legroom.
Choose compact diameters (30–36 inches) and a single pedestal to maximize tuck space.
What’s the difference between standard and counter-height dining?
Direct: Standard tables are ~29–30 inches high; counter-height is 36 inches and can align with counters for a seamless peninsula/breakfast bar.
Pick counter-height if you want one continuous prep/dine surface; choose standard for traditional seating comfort.
How deep should a peninsula overhang be for seating?
Direct: Provide 12–15 inches of overhang for knees and stool tuck space.
Pair with backless stools that slide completely under the ledge.
Do banquettes really save space?
Direct: Yes—banquettes eliminate the need for chair clearance behind the seat, reducing overall aisle requirements.
They also add storage under the bench, making them ideal for small kitchens.
What’s the best multitasking table for a micro-kitchen?
Direct: A rolling island or cart is hard to beat—prep surface by day, two-top table by night, and it parks away after meals.
Consider models with locking casters and a drop-leaf for extra length.
How do I keep the dining area from looking crowded?
Direct: Use clear acrylic or glass, light legs, and open bases; keep stool backs low and finishes cohesive.
Focused pendant light on dimmers defines the zone without visual bulk.
References
National Kitchen & Bath Association (kitchen planning clearances); common manufacturer specifications for stools and overhangs. Always verify local codes and product load ratings before installation.