Insulating a pole barn, also known as a post-frame building, offers numerous benefits that enhance the functionality, longevity, and efficiency of the structure. Insulating a pole barn is a wise investment that pays off through energy savings, increased comfort, and preservation of the building and its contents. A pole barn should be insulated to create additional living or working space, as insulation allows for temperature regulation through heating and cooling.
Whether you use your pole barn for storage, as a workshop, a commercial space, or recreational purposes, insulation enhances its functionality and extends its lifespan. By controlling the interior environment, you protect your assets, improve efficiency, and enjoy a more versatile and comfortable space.
Want to get 3D rendering for your house reno project?

George is a seasoned interior designer and property marketing strategist with over 13 years of experience. He specializes in transforming properties into visually stunning spaces, helping clients recognize the potential and beauty in each property. With an impressive international client base of exciting projects throughout Europe and America.
George Nicola (Expert Interior Designer from TALLBOX) shares:
Insulating a pole barn, or post frame building, offers several key benefits:
Energy Efficiency: Insulation helps maintain a consistent temperature inside the barn, reducing the need for heating in the winter and cooling in the summer. This can lead to significant energy savings.
Comfort: Proper insulation makes the interior more comfortable for both people and animals by reducing drafts and maintaining a stable temperature.
Moisture Control: Insulation helps control moisture levels, preventing condensation that can lead to mold, mildew, and structural damage.
Pest Prevention: Sealing gaps and insulating can help keep pests out, protecting the contents of the barn.
Noise Reduction: Insulation can also reduce noise from outside, creating a quieter environment inside the barn.
Structural Integrity: Insulating and sealing gaps can enhance the overall durability and lifespan of the building by protecting it from the elements.
What enhances Pole Barn efficiency?
The primary goal is to enhance energy efficiency and comfort within the post-framed structure. Insulation, building orientation, and air sealing all improve energy efficiency. This involves addressing various challenges, such as selecting appropriate insulation materials and techniques to ensure optimal performance. The significance of this initiative lies in its potential to improve the building’s functionality and sustainability, making it a valuable endeavor for the community.
There are three main categories of insulation for post-frame buildings and these are walls, roofs, and foundations.
Insulation on wall, roof, and foundation
Wall Insulation: A continuous layer of insulation within the wall cavities is crucial. This minimizes thermal bridging (heat transfer through the framing members) and creates a more consistent thermal envelope. Wall insulation also reduces noise. Properly sealed buildings are better at keeping out external noise, creating a quieter and more comfortable indoor space.
Roof Insulation: Properly insulating the roof helps regulate temperature and prevents heat loss in the winter and heat gain in the summer. Consider using reflective radiant barriers to further reduce heat transfer. Insulating the roof and all gaps that allow air to flow in and out makes it harder to maintain a stable indoor temperature. This leads to higher energy costs as heating and cooling systems work harder to compensate. Proper sealing improves energy efficiency by reducing drafts and heat loss.
Gaps and voids can weaken the structure over time, especially if moisture seeps in and causes wood rot or rust in metal components. Ensuring a tight seal helps maintain the building’s strength and durability.
Foundation Insulation: Insulating the foundation, especially in colder climates, can significantly reduce heat loss through the floor and help with moisture control. Sealing gaps prevents moisture from entering the building, which can lead to mold, mildew, and other moisture-related issues. This is particularly important in maintaining a healthy indoor environment and protecting the building materials. Unsealed gaps on the floor provide easy entry points for pests, which can cause significant damage and create unsanitary conditions. Proper sealing helps keep these unwanted guests out.
Energy-Efficient Feature
Windows and Doors: Install energy-efficient windows with low-e glass and weatherstripping to minimize drafts and heat transfer. Well-insulated doors are also essential.
Lighting: Use energy-efficient lighting options such as LED lights to reduce energy consumption.
Heating and Cooling Systems: Choose energy-efficient HVAC systems that are properly sized for the pole barn’s space. Consider options like geothermal heating or solar panels for a more sustainable approach.
Ventilation: Proper ventilation helps regulate temperature and humidity, reducing the load on your heating and cooling systems.
Other Factors
Building Orientation: Consider the building’s orientation to maximize natural light and minimize solar heat gain.
Air Sealing: Seal any air leaks around windows, doors, and other openings to prevent drafts and energy loss.
Regular Maintenance: Regularly inspect and maintain your pole barn’s insulation, HVAC system, and other energy-efficient features to ensure they are functioning properly.
Identifying and Correcting Pole Barn Construction Mistakes
This section explores the process of identifying and correcting construction mistakes in a post frame building. The initial discovery of poor construction practices was made when the OSB was removed, revealing that the two by four walls were framed using three-inch finish nails, which are typically not suitable for such structural work.
A ledger board was improperly installed across where the ceiling used to be. This board was attached with finish nails, and the joist hangers were secured with inch and a quarter drywall screws, which are not rated for such use. This inadequate construction posed significant risks to the structural integrity of the building.
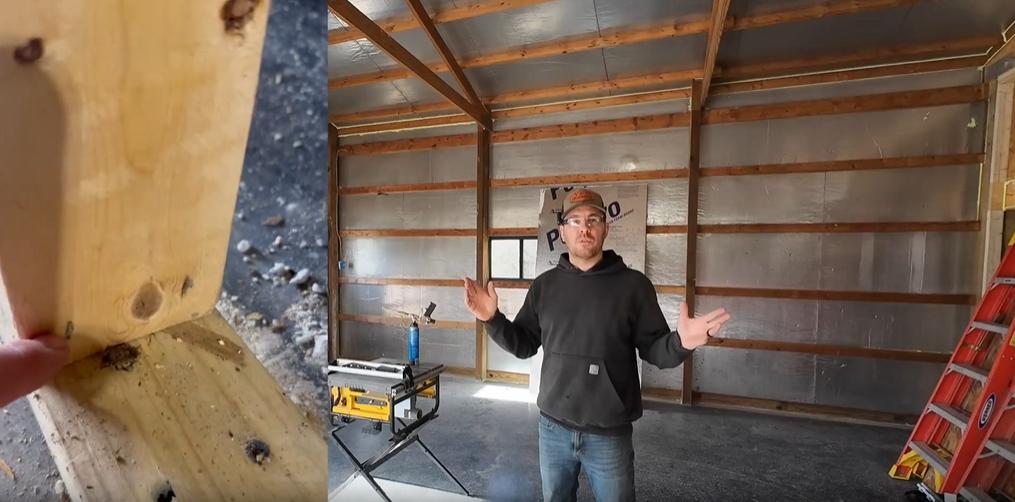
The joist hangers were installed over Romex wiring, further complicating the situation. The use of inappropriate materials and techniques, such as the drywall screws, compromised the safety and durability of the structure.
The importance of proper framing and sealing cannot be overstated. The previous builders left gaps and voids unsealed, allowing pests to infiltrate the walls. Fortunately, no permanent damage was done to the original barn structure, which has now been stripped back to its core.
Proper framing and sealing in pole barn construction are essential for maintaining structural integrity and preventing damage from pests and environmental factors.
Poorly framed pole barns can develop gaps and voids that allow pests to infiltrate and cause damage to the structure.
Improper framing can lead to structural instability, which can be dangerous for occupants and result in costly repairs. High-quality framing ensures proper load distribution, resistance to natural forces, and prevention of structural failures, contributing to the longevity and safety of the pole barn.
Proper sealing helps maintain energy efficiency by preventing air leakage and retaining heat within the building, reducing long-term energy costs.
Preparing for Insulation
In preparing for insulation, it’s crucial to ensure that all necessary groundwork is completed. This involves running essential underground cables and lines to support future needs and prevent potential issues.
Before starting the insulation process, it’s important to establish a solid platform. This involves ensuring that all necessary utilities are in place and functioning correctly.
Running Underground Cables and Lines
During the preparation phase, an underground-rated CAT6 cable was installed to provide Wi-Fi connectivity. Additionally, a three-quarter inch PEX line was laid as a precautionary measure in case the original water line fails. This line is equipped with a tracer wire, ensuring easy location and maintenance.
Setting Up the Platform for Insulation
The groundwork laid with these installations provides a robust platform for the insulation process. Ensuring these elements are in place helps avoid disruptions and supports the overall efficiency of the project.
Choosing The Best Insulation Materials for a Pole Barn
When it comes to insulating a post-frame building, also known as a pole barn, selecting the right materials is crucial for achieving a cost-effective and efficient solution.
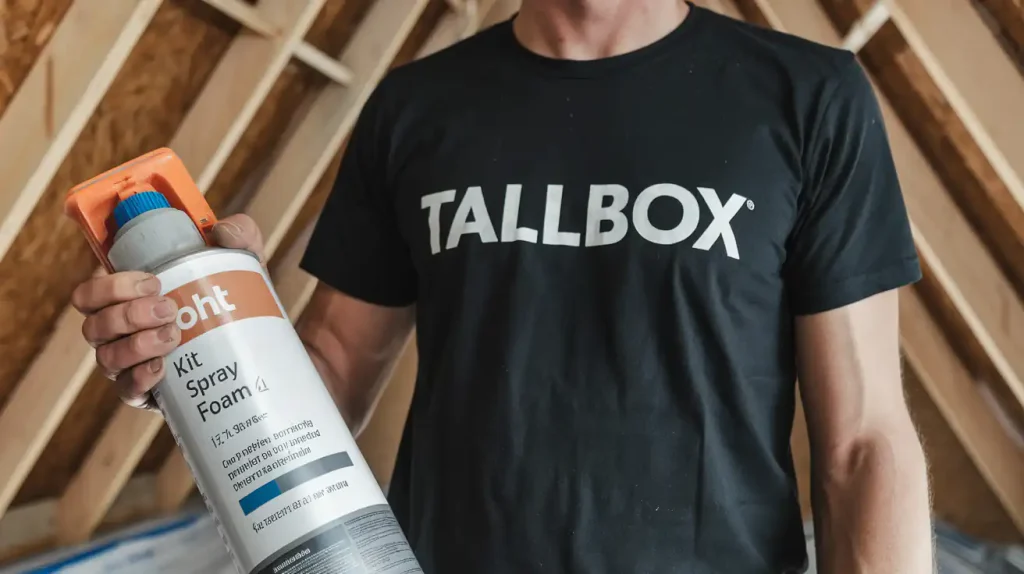
One of the primary tools recommended for this task is a great stuff gun. This tool is highly praised for its effectiveness and longevity. The cartridges for the Great Stuff gun are larger and more durable than traditional cans, making them a preferred choice for many. They are priced at around fifteen dollars and can be used multiple times, even after being stored for several months.
EPS stands for Expanded Polystyrene. It’s a lightweight, rigid foam insulation material made from small polystyrene beads. These beads contain a blowing agent that expands when heated, creating a closed-cell structure that excels at trapping air and resisting heat flow.
In terms of insulation materials, PolyPro EPS foam
boards are the most beneficial option. PolyPro EPS foam is the cheapest way to insulate barn buildings such as the Pole Barn. Each board of EPS cost $10.27 which is x3 times less than the closest competitor FOAMULAR 150 at over $40 per board. These four-by-eight sheets of EPS insulation foam board are known for their insulating properties. The focus remains on the material’s ability to provide effective insulation for the building.

The Owens Corning FOAMULAR 150 rigid foam board insulation is made from XPS (extruded polystyrene) foam, which offers excellent insulation and moisture resistance. It has an R-value of 7.5, indicating good thermal resistance, and is suitable for various applications, including basements, walls, and attics.
In contrast, PolyPro EPS foam boards are made from EPS (expanded polystyrene) and are known for their lightweight and versatile insulation properties. Although PolyPro EPS typically has a lower R-value compared to XPS, it remains effective for many applications and is commonly used for walls, roofs, and floors.
In terms of cost, FOAMULAR 150 is priced at approximately $45.26 per sheet, making it a more expensive option. On the other hand, PolyPro EPS is generally available at a lower cost per sheet, making it a more budget-friendly choice for insulation.
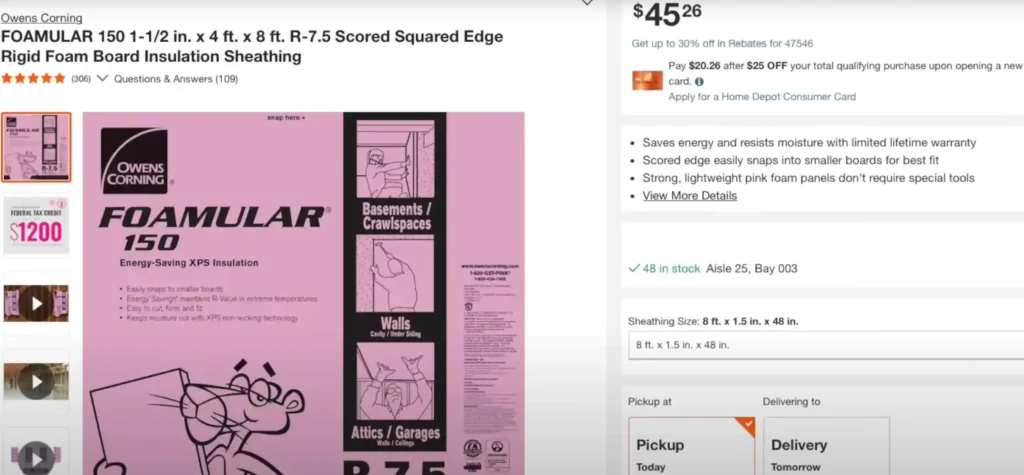

While FOAMULAR 150 provides high-quality insulation with excellent properties, it comes at a higher price point compared to PolyPro EPS foam boards. For those prioritizing cost-effectiveness, PolyPro EPS may be the more beneficial option, especially in larger projects where budget constraints are a factor.
Why PolyPro EPS? PolyPro stands out for several reasons
High R-value: PolyPro EPS boards typically offer an R-value of around 4 per inch, providing good thermal resistance for your pole barn.
Moisture Resistance: The closed-cell structure of EPS makes it highly resistant to moisture absorption, preventing mold growth and maintaining its insulating properties even in humid environments.
Lightweight and Easy to Handle: PolyPro EPS boards are lightweight and easy to cut and install, making them a DIY-friendly option.
Cost-Effective: Compared to other insulation materials like spray foam, PolyPro EPS boards are generally more affordable, making them a budget-friendly choice for large pole barn projects.
Installation Tips for PolyPro EPS
Proper Fit: Ensure the boards fit snugly between framing members, minimizing gaps that can reduce their effectiveness.
Seal the Seams: Use a compatible sealant or tape to seal the seams between boards, preventing air leakage and maintaining a continuous insulation layer.
Consider a Vapor Barrier: Depending on your climate and the intended use of your pole barn, you may need to install a vapor barrier on the warm side of the insulation to prevent moisture buildup.
What are effective and commonly used materials for pole barn insulation?
Regardless if your barn structure is new or old, insulating it is a must; pole barn insulation is vital for transforming the space into a functional all-season structure if you are going to live in it or use it at least few hours a day. It minimizes heat loss, enhances structural stability, and prevents unwanted elements from entering.
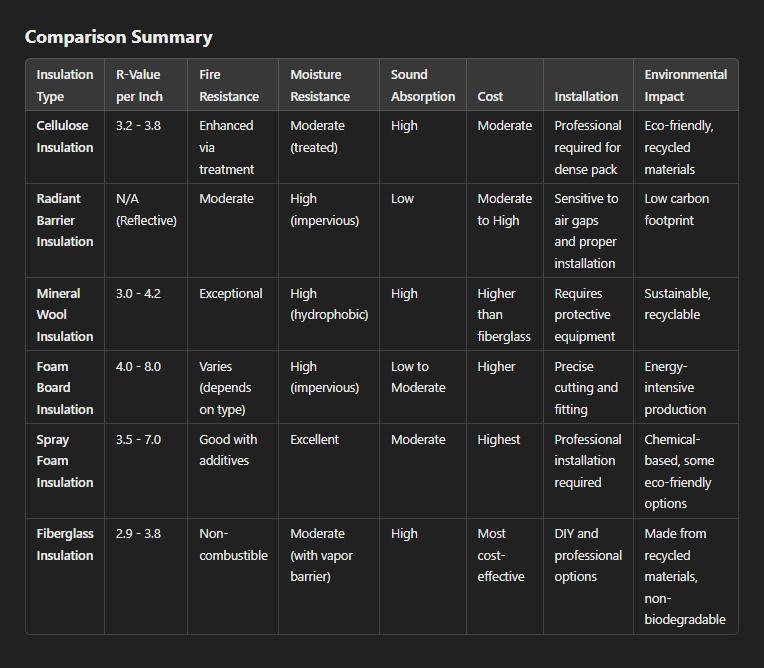
Fiberglass Insulation
Pros: Glass Wool or Fiber insulation is cost-effective and widely available, fiberglass insulation is easy to install and provides good thermal resistance and sound absorption. It is available in batts or rolls that fit between framing members. It comes in Glass Fiber Flakes (for loose-fill) or Glass Fiber Thermal Batts, Glass Fiber Acoustic Batts, Pre-Cut Fiberglass Batts and others.
Cost-Effective and Economical: Fiberglass insulation is one of the most affordable insulation materials available on the market. Its low material cost and widespread availability make it a popular choice for both residential and commercial construction projects, allowing for budget-friendly thermal and acoustic solutions without compromising quality.
Wide Availability and Versatility: Available in various forms such as batts, rolls, and loose-fill, fiberglass insulation can be easily sourced from most building supply retailers. This versatility allows it to be customized to fit different application needs, including walls, attics, floors, and ceilings, accommodating a range of framing configurations and architectural designs.
Good Thermal Resistance (R-Value): Fiberglass insulation typically offers R-values ranging from 2.9 to 3.8 per inch, depending on the density and type. This level of thermal resistance effectively reduces heat transfer, helping to maintain consistent indoor temperatures and enhance energy efficiency by lowering heating and cooling costs.
Effective Sound Absorption and Acoustic Performance: The fibrous structure of fiberglass insulation makes it an excellent sound absorber, effectively dampening airborne noise and reducing sound transmission between rooms and from external sources. This contributes to a quieter and more comfortable indoor environment, enhancing acoustic privacy in residential and commercial spaces.
Ease of Installation: Fiberglass insulation is relatively lightweight and flexible, allowing for straightforward installation by both professional installers and DIY enthusiasts. Its interlocking design in batts and rolls simplifies the fitting process between studs, joists, and rafters, ensuring consistent coverage and minimal gaps when properly installed.
Non-Combustible Nature: Although fiberglass itself is non-combustible, it can help slow the spread of flames in the event of a fire. This property enhances the fire safety of buildings by providing an additional layer of fire resistance within the building envelope.
Moisture Resistance: When properly installed with appropriate vapor barriers, fiberglass insulation can resist moisture accumulation, reducing the risk of mold growth, rot, and structural degradation in areas prone to humidity or water infiltration. This makes it suitable for use in various climates and building types.
Dimensional Stability: Fiberglass insulation maintains its shape and performance over time, exhibiting minimal settling or compression. This ensures that its insulating properties remain consistent throughout the lifespan of the building, providing reliable thermal and acoustic performance.
Compatibility with Various Building Materials: Fiberglass insulation can be easily integrated with other building materials and insulation types, such as vapor barriers, air barriers, and radiant barriers. This compatibility allows for the creation of comprehensive insulation systems that address multiple aspects of thermal regulation and energy efficiency.
Environmental Considerations: Many fiberglass insulation products are made from recycled glass and sand, contributing to resource conservation and environmental sustainability. Additionally, the manufacturing process has become more energy-efficient, reducing the carbon footprint associated with its production.
Fire Safety Compliance: Fiberglass insulation often complies with building codes and fire safety standards, making it a reliable choice for applications where fire resistance is mandated. Its ability to slow flame spread contributes to the overall fire rating of building assemblies.

Cons: Requires careful handling due to potential irritation from glass fibers, and may need additional vapor barriers to prevent moisture issues.
Potential Irritation from Glass Fibers: Handling fiberglass insulation can cause skin irritation, itchiness, and respiratory discomfort due to the presence of fine glass fibers. Proper protective equipment such as gloves, long sleeves, masks, and eye protection is necessary during installation to prevent direct contact and inhalation of fibers.
Installation Challenges and Skill Requirements: While fiberglass is generally easy to install, achieving optimal performance requires precision in cutting, fitting, and securing the insulation. Gaps, compressions, or overlaps can lead to thermal bridging, air leaks, and reduced insulating effectiveness, necessitating a careful and skilled installation process.
Need for Additional Vapor Barriers: In climates with high humidity or where moisture control is critical, fiberglass insulation may require the installation of additional vapor barriers to prevent moisture accumulation within the wall assemblies. Failure to properly install vapor barriers can lead to mold growth, rot, and structural damage, compromising both insulation performance and building integrity.
Limited R-Value Compared to Other Insulations: While fiberglass offers decent thermal resistance, its R-value per inch is generally lower than that of spray foam or polyisocyanurate foam board insulations. Achieving higher levels of thermal performance may require thicker installations, which can be space-consuming and less feasible in areas with limited cavity depth.
Susceptibility to Moisture and Compression: Although fiberglass can resist moisture when paired with vapor barriers, it is inherently **susceptible to moisture absorption if exposed. Wet fiberglass insulation can lose its insulating properties, become heavier, and contribute to mold growth. Additionally, compression of fiberglass batts or rolls during installation can reduce their R-value, diminishing their thermal effectiveness.
Fire Performance Limitations: While fiberglass is non-combustible, it does not provide active fire resistance beyond slowing flame spread. In the absence of fire-resistant barriers or additional fireproofing measures, fiberglass alone may not meet stringent fire safety requirements for certain building applications.
Environmental and Health Concerns: The production of fiberglass insulation involves the use of energy-intensive processes and raw materials such as sand and glass. Additionally, the disposal of fiberglass products can be environmentally challenging due to their non-biodegradable nature and potential to release microfibers into the environment.
Potential for Settling and Air Gaps: In loose-fill applications, fiberglass insulation can settle over time, leading to uneven coverage and reduced R-value. Air gaps or voids created during installation can act as thermal bridges, allowing heat transfer and air leakage, which compromise the overall energy efficiency of the insulated space.
Aesthetic and Finishing Considerations: Exposed fiberglass insulation can be visually unappealing and may require covering with drywall or other finish materials to achieve a polished appearance. Inadequate finishing can lead to aesthetic issues and exposure of insulation fibers, which can further contribute to health and safety concerns.
Fire Safety Additives and Chemicals: Some fiberglass insulation products incorporate fire retardant chemicals to enhance fire resistance. However, these additives can pose environmental and health risks during both manufacturing and disposal, and may contribute to indoor air quality issues if not properly managed.
Spray Foam Insulation
Pros: Spray Polyurethane Foam (SPF) has other names based on the compounds it can be reffered to as Expanding, Isocyanate-Based, High-Density, Low-Density, Closed-Cell Spray Foam, Open-Cell Spray Foam or Spray Foam Polyurethane (SPU). Offers superior thermal resistance and creates an airtight seal, which enhances moisture control. It is particularly effective for irregularly shaped spaces and provides excellent coverage.
Superior Thermal Resistance (High R-Value): Spray foam insulation typically offers R-values ranging from 6.0 to 7.0 per inch for closed-cell varieties and 3.5 to 4.0 per inch for open-cell types. This high thermal resistance makes it exceptionally effective at minimizing heat transfer, contributing to enhanced energy efficiency and consistent indoor temperatures.
Airtight Seal and Enhanced Moisture Control: One of the standout features of spray foam insulation is its ability to create a continuous, airtight barrier around the building envelope. This airtightness not only reduces air leakage and preventing drafts but also controls moisture infiltration, thereby mitigating risks of mold growth, rot, and structural deterioration.
Excellent Coverage for Irregularly Shaped Spaces: Spray foam expands upon application, allowing it to conform seamlessly to irregular shapes and hard-to-reach areas. This property ensures comprehensive coverage without gaps or voids, making it ideal for complex architectural features, corners, crevices, and around obstructions like pipes and wiring.
Structural Reinforcement (Closed-Cell Foam): Closed-cell spray foam adds structural integrity to buildings by acting as a rigid foam that can enhance the strength of walls and roofs. This can be particularly beneficial in areas prone to high winds or seismic activity, providing an additional layer of durability.
Sound Dampening and Acoustic Benefits: The dense, fibrous structure of spray foam insulation contributes to its ability to absorb and dampen sound vibrations, resulting in improved acoustic comfort within residential and commercial spaces. This makes it effective in reducing noise transmission between rooms and from external sources.
Reduction of Thermal Bridging: Spray foam effectively fills gaps and seams, thereby minimizing thermal bridging—the process where heat bypasses insulation through structural elements like studs and joists. This leads to a more uniform thermal barrier and increased overall energy efficiency of the building envelope.
Long-Term Energy Savings: Due to its high insulating properties and airtight seal, spray foam can significantly reduce energy consumption for heating and cooling. Over time, this translates to substantial cost savings on energy bills and a reduction in the building’s carbon footprint.
Versatile Application Methods: Spray foam insulation is available in various formulations, including closed-cell, open-cell, high-density, and low-density options. This versatility allows for customized applications tailored to specific building requirements and climate conditions.
Resistance to Pests and Insects: The non-organic composition of spray foam insulation makes it impervious to pests, such as insects and rodents. This pest-resistant quality helps prevent infestations that can damage other types of insulation and compromise the building’s integrity.
Fire Retardant Additives: Many spray foam products incorporate fire retardant chemicals, enhancing their fire resistance. This makes them suitable for use in applications where fire safety is a primary concern, and can contribute to meeting building code requirements for fire-rated assemblies.

Cons: More expensive than other options and typically requires professional installation.
Higher Initial Cost: Spray foam insulation generally has a higher upfront cost compared to traditional insulation materials like fiberglass batts, cellulose, or foam board. This includes both the material costs and the labor expenses associated with professional installation, which can impact the overall budget of construction or renovation projects.
Professional Installation Required: Proper application of spray foam insulation necessitates specialized equipment and trained technicians. DIY installation is typically not recommended due to the complexity of the process and the need for precise mixing and application to achieve optimal performance and safety.
Potential Health and Safety Risks During Installation: The chemicals used in spray foam insulation can emit volatile organic compounds (VOCs) and other harmful fumes during and shortly after application. Without appropriate protective gear, ventilation, and adherence to safety protocols, there is a risk of respiratory irritation, skin sensitization, and other health hazards for installers and occupants.
Difficulty in Removal and Modification: Once cured, spray foam becomes hard and rigid, making it challenging to remove or modify. This can pose issues during future renovations or repairs, as accessing wiring, plumbing, or other building systems may require destructive removal of the insulation material.
Environmental Impact of Chemicals: The production and application of spray foam insulation involve the use of chemicals that may have environmental implications. Some formulations use hydrofluorocarbons (HFCs) as blowing agents, which have a high global warming potential (GWP). Although there is a shift towards more eco-friendly blowing agents, the environmental footprint remains a consideration.
Potential for Off-Gassing Over Time: While spray foam is generally inert once fully cured, certain formulations may continue to release trace amounts of VOCs over the lifespan of the building. This can contribute to indoor air quality concerns if not properly managed through ventilation and material selection.
Sensitivity to Installation Conditions: The effectiveness of spray foam insulation is highly dependent on proper installation conditions, including temperature, humidity, and surface preparation. Adverse conditions can lead to issues such as improper curing, blistering, or incomplete adhesion, which can compromise insulation performance and durability.
Limited Applicability in Some Building Types: In certain scenarios, such as historic buildings with specific architectural constraints or buildings with existing moisture issues, spray foam insulation may not be the most suitable option. Its rigid nature and chemical composition can conflict with the preservation requirements or existing structural conditions of such buildings.
Potential for Shrinkage and Cracking (Closed-Cell Foam): Some types of closed-cell spray foam can experience shrinkage or cracking over time, especially if exposed to extreme temperatures or moisture. This can lead to gaps in insulation, reduced thermal performance, and the need for additional maintenance or repair work.
Flammability Concerns: While spray foam insulation can be treated with fire retardants, it remains flammable and may release toxic fumes when exposed to fire. This necessitates the use of additional fire barriers or protective coatings to comply with building codes and ensure fire safety.
Recycling and Disposal Challenges: Spray foam insulation is not easily recyclable and disposal can be environmentally challenging. The non-biodegradable nature of the material means it persists in landfills, contributing to environmental waste unless alternative disposal methods are employed.
Foam Board Insulation
Pros: Foam is also referred to as Rigid Foam or Thermal Insulation Boards; Expanded Polystyrene (EPS) Boards; Extruded Polystyrene (XPS) Boards; Polyisocyanurate (Polyiso) Panels; and Structural Insulation Panels (SIPs) (when used as part of SIPs). Most common name is EPS and it’s known for its high thermal resistance and moisture control capabilities, foam board insulation is durable and can be used on walls or roofs. It provides a solid barrier against temperature fluctuations.

High Thermal Resistance (R-Value): Foam board insulation typically boasts R-values ranging from 4.0 to 8.0 per inch, depending on the type (e.g., Expanded Polystyrene (EPS), Extruded Polystyrene (XPS), or Polyisocyanurate (Polyiso)). This high thermal resistance makes foam boards highly effective at minimizing heat transfer, contributing to energy efficiency and maintaining consistent indoor temperatures.
Moisture Control and Vapor Barrier Properties: Many foam board insulations are impervious to moisture, providing an effective vapor barrier that prevents water infiltration and condensation within building assemblies. This property helps in preventing mold growth, rot, and structural deterioration in areas prone to high humidity or moisture exposure.
Durability and Structural Strength: Foam boards are rigid and robust, offering additional structural support when installed on walls, roofs, or foundations. Their dimensional stability ensures that they maintain their shape over time, resisting compression and settling that can compromise insulating performance.
Versatile Application: Foam board insulation can be used in a variety of locations, including exterior walls, under siding, roof decks, foundations, floors, and ceilings. Their thin profile allows for effective insulation without significantly reducing interior or exterior space.
Air Sealing Capabilities: When properly installed, foam board insulation acts as an effective air barrier, reducing air leakage and improving the airtightness of the building envelope. This contributes to enhanced energy efficiency and comfort by minimizing drafts and temperature inconsistencies.
Lightweight and Easy to Handle: Despite their rigidity, foam boards are generally lightweight, making them easy to transport and install. Their straight edges facilitate precise cutting and fitting, allowing for customized installation to accommodate various building dimensions and architectural features.
Compatibility with Other Insulation Types: Foam boards can be layered with other insulation materials, such as fiberglass batts, cellulose, or spray foam, to enhance overall thermal performance. This hybrid approach can optimize both conductive and radiant heat insulation properties.
Pest and Insect Resistant: Many foam board insulations are impervious to pests like insects and rodents, reducing the risk of infestations that can damage other insulation types. Their non-organic composition acts as a deterrent to pest intrusion.
Environmental and Energy Efficiency Benefits: By providing a high-performance thermal barrier, foam boards contribute to lower energy consumption for heating and cooling, which can result in reduced greenhouse gas emissions and cost savings over the building’s lifecycle.
Fire Resistance: Certain foam board insulations, especially those with fire-retardant additives or coatings, offer improved fire resistance, enhancing the safety of the building. Some types meet building code fire ratings, making them suitable for applications where fire performance is critical.
Cons: Installation can be more challenging due to the need for precise cutting and fitting.
Challenging Installation Requirements: Installing foam board insulation often requires precise cutting and fitting to ensure a tight seal around corners, edges, and penetrations. Inaccurate installation can lead to thermal bridging, air leaks, and reduced insulation effectiveness, necessitating skilled labor and attention to detail.
Higher Initial Cost: Foam board insulation generally has a higher upfront cost compared to traditional insulation materials like fiberglass batts or cellulose. This includes the cost of materials and potentially higher installation expenses, which can impact the overall budget of construction or renovation projects.
Limited Fire Resistance Without Additives: While some foam boards offer enhanced fire resistance, others, particularly certain types of polystyrene, can be highly flammable and may release toxic fumes when exposed to fire. This necessitates the use of fire-retardant barriers or protective coatings, which can add to the installation complexity and cost.
Potential Off-Gassing and VOC Emissions: Certain foam board insulations, especially those made from polystyrene or polyurethane, may emit volatile organic compounds (VOCs) during and shortly after installation. Proper ventilation during installation and the selection of low-VOC products are essential to mitigate potential indoor air quality concerns.
Environmental Impact of Production: The manufacturing processes for some foam board insulations, particularly extruded polystyrene (XPS) and polyisocyanurate, can be energy-intensive and involve the use of hydrofluorocarbon (HFC) blowing agents, which have a high global warming potential (GWP). This can contribute to carbon emissions and environmental degradation unless sustainable practices are employed.
Limited Flexibility: Foam boards are rigid and inflexible, which can make them challenging to install around irregular shapes or architectural features. This rigidity can lead to gaps or poor sealing if not properly managed, potentially compromising insulation performance.
Potential for Moisture Trapping: If not correctly installed with adequate vapor barriers and air sealing, foam board insulation can trap moisture within building assemblies. This can lead to condensation, mold growth, and structural damage over time, particularly in areas with high humidity or inadequate ventilation.
Thermal Bridging Risks: Without careful installation, foam board insulation can still allow for thermal bridging through structural elements like studs, joists, and beams. This can reduce the overall thermal performance of the insulation system and negate some of its energy efficiency benefits.
Recyclability and Disposal Challenges: While some foam board insulations can be recycled, the availability of recycling facilities may be limited depending on the region. Additionally, disposal of foam boards can be environmentally challenging due to their non-biodegradable nature and potential to release harmful substances if burned.
Mineral Wool Insulation (Inorganic Insulation)
Pros: Mineral wool, also known as Rock Wool, Stone Wool, or Slag Wool, offers excellent fire resistance, thermal performance, and moisture resistance. It is made from inorganic fibers derived from molten basalt or slag and is often referred to as Stone-Based or Inorganic Insulation.
Exceptional Fire Resistance: Mineral wool insulation is inherently non-combustible, offering superior fire resistance. It can withstand temperatures exceeding 1,000°C (1,832°F) without melting or contributing to the spread of flames, making it an ideal choice for enhancing building safety and fire-rated assemblies.
High Thermal Performance: With R-values typically ranging from 3.0 to 4.2 per inch, mineral wool provides excellent thermal insulation, effectively reducing heat transfer and maintaining consistent indoor temperatures. This contributes to energy efficiency and can lead to lower heating and cooling costs.
Superior Moisture Resistance: Mineral wool is hydrophobic, meaning it repels water and does not absorb moisture. This property helps prevent mold growth, rot, and structural degradation, ensuring the longevity and integrity of the building envelope even in humid or damp environments.
Sound Absorption and Acoustic Performance: The dense, fibrous structure of mineral wool offers excellent soundproofing capabilities. It effectively dampens airborne noise and reduces sound transmission between rooms, enhancing acoustic comfort within residential and commercial spaces.
Inorganic and Sustainable Composition: Made from inorganic fibers derived from molten basalt (rock wool) or slag (a byproduct of steel production), mineral wool insulation utilizes industrial waste materials, promoting sustainability and resource efficiency. Its recyclable nature further supports eco-friendly building practices.
Dimensional Stability: Mineral wool maintains its shape and performance over time, exhibiting minimal settling or compression. This ensures consistent insulating properties and structural integrity throughout the lifespan of the building.
Pest and Insect Resistant: Being inorganic, mineral wool is impervious to pests such as insects and rodents, eliminating concerns related to infestations that can compromise other insulation materials.
Versatile Installation Options: Available in various forms, including batts, loose-fill, and rigid boards, mineral wool can be easily installed in different areas of a building, such as walls, attics, floors, and ceilings, accommodating diverse construction needs.
Environmental Benefits: Mineral wool insulation boasts a low environmental impact, with high recycled content and the ability to recycle at the end of its useful life. Its production process is designed to minimize emissions and energy consumption, aligning with green building certifications like LEED and Energy Star.
Resistance to Thermal Bridging: When properly installed, mineral wool can minimize thermal bridging, which occurs when heat bypasses insulation through structural elements. This enhances the overall energy efficiency of the building envelope.
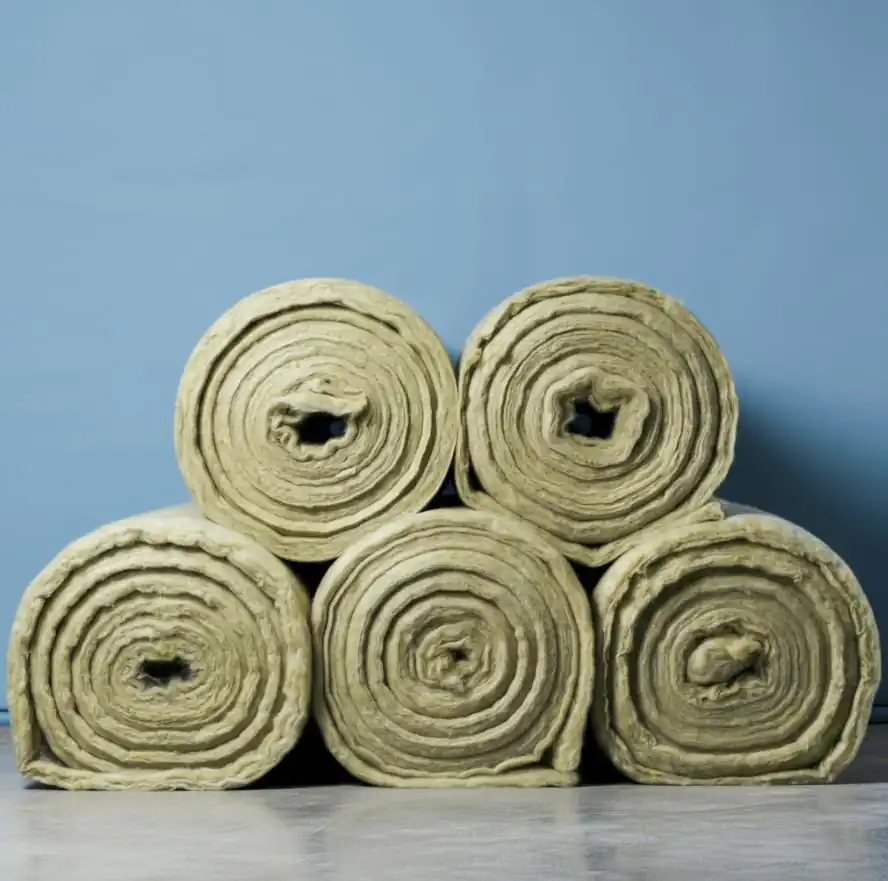
Cons: Generally more expensive than fiberglass insulation.
Higher Cost Compared to Fiberglass: Mineral wool insulation generally carries a higher upfront cost (30% to 40% per sq. ft) than fiberglass insulation. This includes both the material costs and potentially higher installation expenses, which can impact the overall budget of construction or renovation projects.
Weight Considerations: Due to its denser composition, mineral wool is heavier than some other insulation types. This may require additional structural support in certain applications, potentially increasing installation complexity and costs.
Handling and Installation Challenges: While mineral wool is less irritating than fiberglass, it still requires protective equipment (e.g., gloves, masks, and eye protection) during installation to prevent skin irritation and respiratory discomfort. Proper installation techniques are essential to ensure optimal performance and avoid gaps or compression.
Thermal Conductivity in Extremely Cold Conditions: In environments with extremely low temperatures, mineral wool’s thermal performance may be slightly less effective compared to some high-performance synthetic insulations. Additional insulation layers might be necessary to achieve desired thermal resistance levels.
Potential for Off-Gassing: Although mineral wool is generally considered safe, some products may emit minor volatile organic compounds (VOCs) or residual odors shortly after installation. Proper ventilation during and after installation can mitigate these effects.
Limited Availability in Some Regions: Depending on the geographic location, mineral wool insulation might be less readily available compared to more commonly used materials like fiberglass or cellulose, potentially leading to longer lead times or increased transportation costs.
Installation Expertise Required: Achieving the best performance from mineral wool insulation often requires skilled installation to ensure proper fitting, air sealing, and compatibility with other building materials. Inadequate installation can lead to reduced effectiveness and thermal bridging.
Environmental Impact of Production: While mineral wool utilizes recycled materials, the manufacturing process is energy-intensive and may result in carbon emissions. Selecting products from manufacturers with sustainable practices can help mitigate this impact.
Cellulose Insulation
Pros: Cellulose insulation is primarily made from post-consumer recycled paper products, such as newspaper, contributing to waste reduction and promoting sustainable building practices.
The insulation is treated with borate-based fire retardants (e.g., boric acid or borax), enhancing its resistance to ignition and slowing the spread of flames without the use of harmful chemicals.
With an impressive R-value (thermal resistance) typically ranging from 3.2 to 3.8 per inch, cellulose provides effective temperature regulation, helping to maintain comfortable indoor environments and reduce energy costs.
Its dense, fibrous structure allows cellulose insulation to act as an excellent acoustic barrier, effectively dampening sound transmission between rooms and minimizing external noise intrusion.
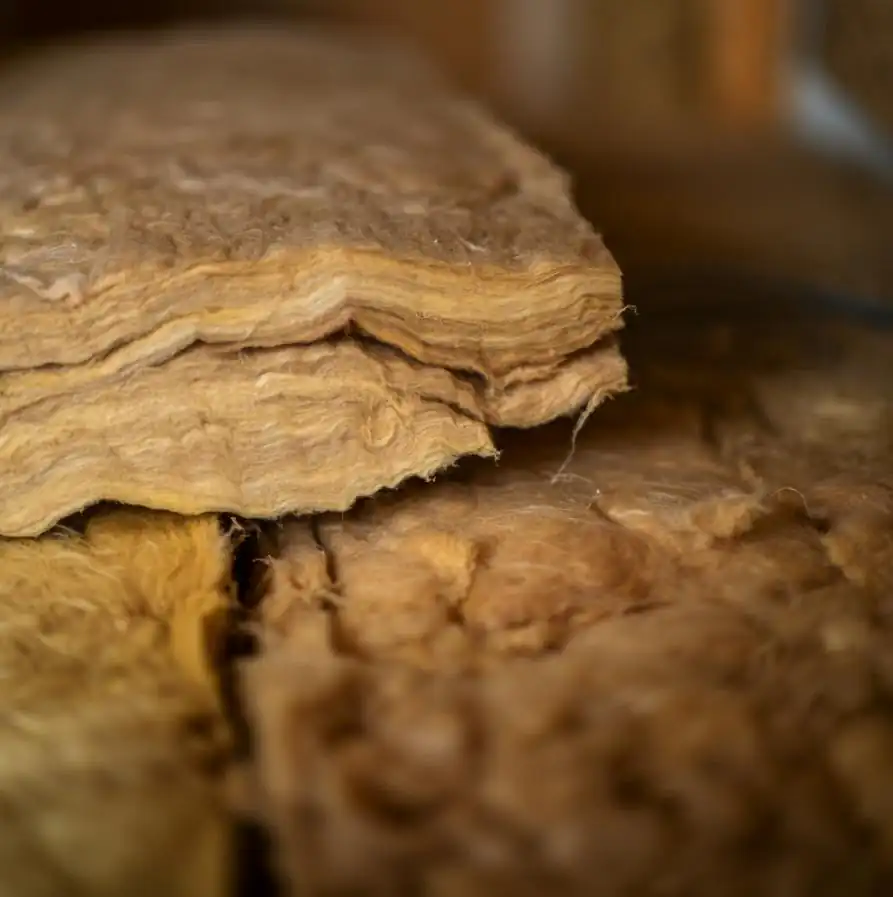
Cons: Requires professional installation for dense pack applications. Over time, cellulose may settle or compact, which can decrease its initial R-value and compromise its insulating effectiveness if not properly installed or if the building settles.
Although treated to resist moisture, cellulose can absorb water in high-humidity environments or in the event of leaks, leading to potential issues such as mold growth, rot, or reduced thermal performance.
Despite fire retardant treatments, cellulose remains combustible and may require additional fire barriers or adherence to specific building codes to ensure safety in certain applications.
Cellulose insulation is heavier than some other types, which may necessitate stronger structural support in certain applications, potentially adding to construction costs.
Reflective or Radiant Barrier Insulation
Pros: Ideal for hot climates or buildings with metal roofing, this type of insulation reflects radiant heat away from the building, reducing cooling costs.
Reflective or radiant barrier insulation utilizes reflective materials (typically aluminum foil, metalized polyester, or foil-faced kraft paper) to reflect a significant portion of radiant heat away from the building. This reduces the amount of heat that enters the interior spaces, thereby lowering the reliance on air conditioning systems.
articularly ideal for hot and sunny climates, radiant barriers can significantly decrease cooling costs by minimizing heat gain. They are highly effective in regions with intense solar radiation or where buildings are exposed to high daytime temperatures.
Radiant barrier insulation is especially beneficial for buildings with metal roofing. Metal roofs tend to absorb and transfer more heat compared to traditional roofing materials. The reflective properties of radiant barriers help mitigate this heat transfer, enhancing overall thermal performance.
Typically lightweight and flexible, radiant barriers can be easily installed in various parts of the building envelope, such as attic rafters, roof trusses, under siding, or within walls. Installation methods include loose-laid, faced, or applied with adhesive tapes.
Radiant insulation can be used in combination with other insulation types, such as fiberglass, cellulose, or spray foam, to enhance overall thermal performance. This layered approach can optimize both radiant heat reflection and conductive heat insulation.
Many radiant barriers are impervious to moisture, reducing the risk of mold growth or rot in areas where humidity might otherwise compromise traditional insulation materials.
When properly installed and protected from physical damage, radiant barriers can maintain their reflective properties for the lifespan of the building, offering long-term energy savings without significant degradation.

Cons: Less effective in colder climates where heat retention is more critical.
Radiant barriers are less effective in colder climates where the primary need is heat retention rather than heat reflection. In such environments, radiant barriers may offer minimal benefits and could potentially disrupt the balance of heat flow if not properly integrated with other insulation types.
The reflective performance of radiant barriers is highly dependent on the presence of an air gap. Without adequate air circulation (typically at least 3 inches), the reflective surface cannot effectively redirect radiant heat, diminishing its insulating capabilities.
Improper installation can lead to air leaks or compression of the reflective material, which can reduce effectiveness. Ensuring the correct placement and maintaining the necessary air space is crucial for optimal performance.
While radiant barriers are generally durable, they can be prone to physical damage from pests, debris, or building maintenance activities. Tears, holes, or scratches in the reflective surface can compromise their ability to reflect radiant heat.
Cutting and Installing Insulation Boards
This guide provides detailed instructions for cutting and installing insulation boards in a post frame building. Follow these steps to ensure a snug fit and effective insulation.
Tools Needed for Cutting Insulation Boards
- DEWALT Table Saw: Essential for cutting the insulation boards to the correct width.
DEWALT DWE7485
Motor and Power: Features a powerful 1850W motor, providing high performance for various applications.
Rip Capacity: Offers a large rip capacity of 622mm to the right of the blade, allowing for cutting large sheet materials.
Portability: Weighs 22kg, making it highly portable and easy to transport between job sites.
Accuracy Features: Equipped with a rack and pinion fence system for precise adjustments and accurate cuts.
Durability: Includes a steel roll cage to protect against job site impacts.
- Tool Belt: Handy for keeping tools accessible during installation.

Step-by-Step Guide to Cutting and Fitting Boards
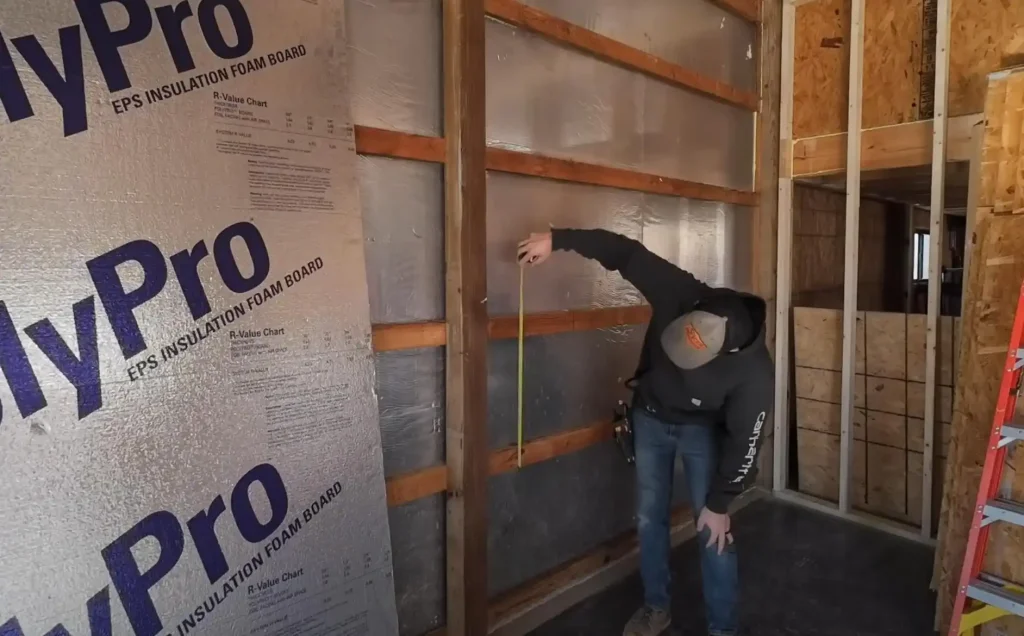
Measure the Space: Begin by measuring the distance between the girts where the insulation will be installed. This ensures that the boards are cut to the correct size.
Cut the Insulation Boards: Use the DEWALT table saw to rip the boards down to the required width. The boards should fit snugly between the girts.
Install the Boards: Place the cut boards between the girts. Ensure they are flush with the existing insulation that is sandwiched between the girt and the exterior sheet metal.
Check the Fit: Make sure the boards are tightly fitted to prevent any gaps that could reduce the insulation’s effectiveness.
Want to get 3D rendering for your renovation project?
Sealing and Finalizing Insulation
Sealing and finalizing insulation is a crucial step in ensuring the efficiency and longevity of your post frame building’s insulation. Proper sealing prevents air leaks, which can significantly impact the building’s energy efficiency.
Importance of Sealing Gaps
During the installation process, it’s common to encounter gaps between the insulation boards and the building structure. These gaps can lead to air leakage, reducing the effectiveness of the insulation. Ensuring a tight seal is essential for maintaining the desired temperature and reducing energy costs.
Using Great Stuff Foam for Sealing
One effective method for sealing these gaps is using a product like Great Stuff foam. This foam expands to fill voids, providing a “super tight seal,” as noted by the installer. This is particularly important when the R-value of the insulation isn’t very high, as preventing air transfer can greatly enhance insulation performance.
Final Adjustments and Checks
Before finalizing the insulation, it’s important to make any necessary adjustments. The installer recommends leaving a small gap, about an eighth to a quarter of an inch, at the top and bottom of the insulation boards. This allows for any deviations in the structure and provides space for the foam to expand and seal effectively.
Cost Analysis and Efficiency
In this section, we discuss the cost analysis and efficiency of insulating a post frame building. The choice of materials and methods can significantly impact both the budget and the effectiveness of the insulation.
Breakdown of Costs
The insulation process involved using PolyPro insulation boards, which were chosen primarily for their cost-effectiveness. Each board was priced at $10.27, a considerable saving compared to other options like the pink board just below $46, which can be three times more expensive. This choice was not solely based on R-value but also on the ability to prevent air transfer with its foil face.

The insulation process, while time-consuming, proved to be effective, sealing the building tightly and ensuring energy efficiency. The strategic choice of materials and methods contributed to a successful insulation project at a decent cost.
Efficiency of the Insulation Process
The process involved careful placement and securing of the insulation boards, ensuring that gaps were minimized. The use of repurposed drywall screws helped in maintaining even gaps, which were later filled with “great stuff” foam for a tight seal. This method ensured that the insulation was both effective and efficient.
Tips for Cost-Saving and Maximizing Efficiency
- Material Choice: Opt for cost-effective materials like PolyPro boards to reduce expenses without compromising on quality.
- Reuse Materials: Repurposing materials such as drywall screws can help in cutting down costs.
- Precision in Installation: Leaving a quarter-inch gap around the girts and filling it with foam ensures a tight seal, enhancing the insulation’s efficiency.
General Cost Estimates
Overall Cost Range: Insulating a pole barn typically costs between $5,000 and $8,000. However, this can vary based on the size and specific requirements of the building.
Small Pole Barns: To meet code requirements, a smaller 30×40 pole barn will cost approximately $4,000.
Larger Pole Barns: A larger 40×60 pole barn might cost around $8,000 to insulate on average if you hire a company.
Approximate Cost by Insulation Type
Spray Foam Insulation: Costs range from $1.00 to $4.50 per square foot, depending on the R-value needed and whether both walls and roof are insulated. For example, closed-cell spray foam is more expensive but offers superior air sealing and insulation properties.
Fiberglass Insulation: Typically costs around $0.85 per square foot for R-25 8” thick batts with a white facing. This is a more economical choice compared to spray foam.
Foam Board Insulation: Costs range from $1.20 to $3.70 per square foot for labor and materials. This type of insulation provides good thermal resistance and moisture control.
Approximate Cost by Insulation Type
Spray Foam Insulation: Costs range from $1.00 to $4.50 per square foot, depending on the R-value needed and whether both walls and roof are insulated. For example, closed-cell spray foam is more expensive but offers superior air sealing and insulation properties.
Fiberglass Insulation: Typically costs around $0.85 per square foot for R-25 8” thick batts with a white facing. This is a more economical choice compared to spray foam.
Foam Board Insulation: Costs range from $1.20 to $3.70 per square foot for labor and materials. This type of insulation provides good thermal resistance and moisture control.
What can increase the Cost of Insulation?
Building Size: Larger buildings generally have lower costs per square foot due to economies of scale.
Regional Climate: The local climate and energy codes can influence the type and thickness of insulation required, impacting overall costs.
Insulation Thickness and R-value: Higher R-values require more material or different types of insulation, which can increase costs.
Want to get 3D rendering for your renovation project?
Future Plans and Conclusion
In this final section, we explore the future plans for the gym area and summarize the insulation process. The next steps involve framing out the entire gym to ensure the space is well-insulated and functional. The plan includes using OSB with some damage for sheeting over the insulation board, followed by framing a new two-by-four wall inside to match the treated posts. This will be insulated and drywalled, creating a well-insulated gym area with a breathable gap to prevent moisture buildup.

The next steps involve framing out the entire space is well-insulated and functional. The plan includes using OSB with some damage for sheeting over the insulation board, followed by framing a new two-by-four wall inside to match the treated posts. This will be insulated and drywalled, creating a well-insulated gym area with a breathable gap to prevent moisture buildup.
The insulation process described involves using four by eight sheets of insulation board, with costs estimated at around $45 per eight-foot bay with a ten-foot ceiling. The process is efficient, taking about an hour to an hour and a half per bay, including trimming and cleaning.
There are numerous ways to insulate a post frame building, and this method is just one option. It encourages research to find the best method for specific needs, whether for continuous heating or occasional projects.
Where to start to insulate pole barn floor, walls or roof?
Insulate first the roof, then floor and finally the walls.
1. Floor and Foundation
Starting Point:
Assess the Building’s Use: If your pole barn will be heated, used as a workshop, living space, or for storing temperature-sensitive items, insulating the floor and foundation is beneficial.
Foundation Type: Determine whether you have a concrete slab, dirt floor, or another type, as this will influence the insulation method.
Insulation Options:
Concrete Slab Floors:
Under-Slab Insulation (New Construction):
- Method: Before pouring the concrete slab, install rigid foam insulation boards (like EPS or XPS foam) over a vapor barrier.
- Benefits: Prevents heat loss to the ground, reduces moisture infiltration, and increases floor comfort.
Perimeter Insulation:
- Method: Install rigid foam insulation vertically along the slab edges (foundation walls).
- Benefits: Reduces heat loss at the slab edges, which is a significant source of energy loss.
Existing Concrete Floors:
Above-Slab Insulation:
- Method: Lay rigid foam insulation over the existing slab, then add a new layer of plywood or flooring material.
- Considerations: This raises the floor level; adjustments to doors and thresholds may be necessary.
Dirt or Gravel Floors:
Vapor Barrier and Insulation:
- Method: Install a polyethylene vapor barrier over the ground, followed by rigid foam insulation and a suitable flooring surface (e.g., plywood, concrete pavers).
- Benefits: Reduces moisture, improves comfort, and prepares the floor for various uses.
Additional Tips:
Moisture Control: Always include a vapor barrier to prevent ground moisture from affecting the insulation and interior space.
Drainage: Ensure proper site drainage to divert water away from the foundation and prevent moisture problems.
2. Walls
Starting Point:
Air Sealing: Before adding insulation, seal all cracks, gaps, and penetrations in the walls to prevent air leaks and improve insulation performance.
Inspect Framing: Ensure that the wall framing is properly constructed without gaps or voids that could compromise insulation.
Insulation Options:
Rigid Foam Insulation (PolyPro EPS Foam Boards):
Method:
- Cut foam boards to fit snugly between the wall girts or studs.
- Use construction adhesive or mechanical fasteners to secure them.
- Seal all edges and seams with spray foam (e.g., Great Stuff) or tape designed for foam insulation.
Benefits:
- Provides continuous insulation with minimal thermal bridging.
- Acts as an air barrier if seams are properly sealed.
- Some foam boards come with a reflective foil facing that acts as a radiant barrier.
Spray Foam Insulation:
Closed-Cell Spray Foam:
- Method: Applied directly to the interior wall surfaces between framing members.
- Benefits: High R-value per inch, excellent air sealing, adds structural rigidity, and acts as a vapor barrier.
Open-Cell Spray Foam:
- Method: Similar application but less dense and lower R-value.
- Benefits: Good for sound dampening, allows for some moisture permeability.
Fiberglass or Mineral Wool Batts:
Method:
- Insert batts between studs or girts.
- Use vapor barriers if necessary (climate-dependent).
Benefits: Cost-effective, easy to install, and available in various thicknesses.
Blown-In Insulation:
Method: Install netting or sheathing to contain insulation, then blow in loose-fill fiberglass or cellulose.
Benefits: Fills gaps and irregular spaces more effectively than batts.
Considerations:
Vapor Barriers:
Climate Dependent: In cold climates, install a vapor barrier on the warm-in-winter side (interior). In warm, humid climates, it may be necessary on the exterior side.
Proper Sealing: Ensure vapor barriers are continuous to prevent moisture issues.
Interior Finishing:
Fire Safety: Some insulation materials need to be covered with a fire-resistant material (e.g., drywall).
Durability: Choose wall coverings (e.g., plywood, OSB, metal panels) that suit the building’s use.
Pest Prevention:
Sealing Gaps: Insulate and seal all gaps to prevent pests from entering. Proper framing and sealing guard against infestations.
3. Roof
Starting Point:
Safety Measures: Use appropriate fall protection and ensure safe access when working at heights.
Air Sealing: Just like walls, seal any gaps or penetrations in the roof to prevent air leakage.
Insulation Options:
Attic Space (If Present):
Blown-In Insulation:
- Method: Blow loose-fill fiberglass or cellulose onto the attic floor.
- Benefits: Covers hard-to-reach areas and provides uniform coverage.
Batt Insulation:
- Method: Lay batts between attic floor joists.
- Benefits: Easy installation, cost-effective.
Underside of Roof Deck:
Spray Foam Insulation:
- Method: Apply closed-cell spray foam directly to the underside of the roof deck.
- Benefits: High R-value, excellent air sealing, reduces condensation risk.
Rigid Foam Insulation:
- Method: Attach foam boards to the underside of roof framing.
- Benefits: Provides continuous insulation, reduces thermal bridging.
Above Roof Deck:
Insulating Above Sheathing:
- Method: Install rigid foam insulation over the roof deck before applying roofing material.
- Benefits: Provides a thermal break over the framing, improves energy efficiency.
Considerations: Typically done during new construction or re-roofing.
Should you hire barn insulation company or DIY?
If you decide to proceed with DIY, take advantage of resources like instructional videos, manufacturer guidelines, and forums where you can ask questions and learn from others who have undertaken similar projects. Safety should always be a top priority—invest in proper protective equipment and never hesitate to seek professional advice if you’re unsure about any aspect of the work.
When deciding whether to insulate your pole barn yourself or hire a professional insulation company, several factors come into play. Both options have their advantages and disadvantages, and the best choice depends on your specific circumstances, including your budget, expertise, time constraints, and the complexity of the project.
Hiring a Professional Barn Insulation Company
Benefits:
Expertise and Experience:
- Quality Workmanship: Professionals have the training and experience to install insulation correctly, ensuring maximum efficiency.
- Knowledge of Best Practices: They are familiar with the latest insulation materials, techniques, and building codes.
Time Efficiency:
- Quick Completion: A professional crew can typically complete the job faster than an individual, minimizing disruptions.
- Project Management: They handle all aspects of the project, from preparation to cleanup.
Access to Specialized Equipment:
- Advanced Tools: Professionals have equipment like spray foam rigs and thermal imaging cameras to detect leaks.
- Safety Gear: They have the necessary protective equipment to handle materials safely.
Code Compliance and Permits:
- Regulatory Knowledge: Professionals ensure the work meets local building codes and obtain any required permits.
- Inspection Readiness: Proper installation can pass inspections without costly delays or modifications.
Warranty and Insurance:
- Workmanship Guarantees: Many companies offer warranties on their services.
- Liability Coverage: Professionals carry insurance that protects you from liability in case of accidents during the project.
Drawbacks:
Higher Upfront Cost:
- Labor Expenses: Professional services include labor costs, which can be a significant portion of the total expense.
- Premium Materials: They may recommend higher-end materials that increase the overall cost.
Less Control Over the Process:
- Scheduling: You’ll need to work within the company’s timeline.
- Decision-Making: Some aspects may be decided by the contractor, limiting your input.
Doing It Yourself (DIY) Insulation
Benefits:
Cost Savings:
- Elimination of Labor Costs: You save money by not paying for professional labor.
- Material Choices: You can shop around for deals on materials and choose options that fit your budget.
Flexibility and Control:
- Own Pace: Work according to your schedule without deadlines.
- Customization: Make adjustments and changes as you see fit during the process.
Learning Experience:
- Skill Development: Gain valuable skills and knowledge in construction and insulation techniques.
- Personal Satisfaction: Completing the project yourself can be rewarding.
Drawbacks:
Lack of Expertise:
- Potential for Mistakes: Improper installation can lead to reduced efficiency, moisture issues, or structural problems.
- Learning Curve: Research and preparation take time, and mistakes can be costly.
Time-Consuming:
- Longer Project Duration: Without a team, tasks may take significantly longer to complete.
- Disruption: The area may be unusable for an extended period.
Equipment and Safety:
- Tool Acquisition: You may need to purchase or rent tools, increasing costs.
- Safety Risks: Handling insulation materials (like fiberglass) and working at heights can be hazardous without proper safety gear and training.
Code Compliance Challenges:
- Regulations: You must ensure your work complies with local building codes, which can be complex.
- Inspection Failures: Mistakes might lead to failed inspections, requiring rework.
Factors to Consider When Making Your Decision
Project Complexity:
- Size of the Barn: Larger barns may be more challenging to insulate properly on your own.
- Insulation Type: Some materials (like spray foam) are difficult to apply without professional equipment.
Your Experience and Skills:
- Construction Background: If you have prior experience, DIY may be feasible.
- Comfort Level: Assess your ability to handle the physical demands and technical aspects.
Budget Constraints:
- Upfront Costs vs. Long-Term Savings: While DIY might be cheaper initially, professional installation might offer better energy efficiency and savings over time.
Time Availability:
- Immediate Needs: If you need the insulation done quickly, a professional might be faster.
- Personal Schedule: Consider how much time you can realistically dedicate to the project.
Safety Concerns:
- Risk Assessment: Evaluate the potential hazards and whether you’re equipped to handle them safely.
Quality Expectations:
- Performance Needs: If your barn stores sensitive items or will be used as a living space, the quality of insulation is critical.
Local Building Codes and Regulations:
- Knowledge of Codes: Ensure you understand and can comply with local requirements.
- Inspection Requirements: Be prepared for any necessary inspections.
Hybrid Approach
Consider a combination of both DIY and professional help:
Partial DIY: Handle simpler tasks yourself, like removing old insulation or installing easy-to-handle materials.
Consultation: Hire a professional for consultation to guide you through the process.
Professional Review: After DIY installation, have a professional inspect the work to ensure it meets standards.
Conclusion
Deciding between hiring a professional insulation company or doing it yourself depends on balancing cost, quality, time, and your personal capabilities. Here’s a quick summary to help you decide:
Hire a Professional If:
- You want high-quality installation with maximum efficiency.
- You have limited time or desire to dedicate to the project.
- The project is large, complex, or involves challenging materials.
- Compliance with building codes is critical, and you prefer professionals to handle permits and inspections.
DIY If:
- You have experience with similar projects and feel confident in your abilities.
- Budget constraints make professional services impractical.
- You’re willing to invest the time to learn and execute the project properly.
- You enjoy hands-on projects and the satisfaction of completing work yourself.
Before making a decision, consider getting quotes from reputable insulation companies and comparing them with a detailed DIY cost estimate. Think about the long-term implications of energy savings, building integrity, and personal safety.
Remember, proper insulation is crucial not just for comfort and energy efficiency but also for the structural health of your pole barn. Whichever route you choose, ensure the work is done correctly to avoid issues like moisture buildup, pest infiltration, and reduced insulation performance.
Faced or unfaced insulation for pole barn?
Faced and unfaced insulation serve different purposes in a pole barn. Unfaced insulation, or insulation without a vapor barrier, is suitable for interior applications where moisture control is not a primary concern, such as living spaces, dining rooms, or studies. This type of insulation allows any moisture to pass through, reducing the risk of mold or mildew.
Faced insulation, on the other hand, includes a vapor retarder like paper or plastic, which helps prevent moisture and mold growth. It is ideal for exterior walls, attic ceilings, and exterior basement walls. In a pole barn, faced insulation may be preferred for walls and roof insulation to improve energy efficiency and protect against moisture-related issues, depending on the local climate and building codes.